How to setup OpenVPN client for Asus RT-N66U router with Tomato firmware 1.28 by Shibby
Guide for VPN Unlimited users
How to Install VPN Unlimited on Different Platforms & Create KeepSolid ID
Detailed installation guides on different platforms:
- How to install VPN Unlimited on macOS 10.14 and higher (Standalone Version)
- How to install VPN Unlimited on macOS 10.14 and higher (App Store version)
- How to install and get started with VPN Unlimited on iOS
- How to install VPN Unlimited Application on Android
- How to install VPN Unlimited application on Windows XP SP3
- How to install VPN Unlimited Application on Windows 7
- How to set up VPN Unlimited Application on Windows 8/8.1
- How to Install and Get Started with VPN Unlimited App on Windows 10
- How to install VPN Unlimited on Linux
How to create a new KeepSolid ID
- After installing the VPN Unlimited app, you will see the line "Create KeepSolid ID", сlick on it to start the process.
- Enter your email address in the designated field.
- Create a password and enter it in the password field.
- Repeat your password in the provided field to confirm it.
- Check the box next to the statement "By continuing, you agree to our…".
- Tap the "Sign up" button to complete the registration.
Connecting to a VPN server for the first time, you will be requested to allow adding VPN configurations and downloading a VPN profile. For more details, please refer to the manuals provided above on how to install VPN Unlimited on different platforms.
This tutorial will provide you step-by-step instruction on how to set up an OpenVPN client on your router with the Tomato firmware (Asus RT-N66U router with Tomato Firmware 1.28.0000 MIPSR2-140 K26AC USB AIO-64K was taken as an example).
To get more information about the OpenVPN protocol, check out our detailed article What is OpenVPN protocol.
- First of all, you need to get manual configuration files. For this, please follow a few simple steps described in our tutorial on how to manually create VPN configurations.
- Then, open the web interface of your VPN Tomato router in your browser and enter login and password. If you don’t know how to access your router web interface, check out our manual on how to find your router IP.
- In the side menu, select VPN Tunneling and open the OpenVPN Client tab.
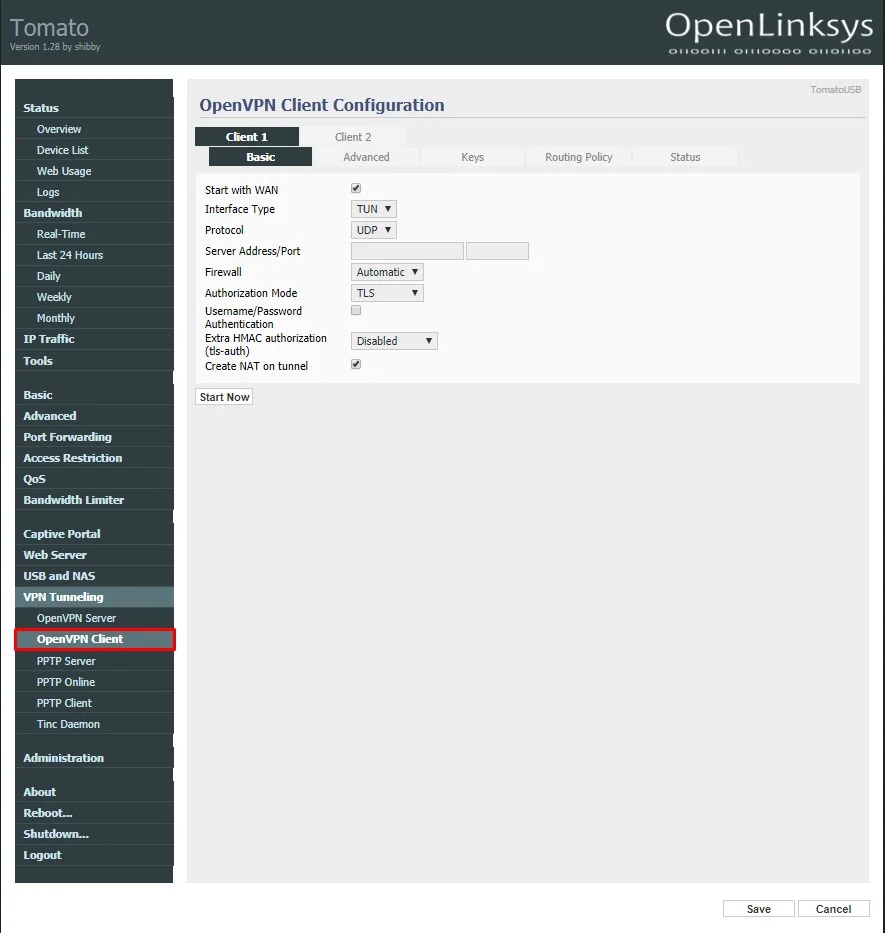
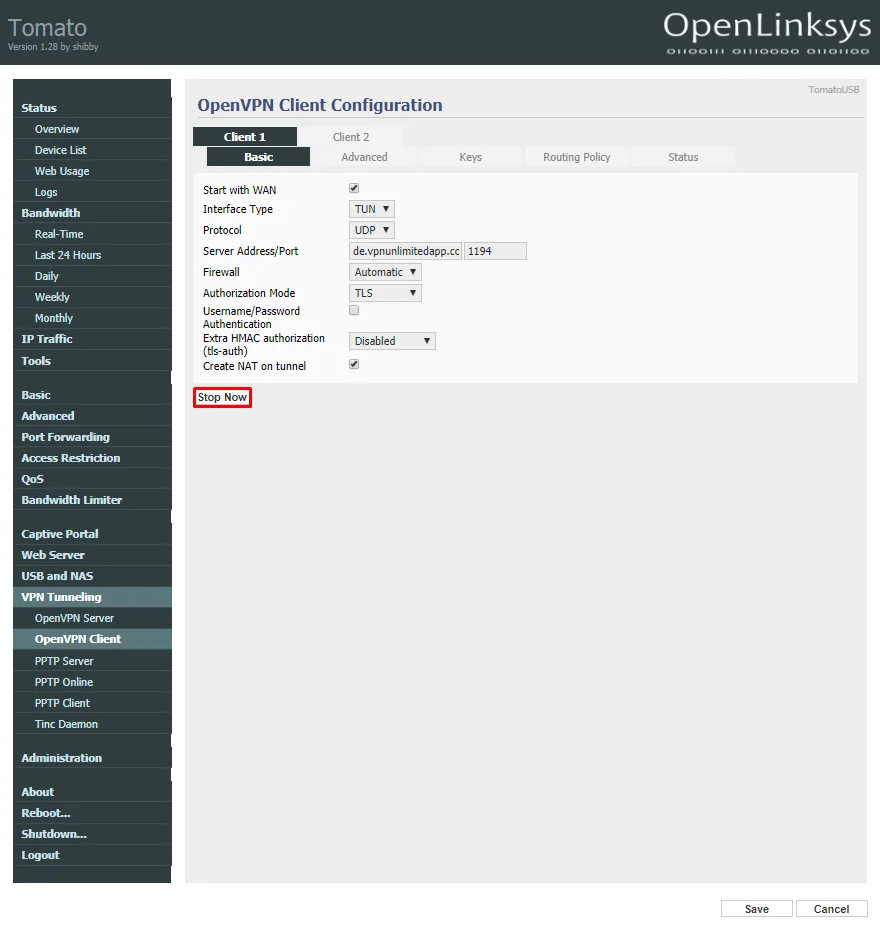
- Сomplete the fields of the OpenVPN Client tab of your VPN Tomato router in the following way:
- Set the checkbox for Start with WAN
- Interface Type: Choose TUN
- Protocol: Choose UDP
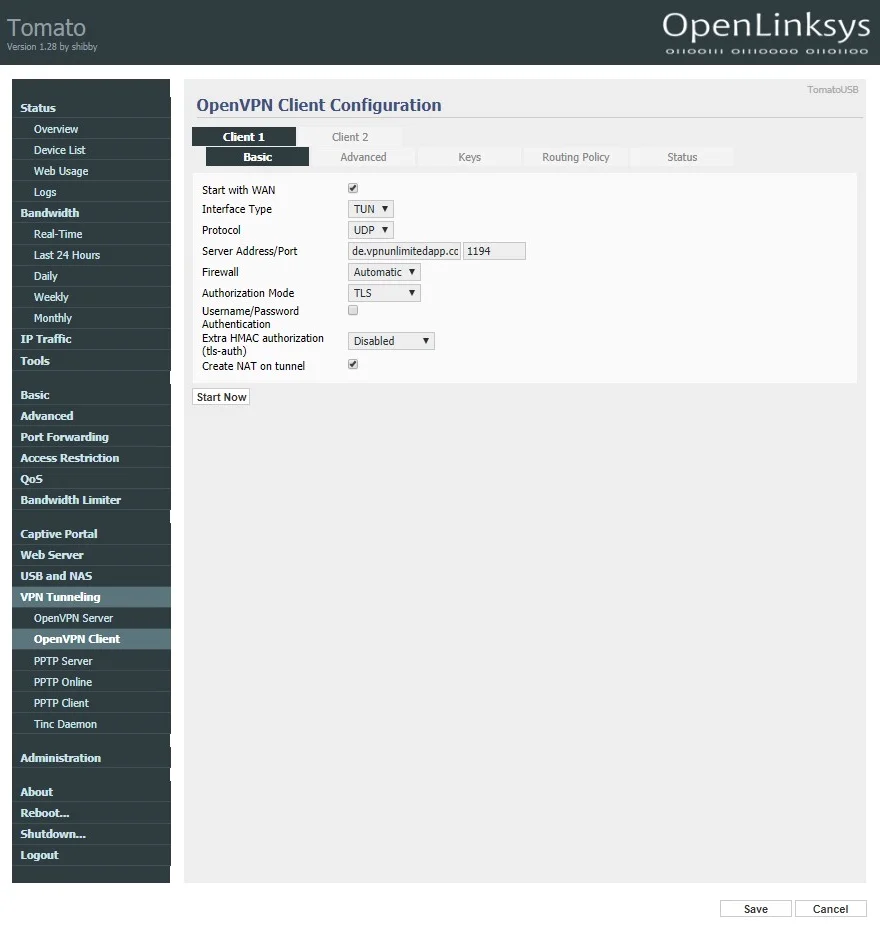
- Server Address/Port: Input a server name from the Domain name field in the generated configuration settings: de.vpnunlimitedapp.com / 1194
Note: We have chosen the German server as an example - Firewall: Automatic
- Authorization Mode: TLS
- Username/Password Authentication: Leave it unchecked
- Extra HMAC authorization (tls-auth): Disabled
- Set the checkbox for Create NAT on tunnel
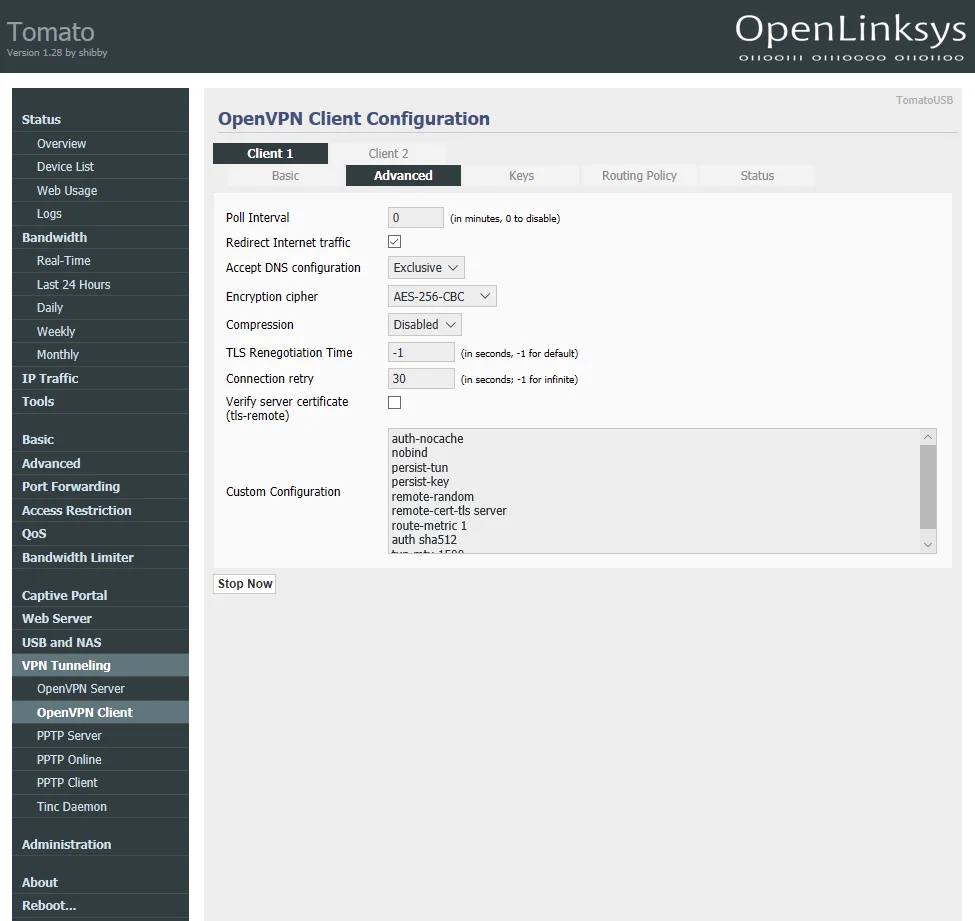
- Proceed to the Advanced tab of the VPN Client 1 and set the following options:
- Poll Interval: 0
- Redirect internet traffic: Checked
- Accept DNS configuration: Exclusive
- Encryption cipher: AES-256-CBC
- Compression: Disabled
- TLS Renegotiation Time: -1
- Connection retry: 30
- Verify server certificate (tls-remote): Unchecked
- In the Custom Configuration input the following data:
auth-nocache
nobind
persist-tun
persist-key
remote-random
remote-cert-tls server
route-metric 1
auth sha512
tun-mtu 1500
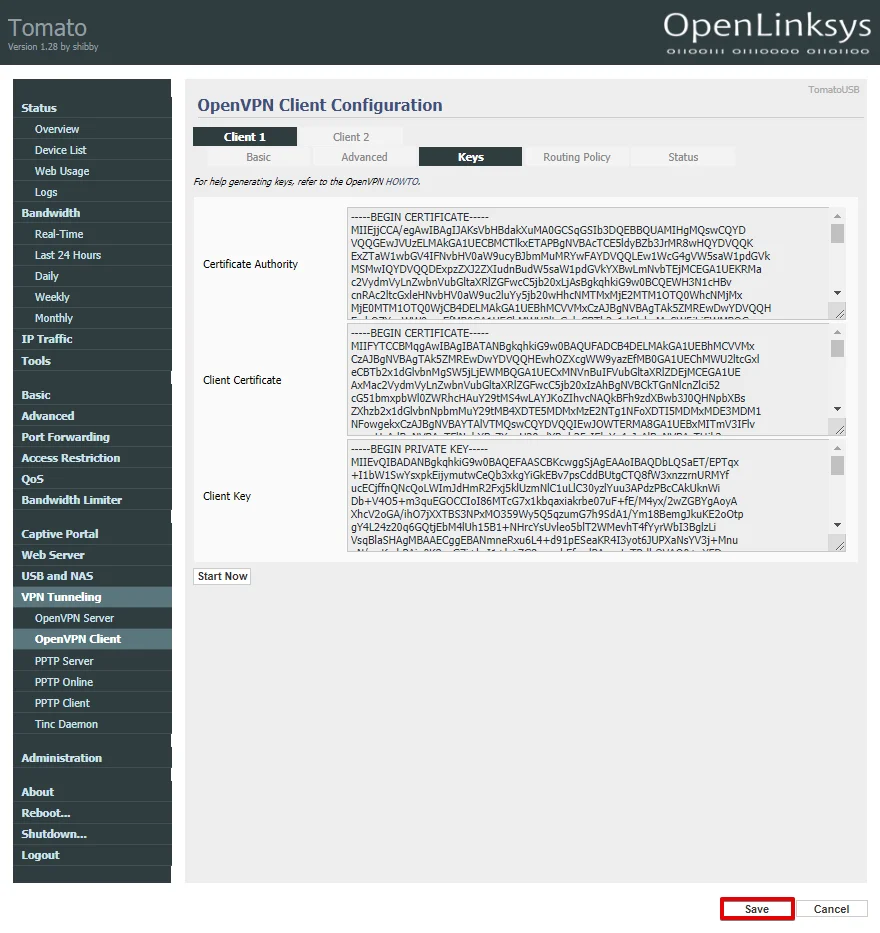
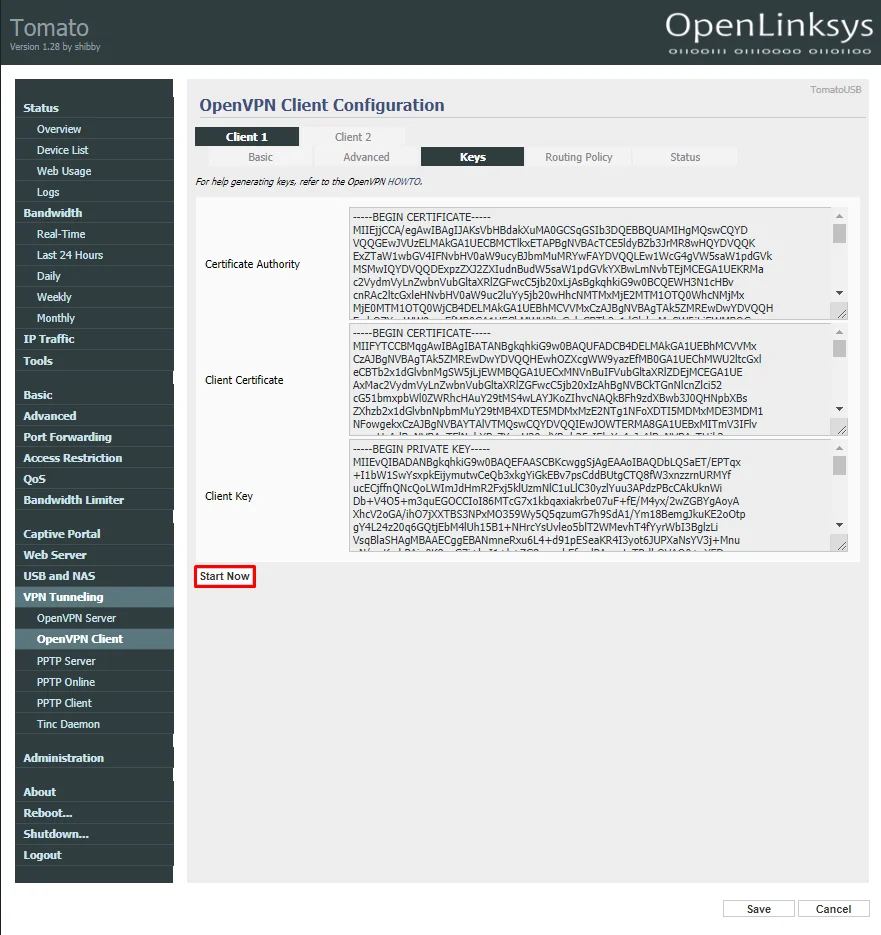
- Go to the VPN Client 1 > Keys tab. In the configuration file you’ve previously generated, select data between <tag> and </tag> and paste it in the relevant fields:
- Certificate Authority - <ca> text from the configuration file </ca>, including -----BEGIN CERTIFICATE----- and -----BEGIN CERTIFICATE-----
- Client Certificate - <cert> text from the configuration file </cert>, including -----BEGIN CERTIFICATE----- and -----BEGIN CERTIFICATE-----
- Client Key - <key> text from the configuration file </key>, including -----BEGIN CERTIFICATE----- and -----BEGIN CERTIFICATE-----
- Once completed, click Save at the bottom of the page.
- Click Start Now to establish the VPN connection for your Tomato Asus RT-N66U router.
- To view the status of your connection, proceed to the relevant Status tab your VPN Tomato router.
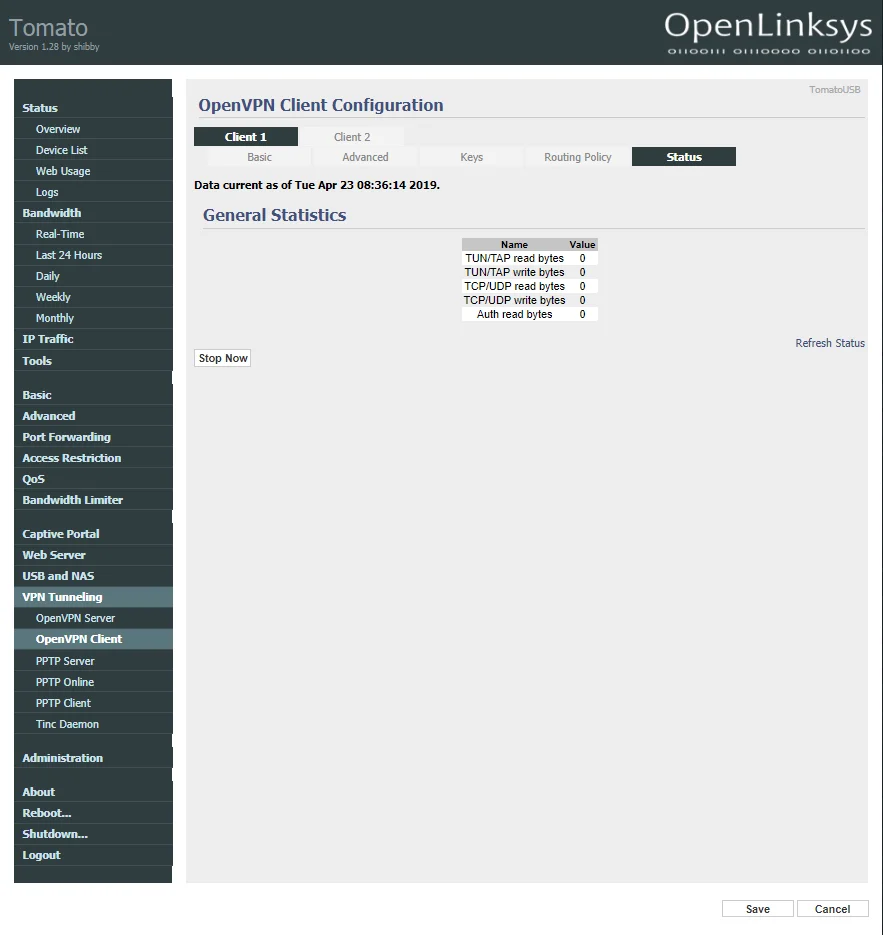
That’s it! You’ve successfully configured OpenVPN client and have a running VPN connection on your Tomato Asus router with Tomato firmware.
To disconnect from the VPN server, just click Stop Now on any of the Client 1 settings tabs.
Bottom line on setting up Tomato VPN Client
That’s all for today! Now you know to setup RT-N66U VPN on your Tomato Asus router. In case you need to configure other devices, check out the Manuals page for the relevant guides or contact our customer support via [email protected].
“OpenVPN” is a registered trademark of OpenVPN Inc.


