How to set up VPN Unlimited on Synology using L2TP protocol
Synology NAS is a network-attached storage device with a variety of functions including backing up computer drive and managing and storing media files. Your Synology NAS can be covered with VPN protection in 2 ways:
- Set up VPN on your router and connect Synology NAS to this router. Explore the Routers section of our Manuals page for the relevant guides.
- Set up VPN connection on your Synology NAS. This tutorial will walk you through the steps to perform L2TP VPN setup on Synology NAS based on DiskStation Manager (DSM) 6.1 version. For easy navigation through this manual, see the contents below:
Generate VPN configurations for L2TP connection
Before you start setting up VPN on Synology NAS using L2TP, you need to generate the required VPN configurations in your User Office. Check out the guide How to manually create VPN configurations for detailed instructions.
The VPN configurations for L2TP protocol will include chosen VPN server domain name, pre-shared key (psk), login, and password.
Set up Synology VPN Client
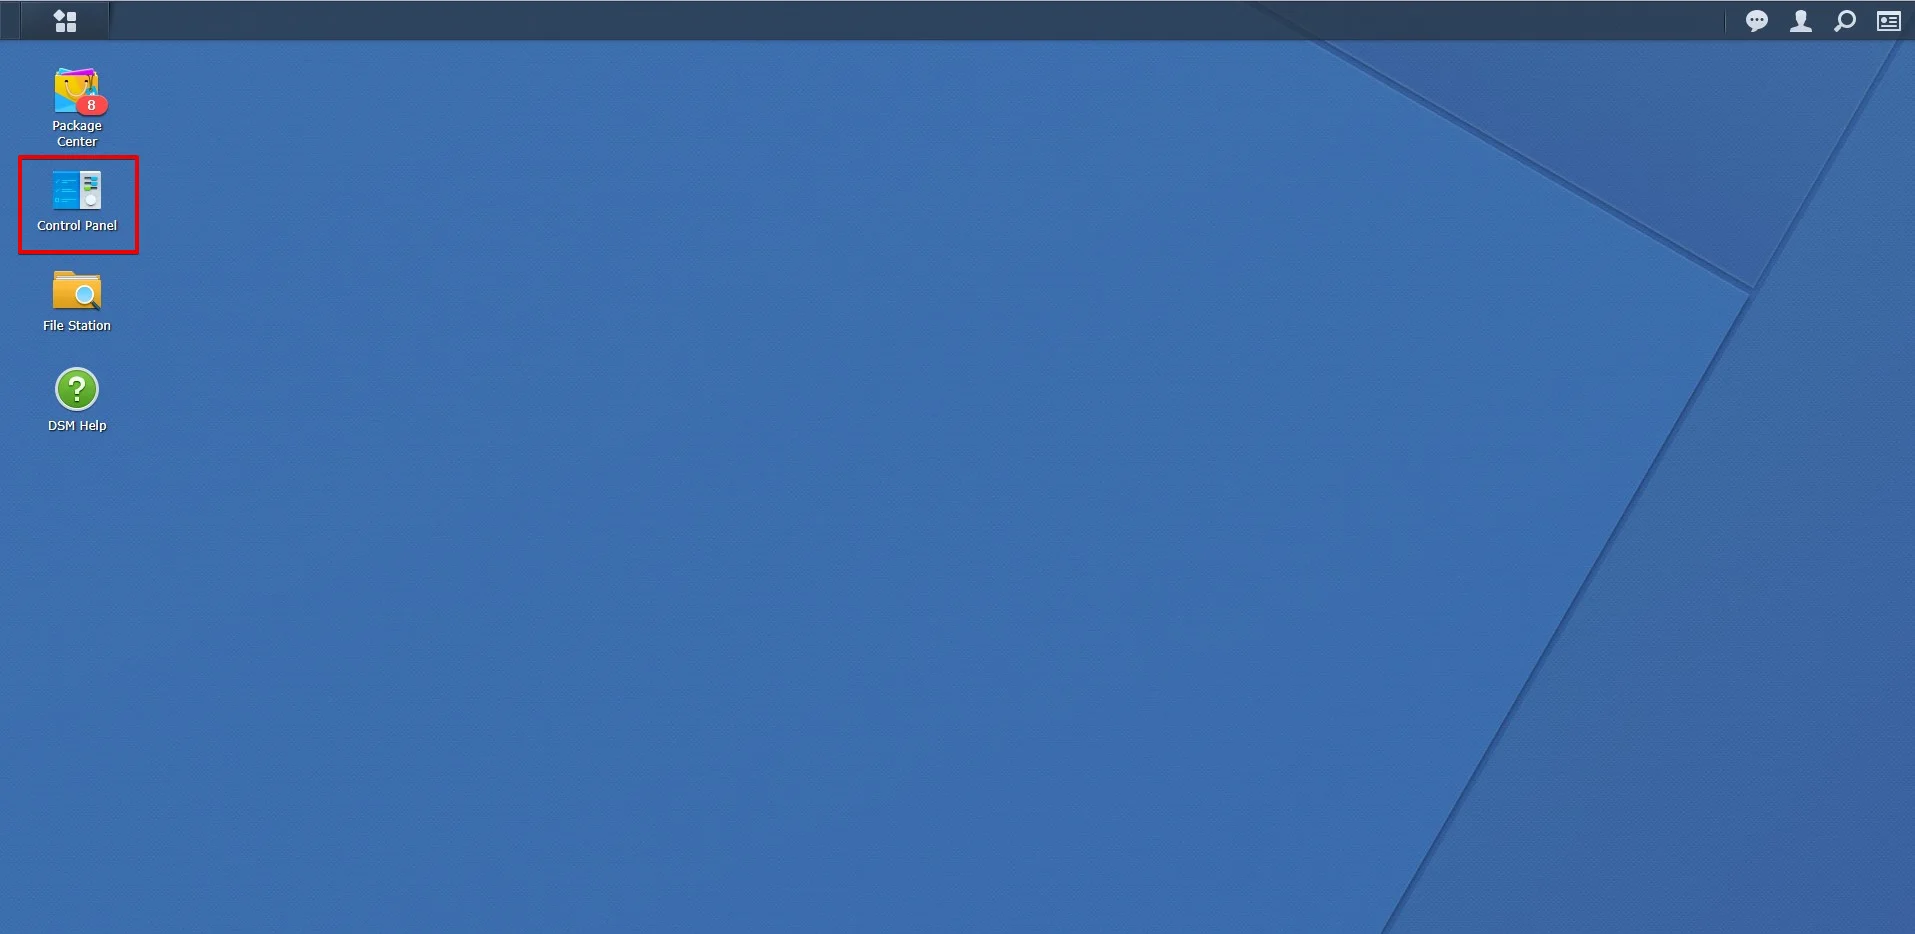
- Sign in to your Synology and open the Control Panel.
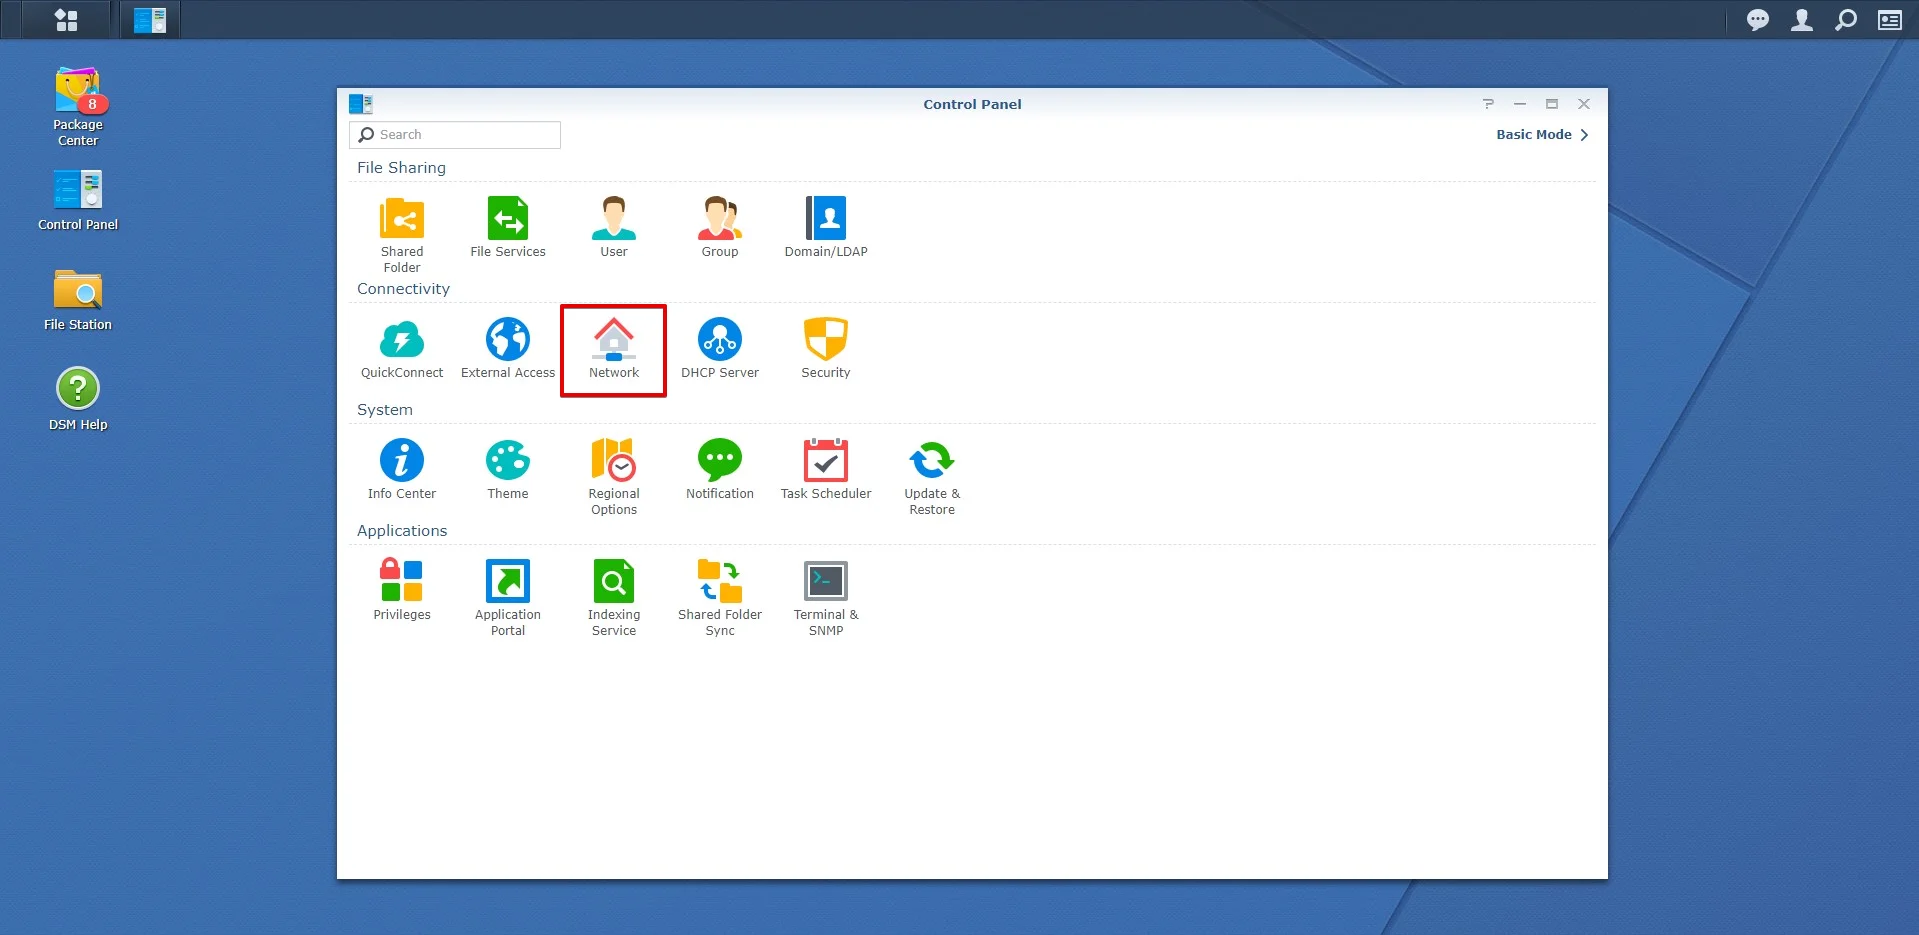
- In the Connectivity section, click on Network.
- Proceed to the Network Interface tab and press Create > Create VPN Profile.

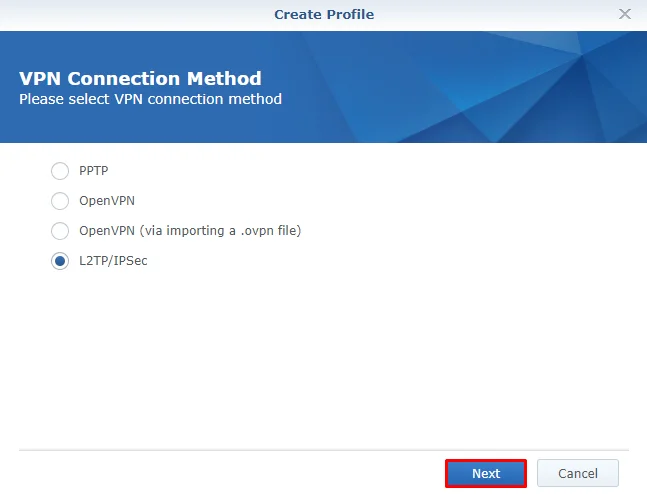
- On the Create Profile screen with a variety of VPN connection methods, choose the L2TP/IPSec option and press Next.
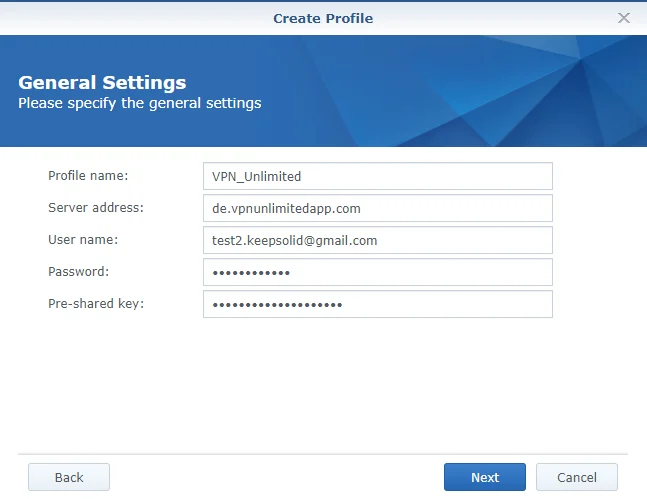
- To fill out the fields of the General Settings screen, you’ll need the manual VPN configurations you’ve generated before:
- Profile name: Type a custom name for this connection, for example VPN_Unlimited.
- Server address: Paste the VPN server address from the Domain name field of your manual configurations.
- User name: Paste your login from the Global Config section.
- Password: Enter the password from the Global Config section.
- Pre-shared key: Insert the key from the psk field of your manual VPN configurations.
- Click Next.

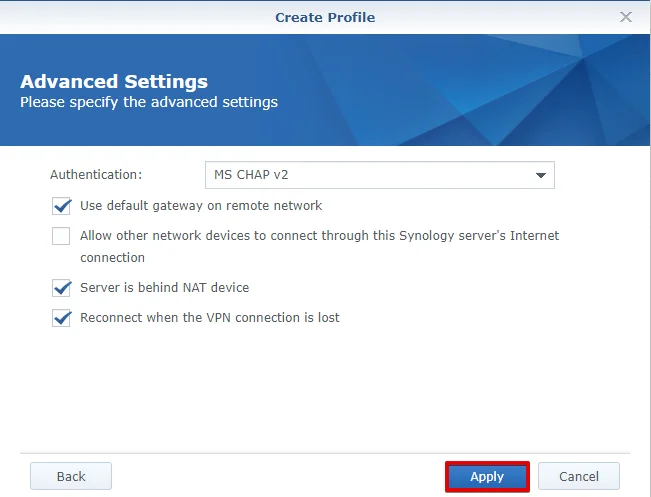
7. On the Advanced Settings screen, select MS CHAP v2 authentication and check the box in front of the following fields:
-
- Use default gateway on remote network
- Server is behind NAT device
- Reconnect when the VPN connection is lost
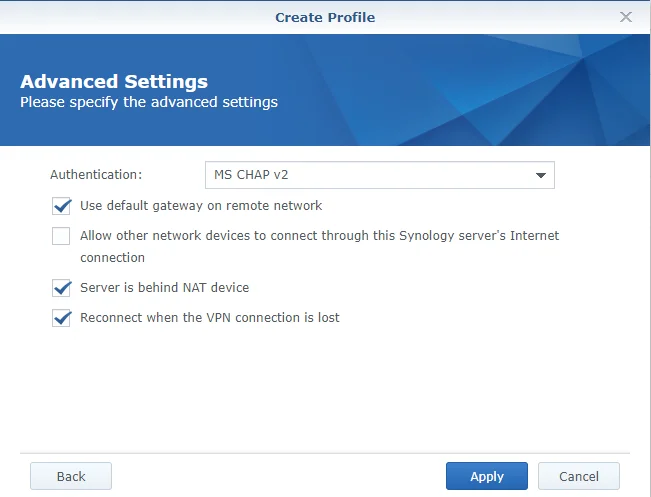
- Click Apply.

Get VPN Unlimited right now and start enjoying a secure and private internet with absolutely no borders!


Turn off IPv6 on your Synology NAS
Before you enable the VPN connection, we recommend to turn off IPv6 on your Synology NAS. This will help you avoid IPv6 traffic leaks outside the VPN tunnel.
To do this, follow the few simple steps below:
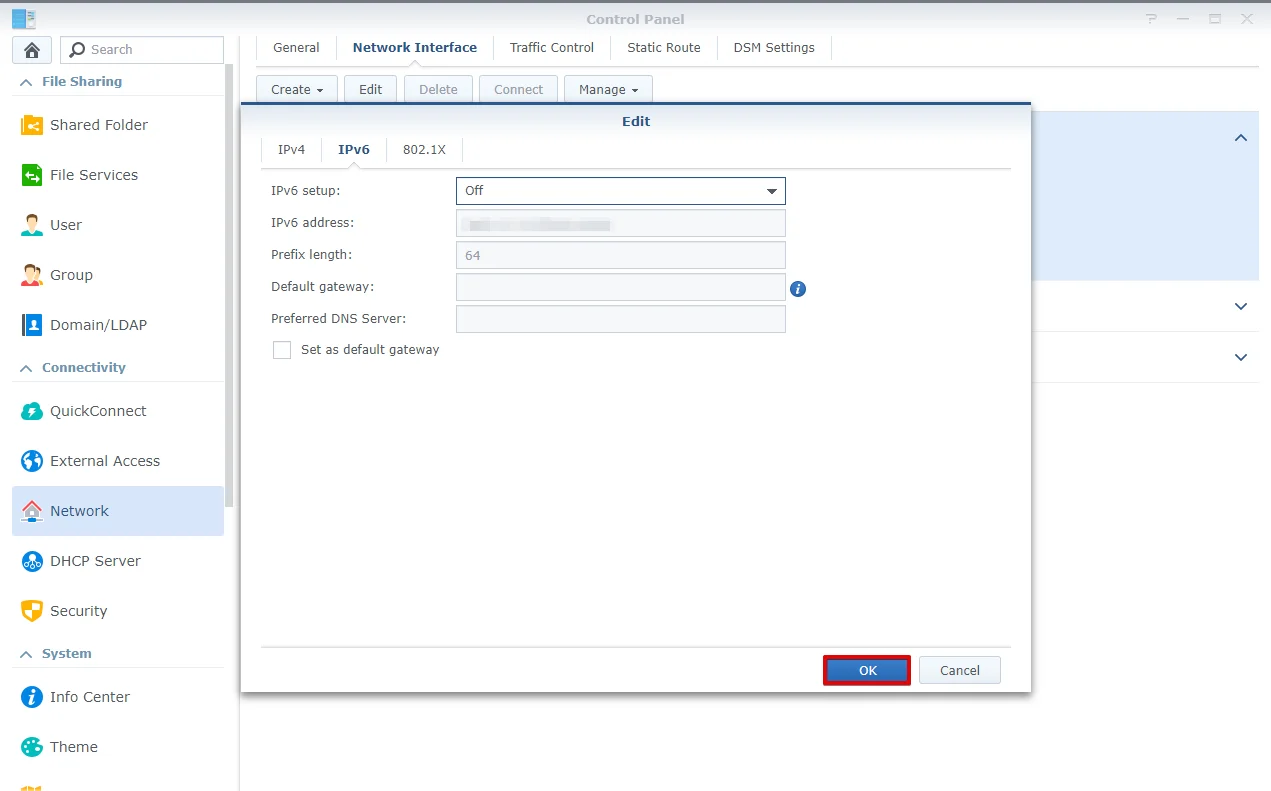
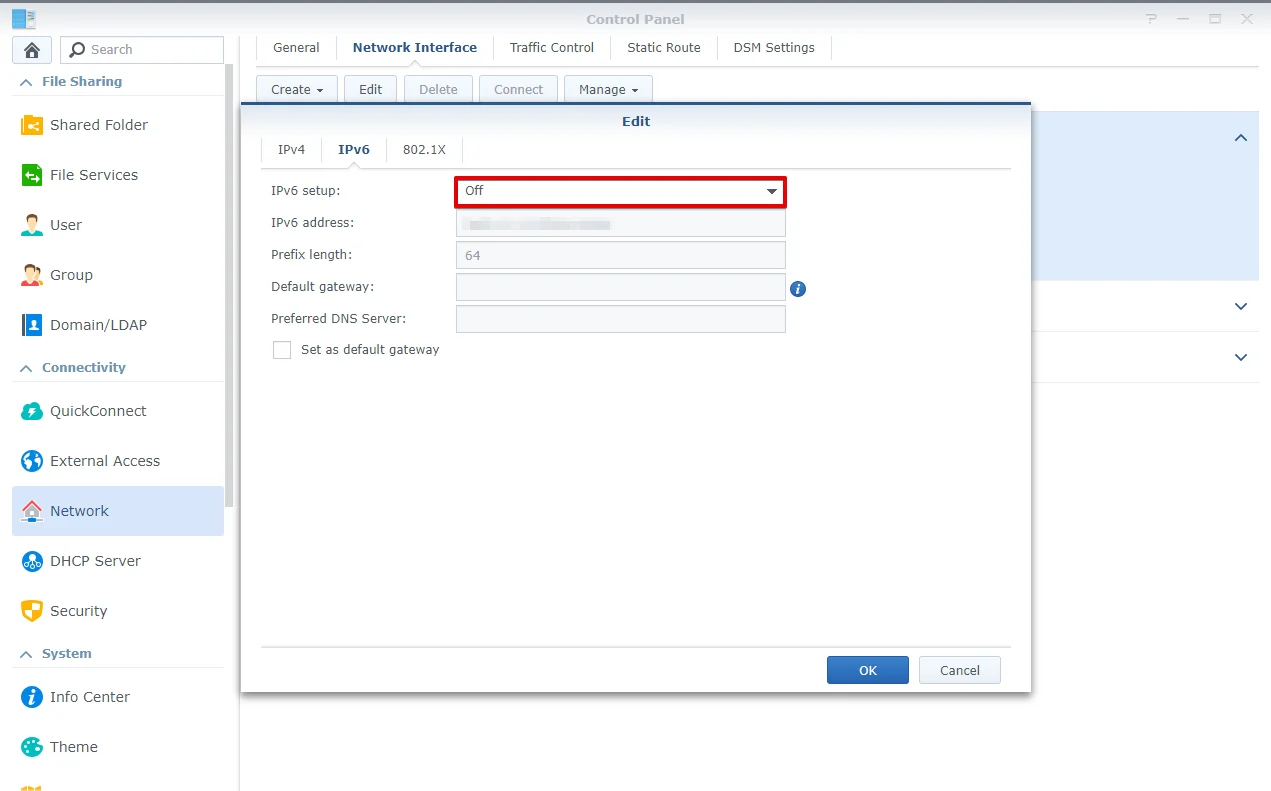
- Navigate to Control Panel > Network > Network Interface.
- Click on the LAN menu to expand it.
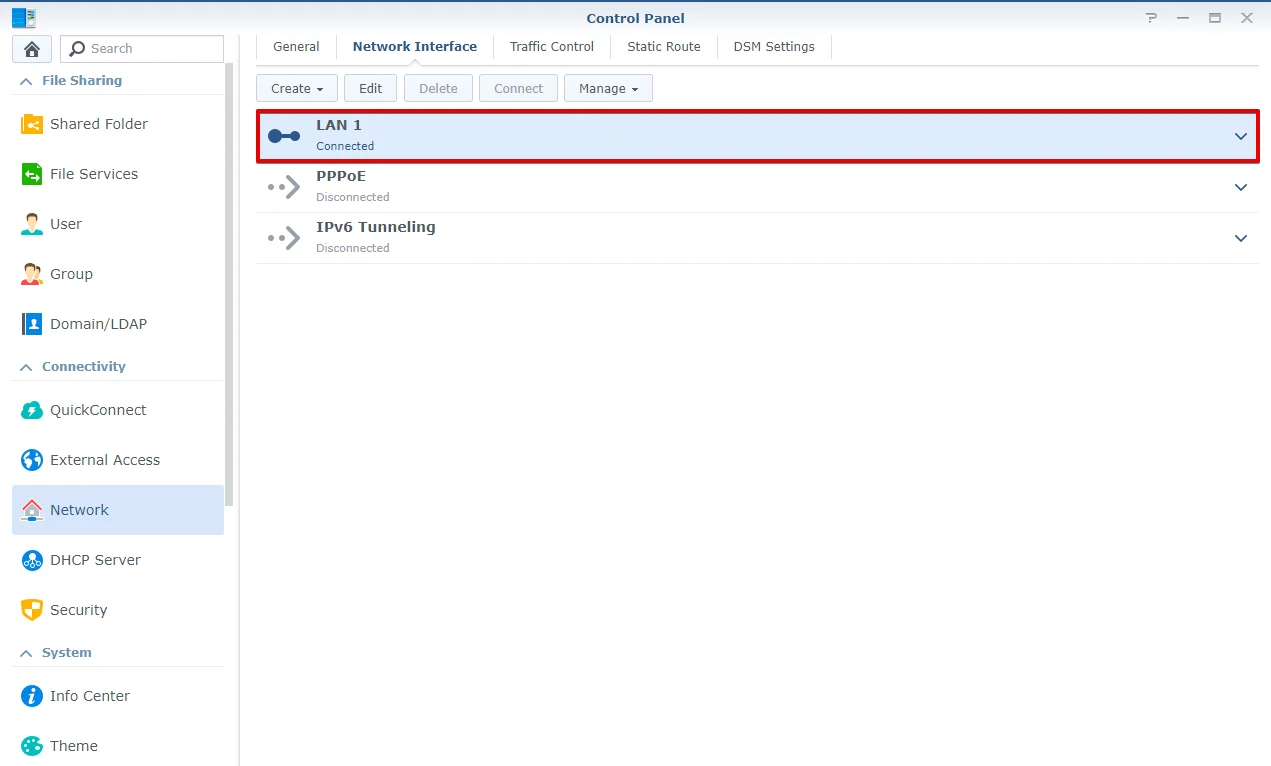
- Click Edit.

- Navigate to the IPv6 tab.
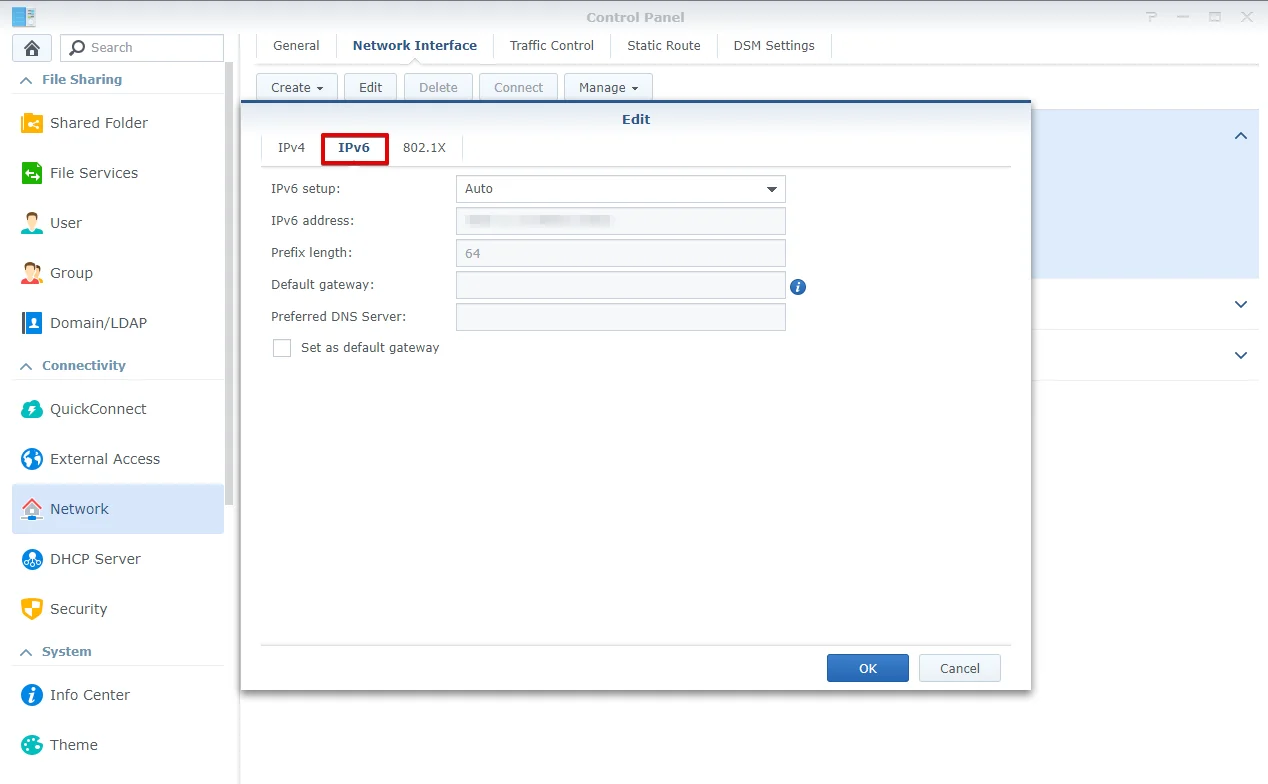
- In the IPv6 Setup field, select Off and click OK.
- After you disable IPv6, reboot your Synology.
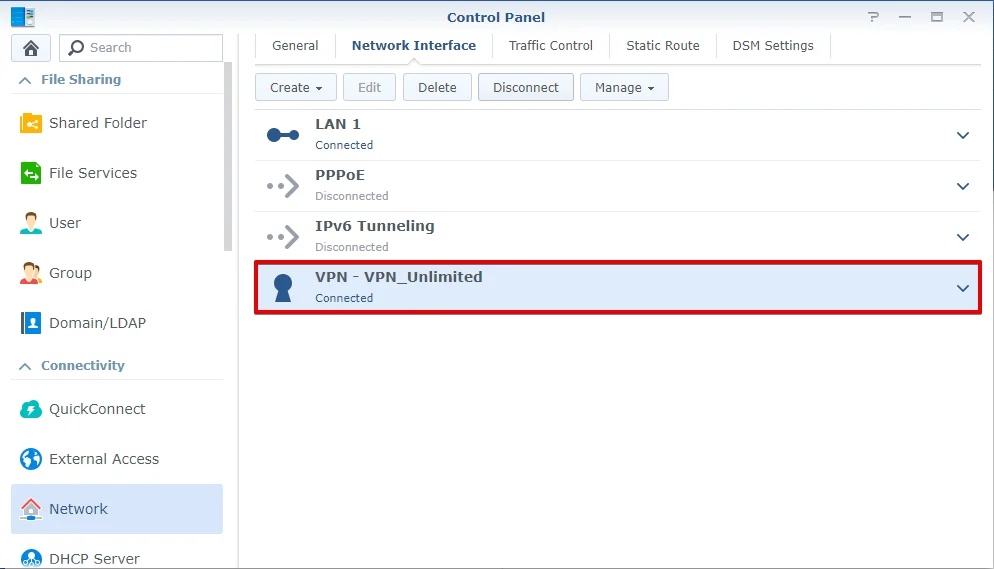
Connect to the VPN server on Synology NAS
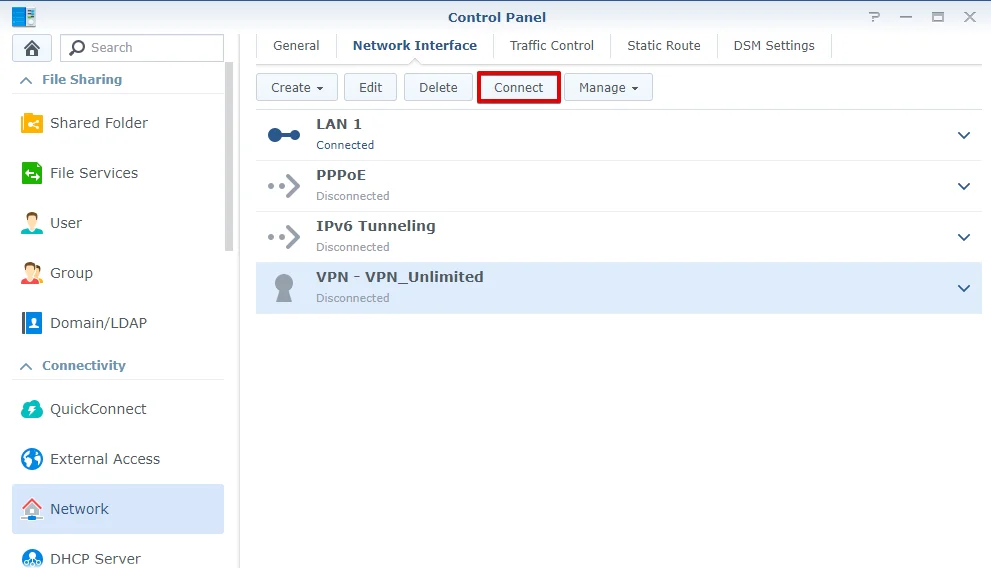
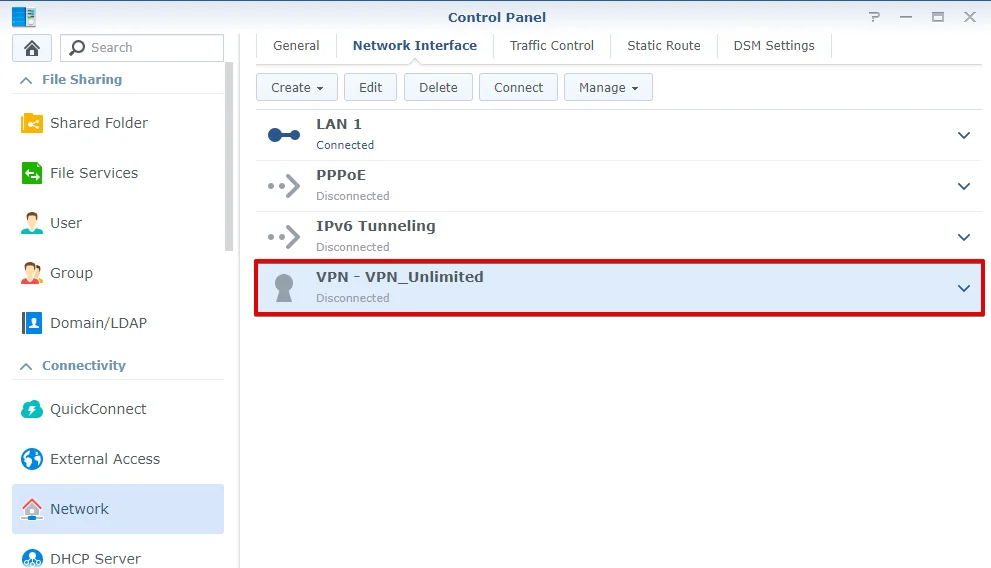
The VPN profile you’ve just created will appear on the Network Interface window. To establish connection with the VPN server, click on your new VPN Profile and press Connect.
That’s it! The Synology VPN setup is complete and your Synology NAS traffic is now protected by VPN Unlimited.
Disconnect from the VPN server on Synology NAS
To disconnect from the VPN server on your Synology, navigate to Control Panel > Network > Network Interface. Click on the relevant VPN profile and press Disconnect.

Want to set up VPN connection on another device? Check out our manuals to find the guide you need or contact our 24/7 customer support for assistance.
Get VPN Unlimited, set it up on your Synology NAS, and figure out what does top-notch privacy mean.