IKEv2 configuration guide for all major platforms
IKEv2 proves itself to be extremely secure while also demonstrating high stability and performance speed. Therefore, it will be no wonder if you decide to use it on your device.
More information about IKEv2 features you can find in the article What is the IKEv2 protocol?
This guide will walk you through the IKEv2 setup on the most popular platforms, such as iOS, macOS, and Windows. So let's start!
First of all, you need to create manual configuration files. In this regard, please follow a few simple steps described in our tutorial.
Please note that this option is considered equivalent to 1 active device, therefore occupies 1 slot.
Now, choose your platform and follow a few simple steps.
Method 1
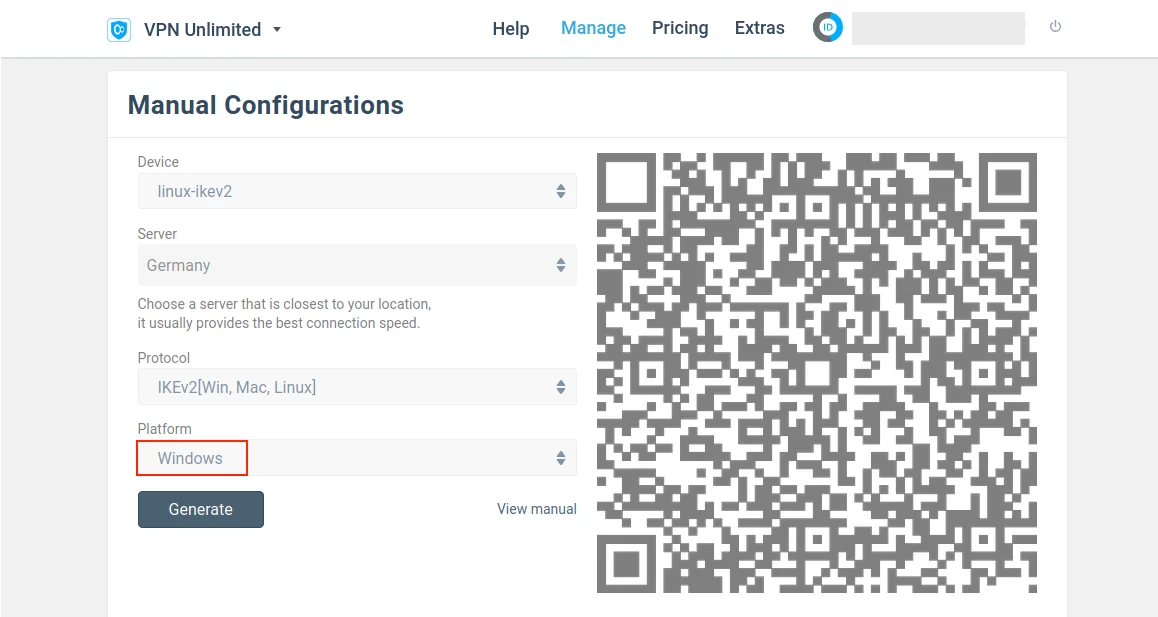
1. Create IKEv2 configuration files for Windows. This is a critical step as you will need the certificate provided there.
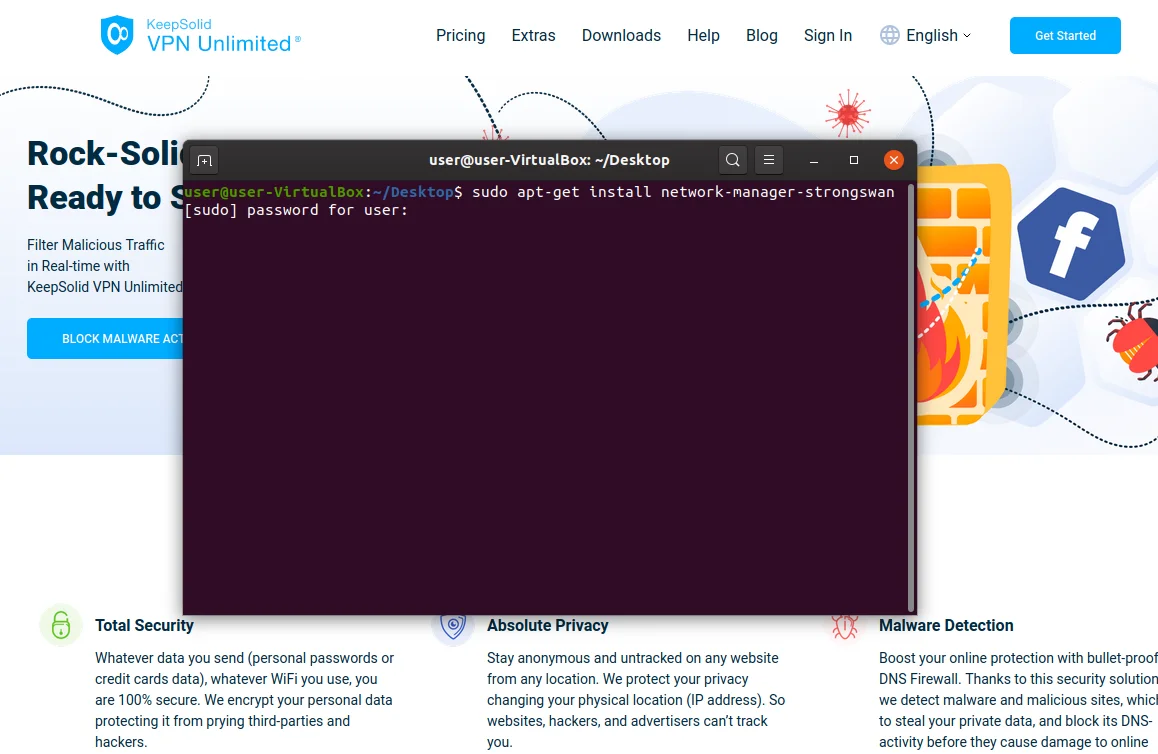
2. Execute the following command in the Terminal to install the strongSwan NetworkManager plugin:
sudo apt-get install network-manager-strongswan
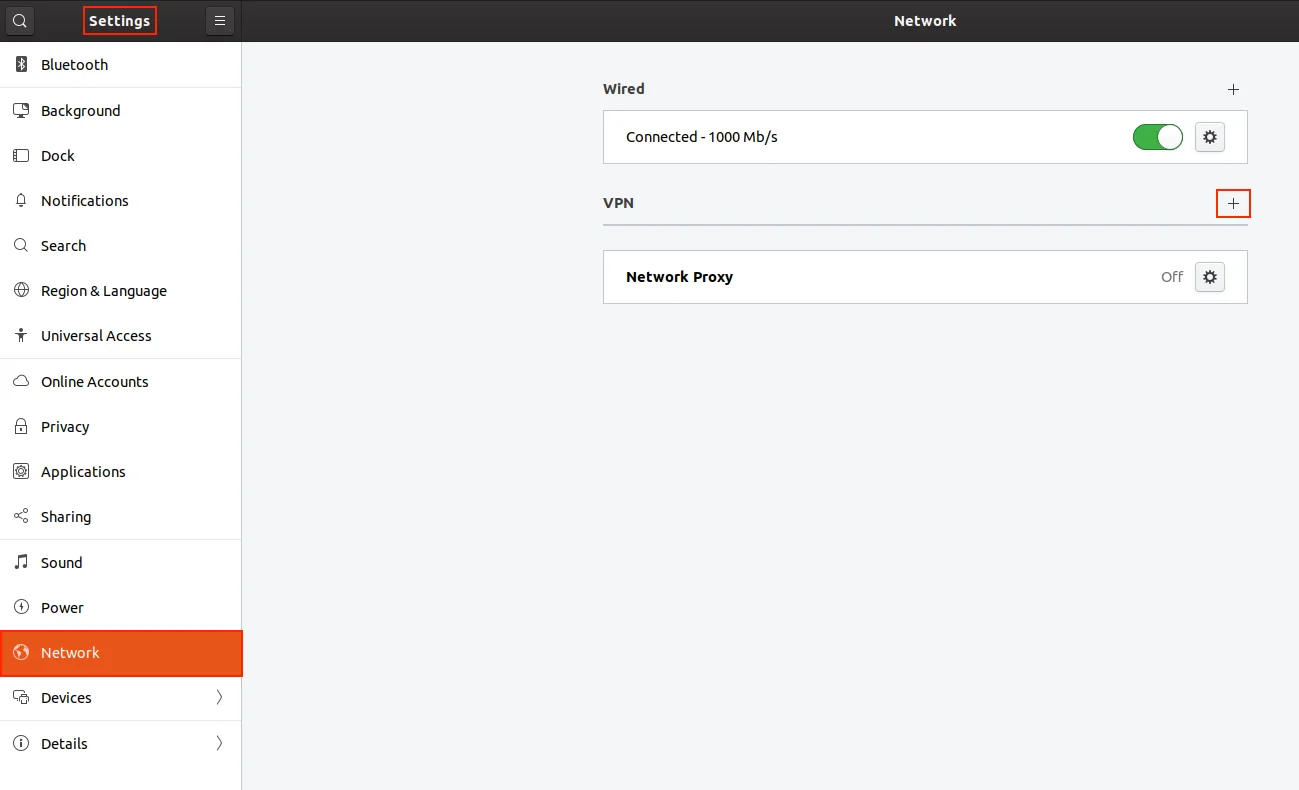
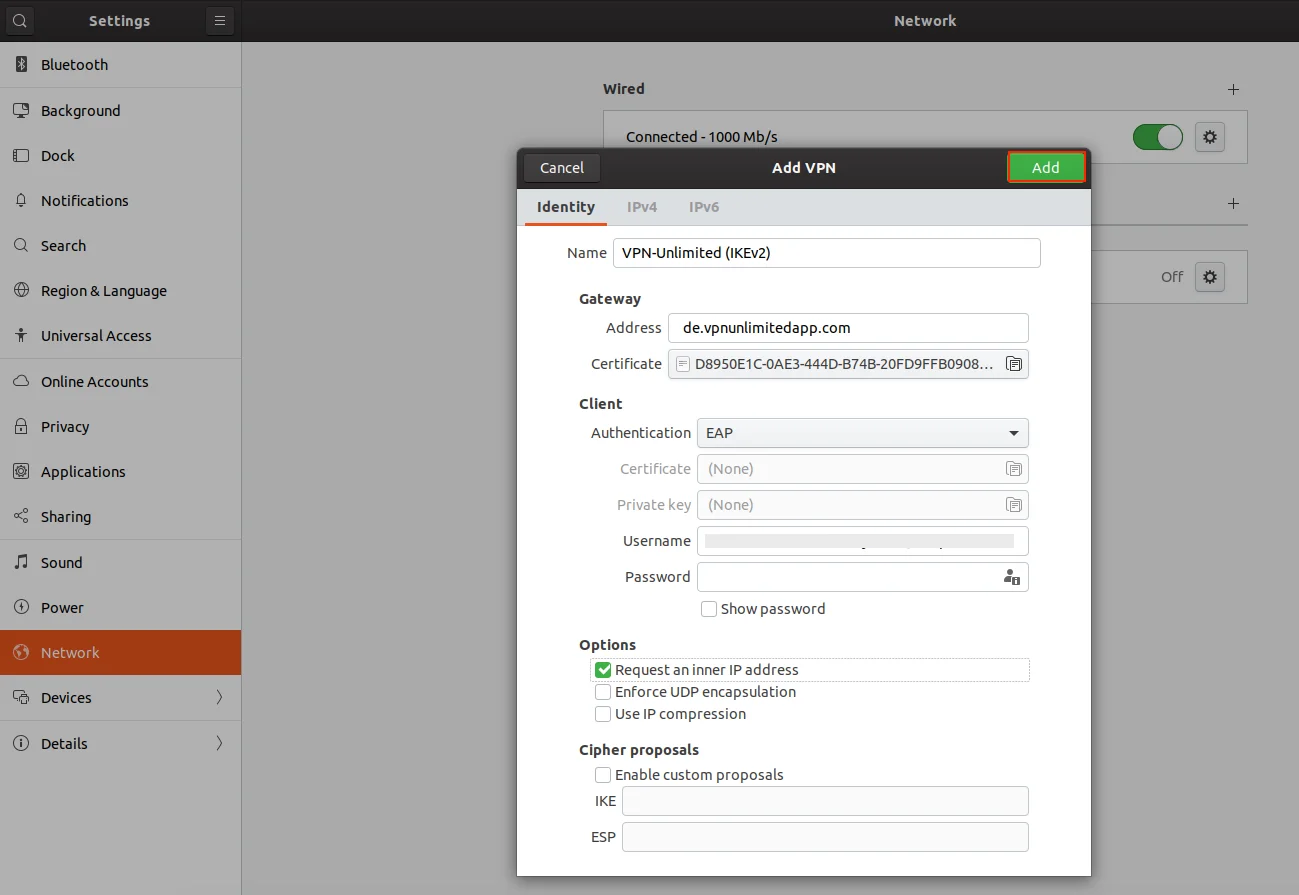
3. Go to Settings > Network and click + in the VPN section.
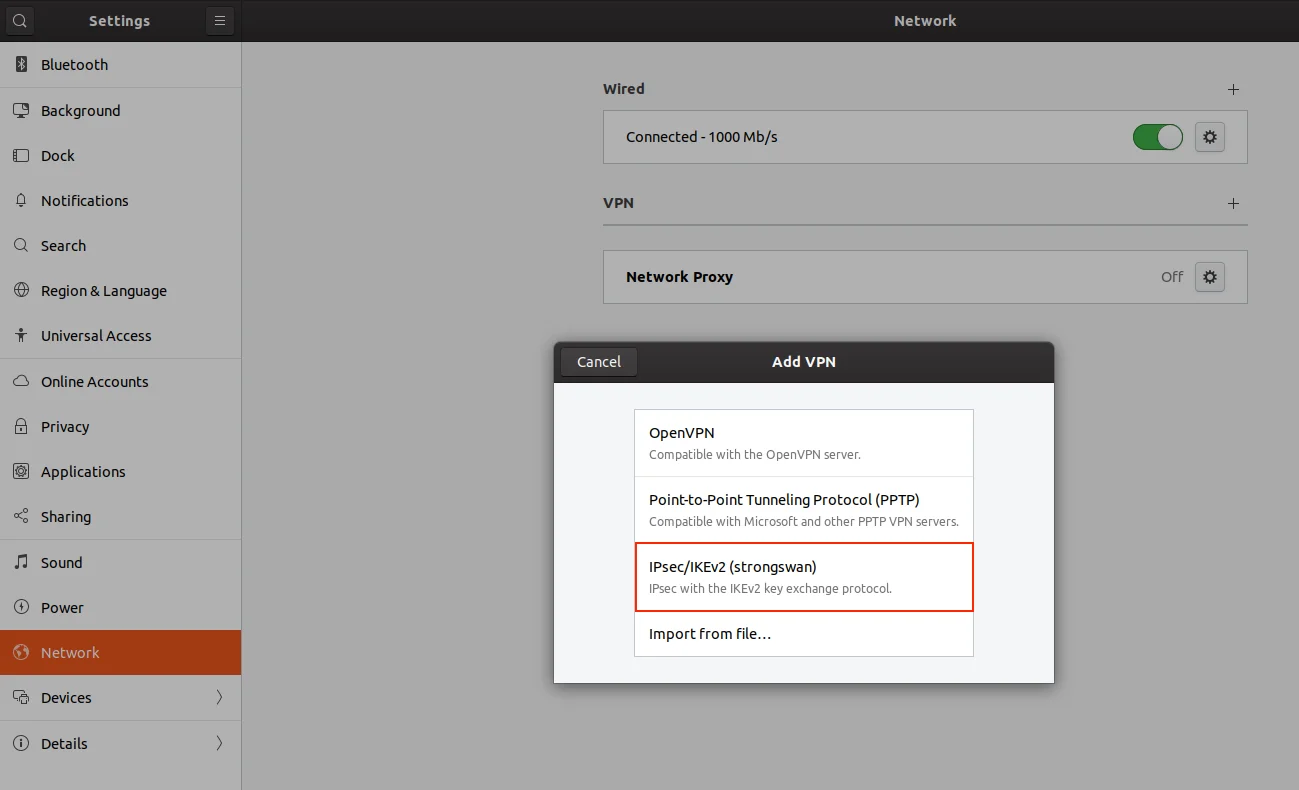
4. Select IPSec/IKEv2 (strongswan).
5. Input the following data:
-
Connection name: enter any name of your choice, for example, VPN-Unlimited (IKEv2)
-
Address: enter the IPS value from your User Office
-
Certificate: indicate the path to the downloaded certificate
-
Authentication: select EAP
-
Username: enter Login from the Device Config section of your User Office
-
Set the checkbox for Request an inner IP address
When you finish, click Add.
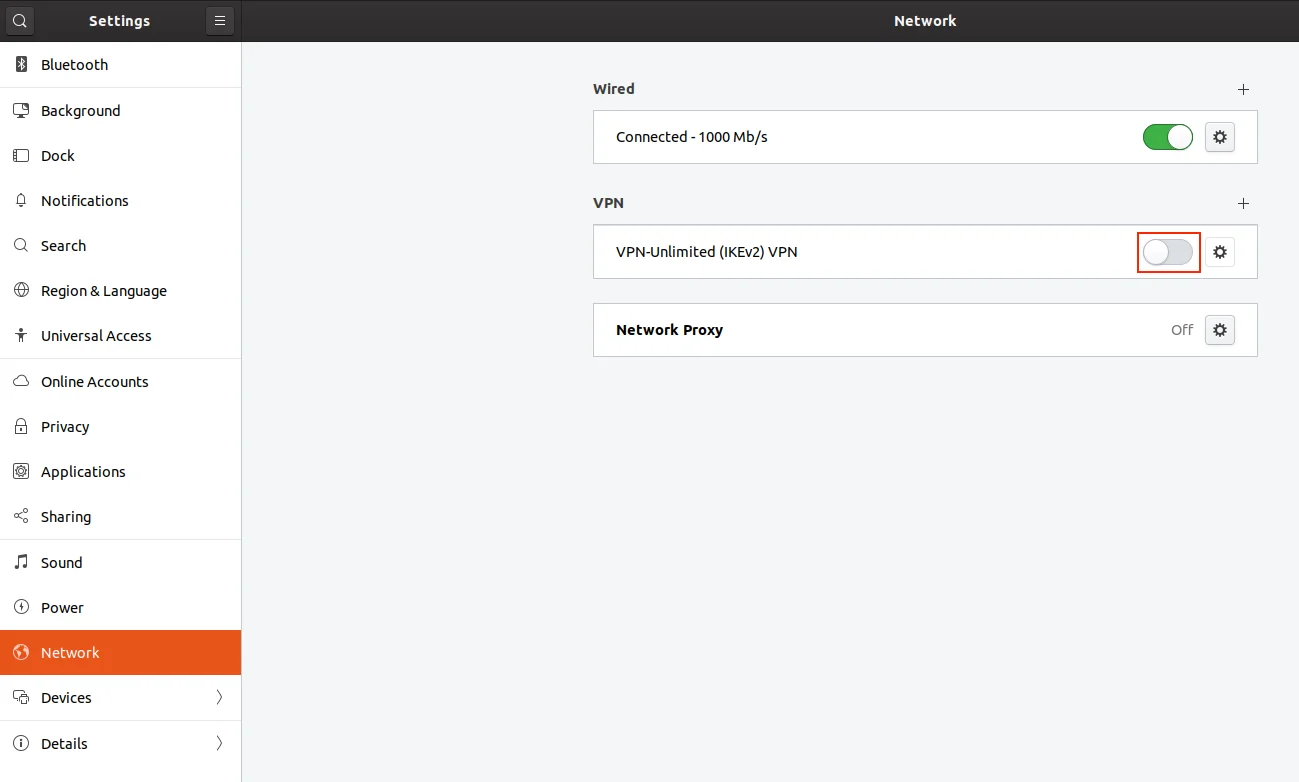
6. To establish the VPN connection enable the appropriate option and enter the password from the Device Config section. Your IKEv2 VPN connection will be established in a few seconds.
Method 2
1. Install StrongSwan and related packages.
sudo -s
apt-get update
apt-get -y install strongswan
apt-get -y install strongswan-plugin-eap-mschapv2
apt-get -y install libcharon-extra-plugins
apt-get -y install libstrongswan-extra-plugins
Please note that you might get E: Unable to locate package… when installing some packages. There is nothing to worry about, as not all Debian based distributions keep the eap-mschapv2 in the same package.
2. Set the desired settings. As an example, we have generated configurations for Sydney, Australia. Just replace the highlighted data with yours.
printf '%s\n\t' 'conn kps-au-syd' 'keyexchange=ike''dpdaction=clear' 'dpddelay=300s''eap_identity=[email protected]' 'leftauth=eap-mschapv2''left=%defaultroute' 'leftsourceip=%config''right=au-syd.vpnunlimitedapp.com' 'rightauth=pubkey''rightsubnet=0.0.0.0/0' 'rightid=ironnodes.com' 'type=tunnel''auto=add' > /etc/ipsec.conf
3. Write your credentials into /etc/ipsec.secrets. Execute the following command using the username and password created in the User Office.
"printf '%s' '[email protected]' ' : EAP ' 'OgXVVlLvH3Yr' >> /etc/ipsec.secrets"
4. Link the system's OpenSSL certificate store, so that the VPN Unlimited certificate can be verified.
rmdir /etc/ipsec.d/cacerts
ln -s /etc/ssl/certs /etc/ipsec.d/cacerts
5. Restart strongswan daemon so it can read new settings.
ipsec restart
6. Start your IKEv2 VPN connection.
sudo ipsec up kps-au-syd
To disconnect, type:
sudo ipsec down kps-au-syd
To check the status of your connection, type:
sudo ipsec kps-au-sydThat's about it. Now you have a running VPN connection through the IKEv2 protocol.
Important! Please note that you will need to configure your device using the generated settings by yourself at your own risk.

Try out VPN Unlimited for other platforms and and start surfing the web privately and anonymously!


