WireGuard® Configuration Guide for TP-Link Archer Router
for VPN Unlimited users
This step-by-step guide explains how to set up the VPN Unlimited WireGuard® VPN on your TP-Link Archer AX3000 (AX55) router.
After setup, all devices connected to the router will be protected.
The process involves two main parts:
- Part 1. Getting the WireGuard configuration file from your KeepSolid User Office.
- Part 2. Setting up the VPN Client on your TP-Link router.
Part 1. Get the WireGuard® Configuration File
To set up the VPN on your TP-Link router, you first need to generate a WireGuard configuration file (.conf) in your KeepSolid User Office.
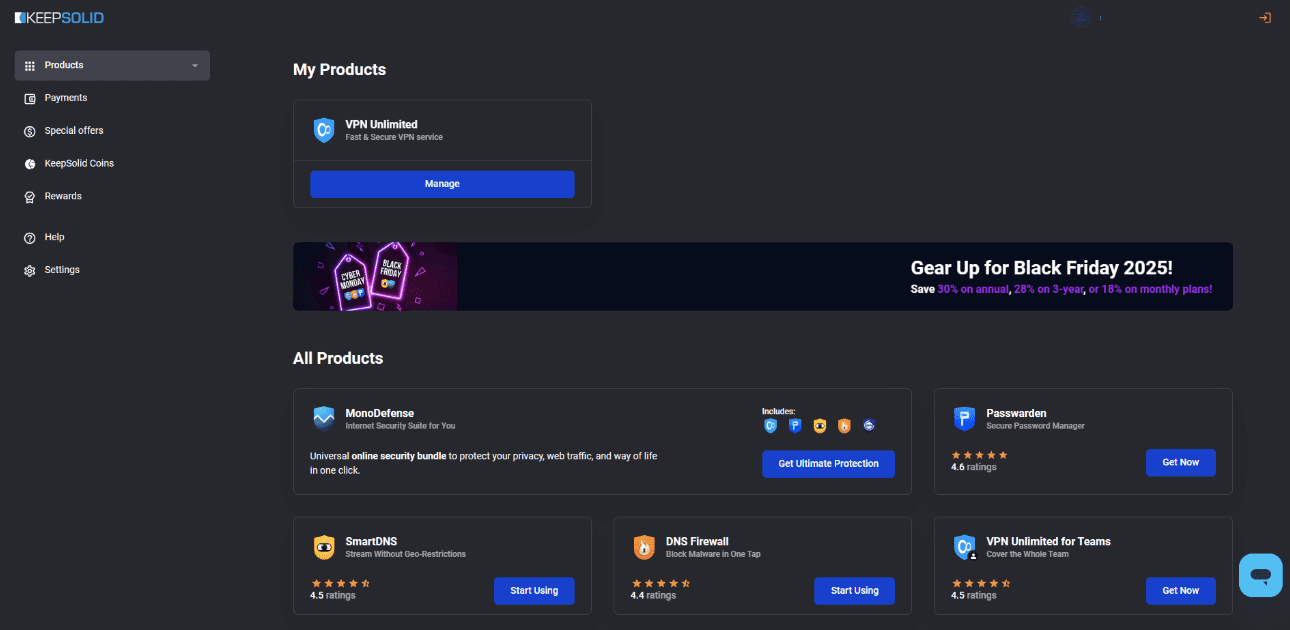
1. Log in to your KeepSolid User Office. Navigate to the official website and sign in using your KeepSolid ID.
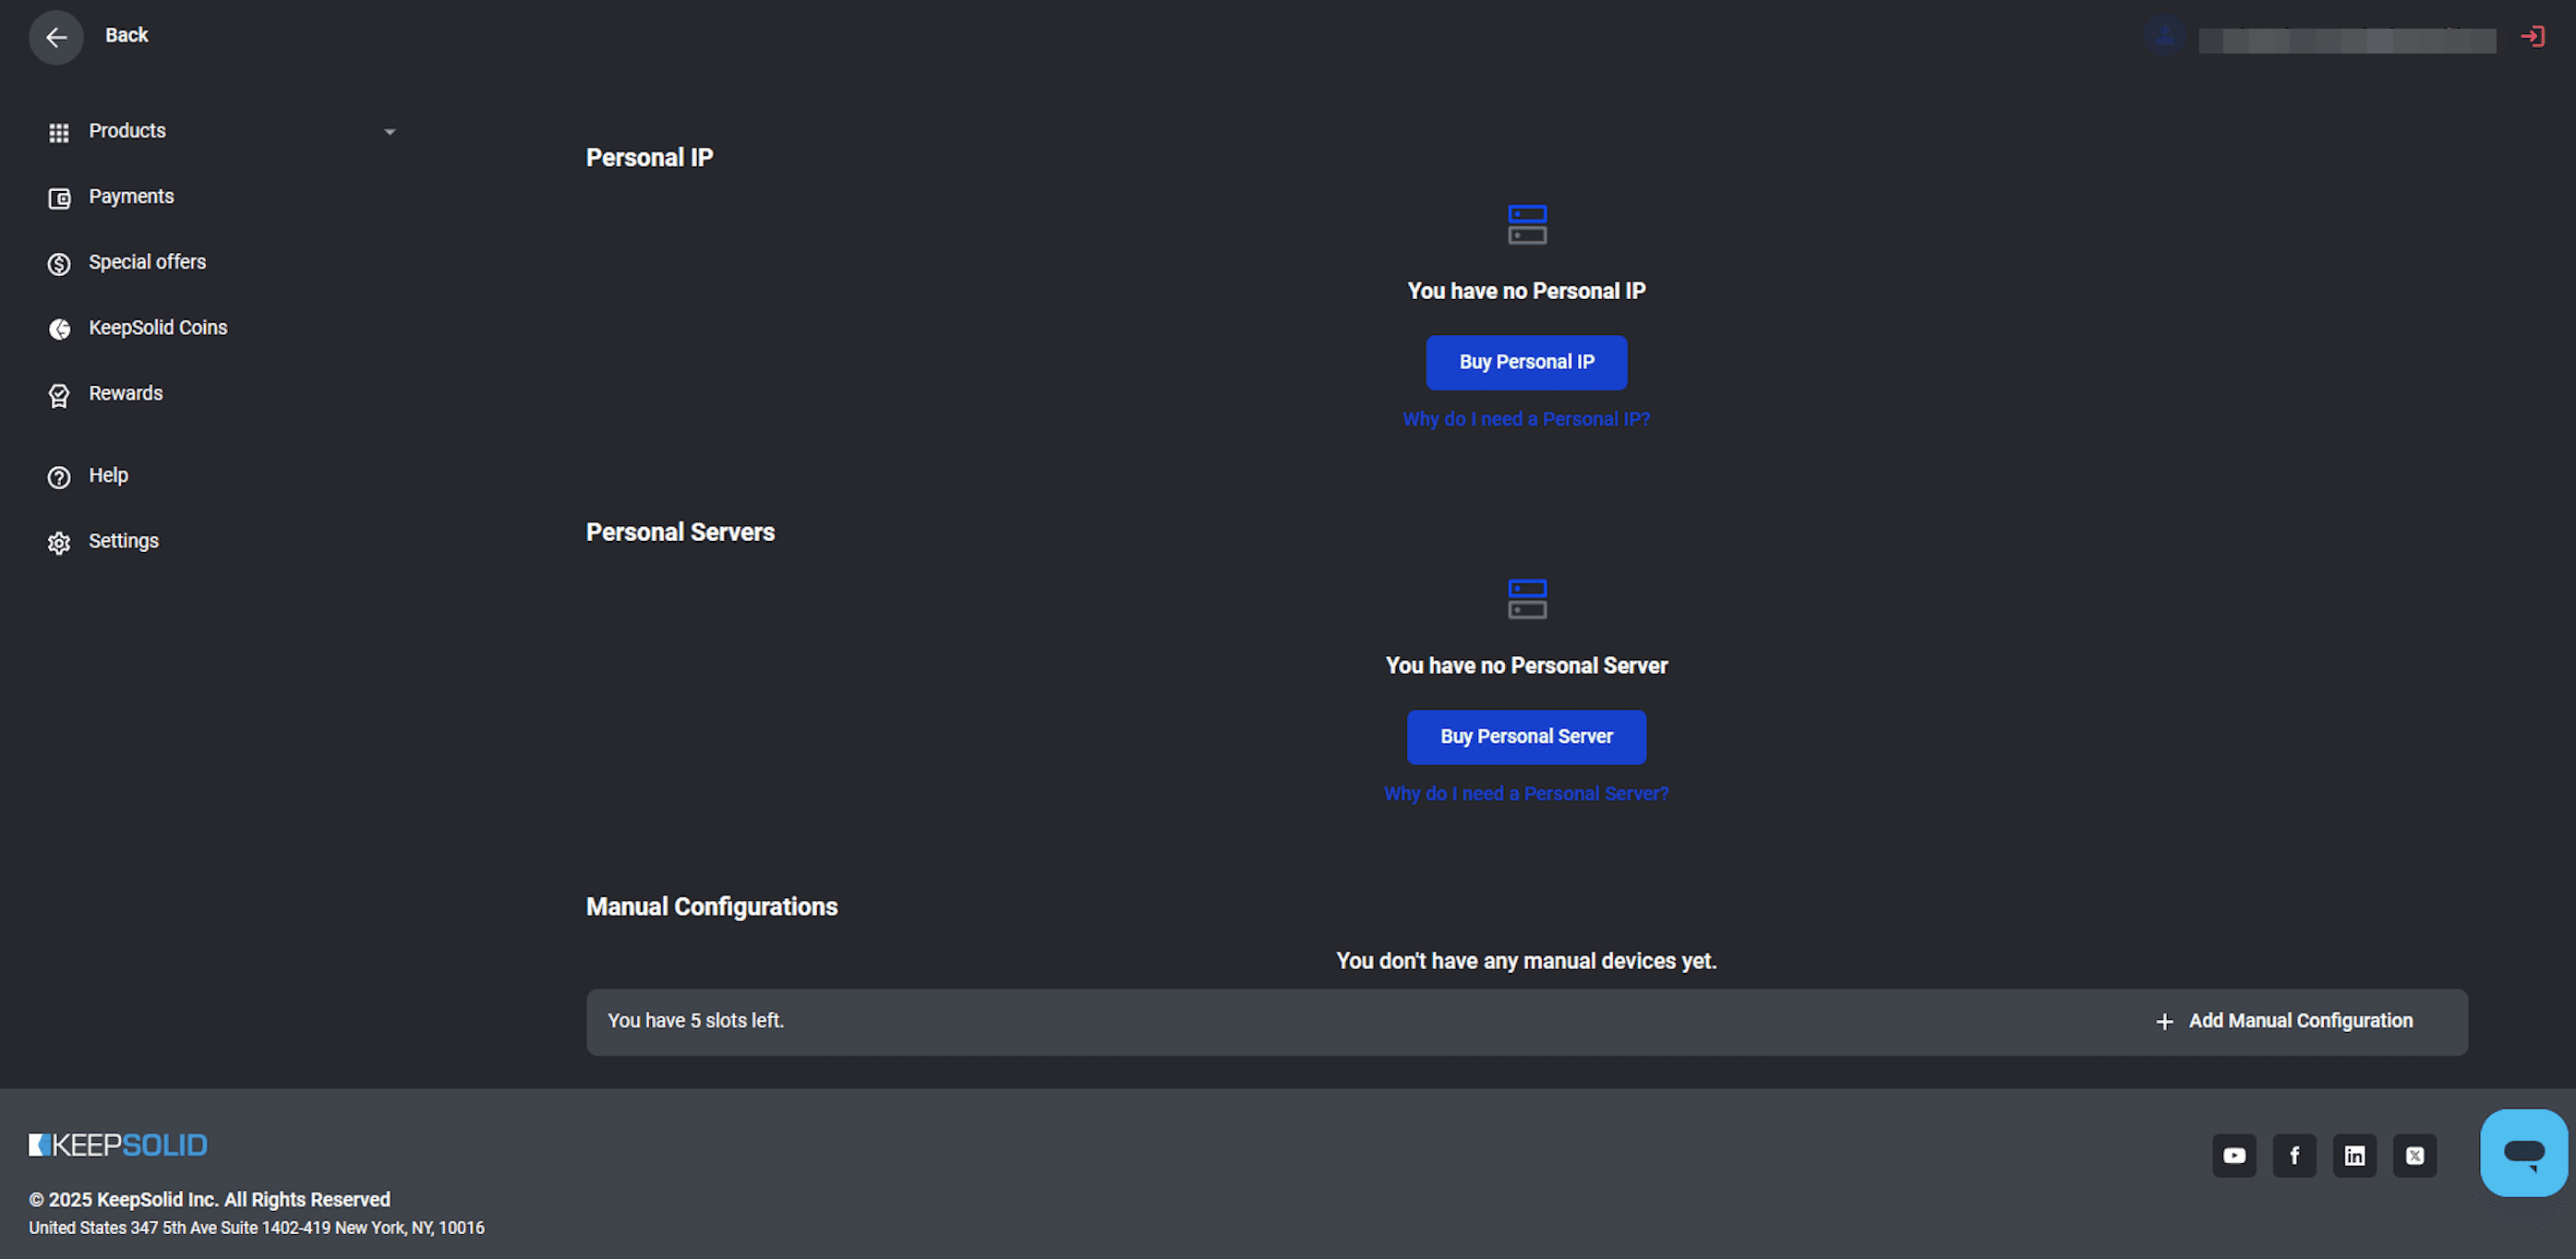
2. Go to Manual Configuration. On the My Products page, click Manage on the VPN Unlimited tile. Scroll down to the Manual Configurations section and click + Add Manual Configuration.
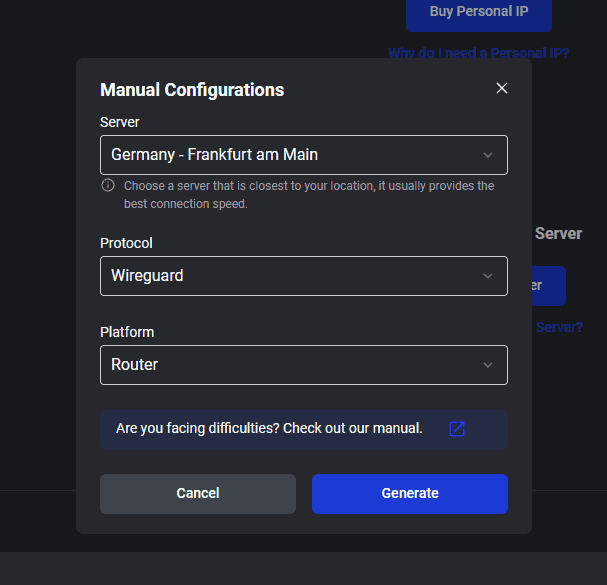
3. Generate the File. In the pop-up window:
- Select the Server location you wish to connect to.
- Select Wireguard as the Protocol.
- Select Router as the Platform.
4. Click Generate and then save the resulting configuration file (it will have a .conf extension).
Part 2. Setup VPN on TP-Link Router
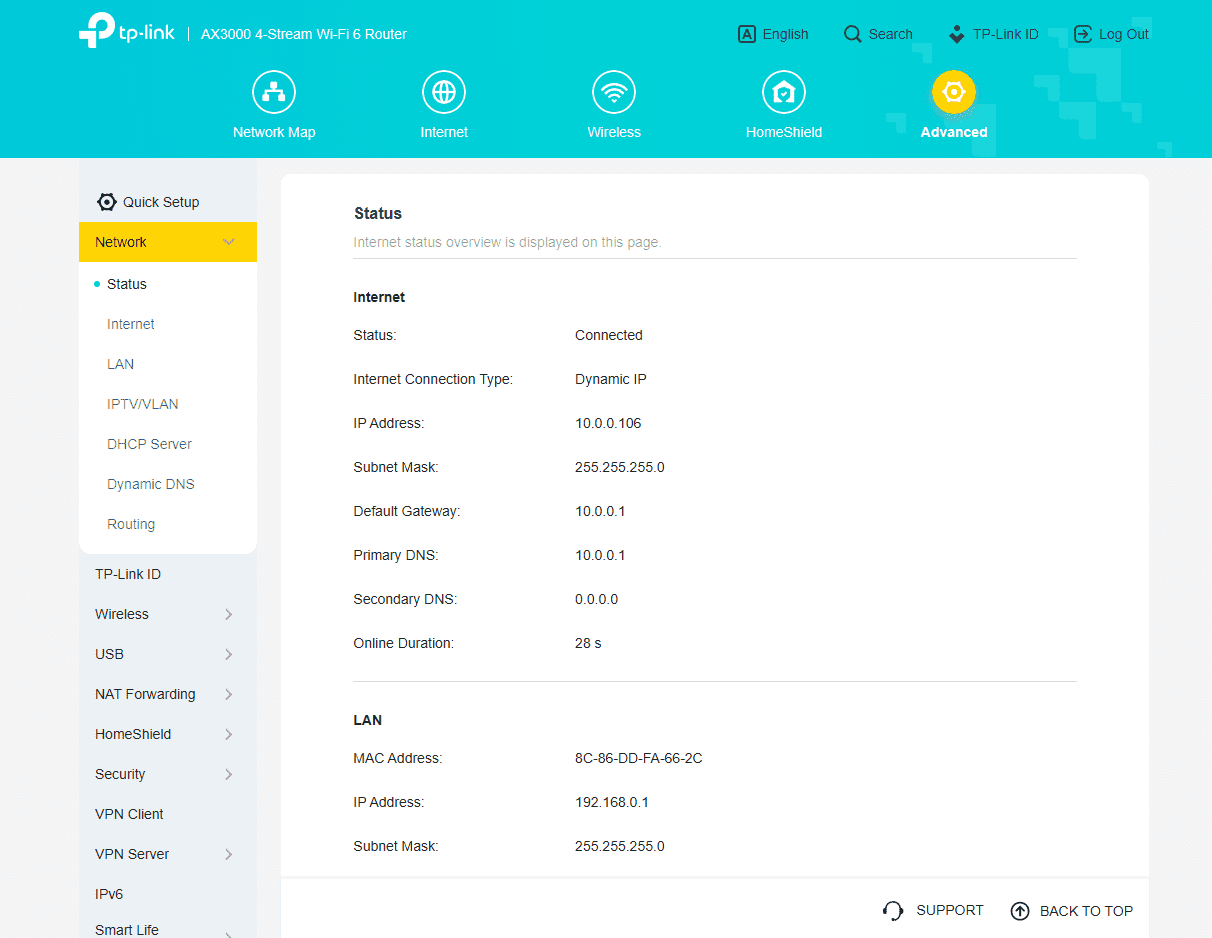
1. Log in to your router. Open your web browser and enter 192.168.0.1 in the address bar. Log in using your router credentials.
2. Navigate to VPN Client. Once logged in, click on the Advanced tab in the top menu. In the sidebar, select Network > Status to confirm your internet connection.
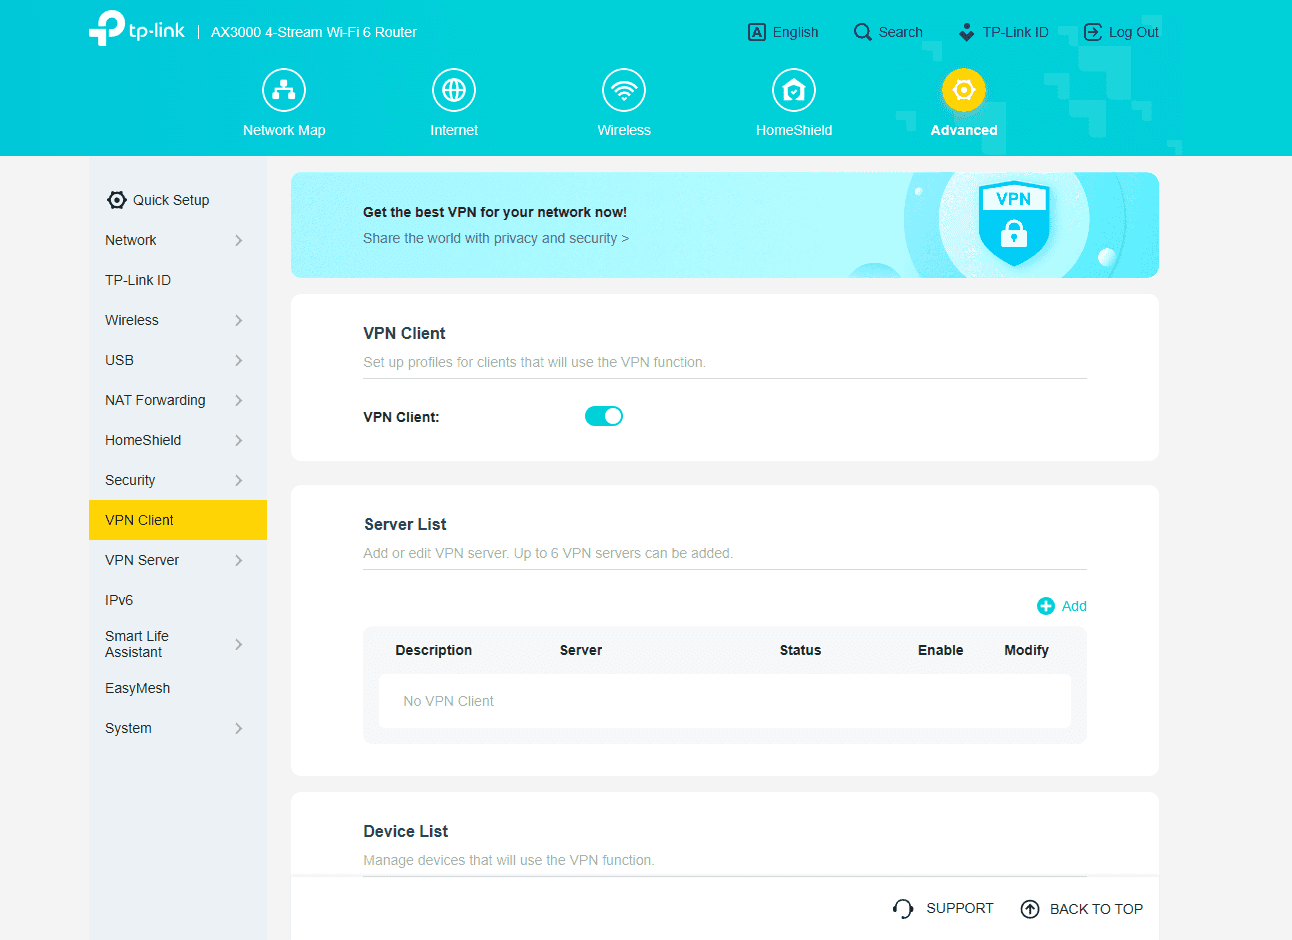
3. Go to VPN Client settings. In the sidebar under Advanced, navigate to VPN Client. Ensure the VPN Client toggle is switched ON.
4. Click the + Add button under the Server List section.
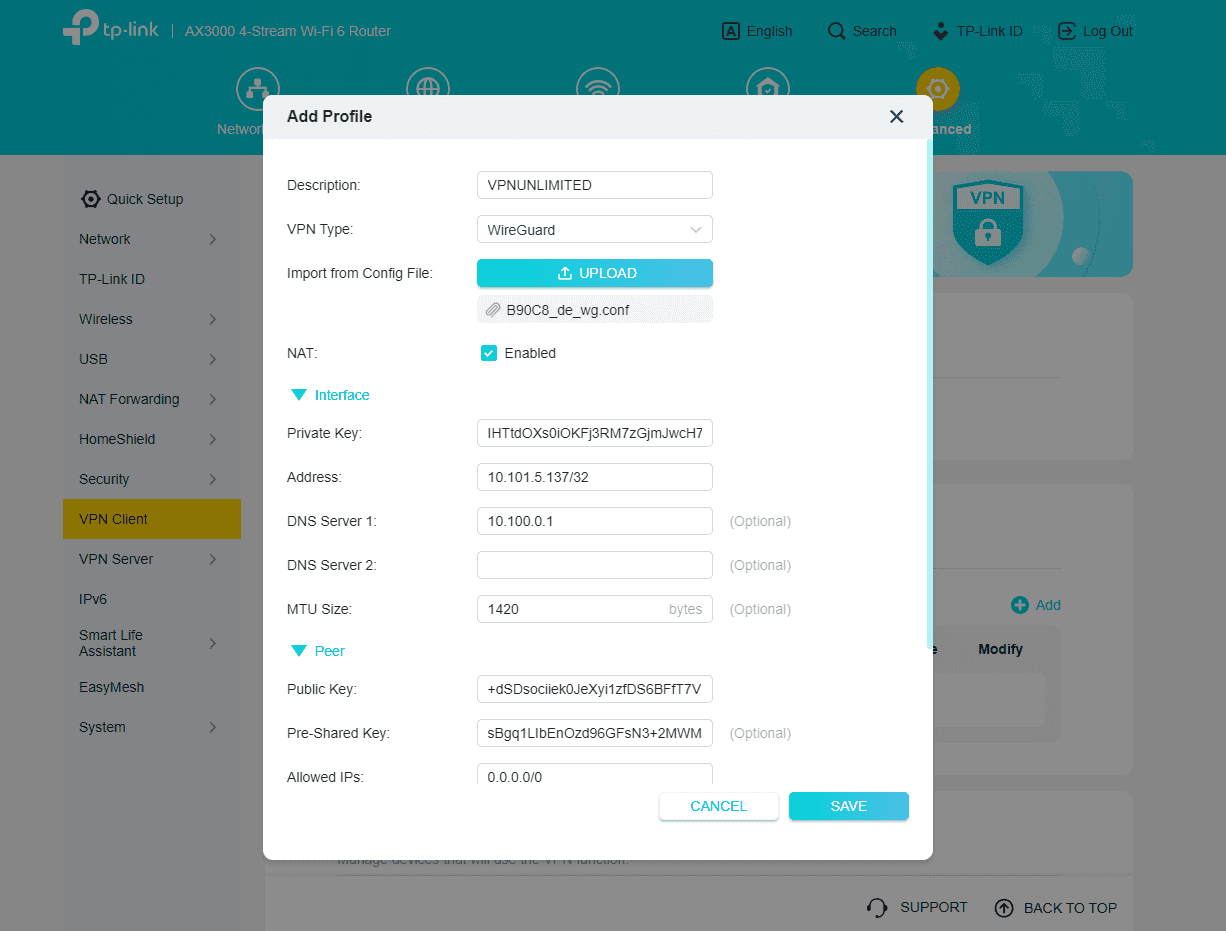
5. Add New Profile. In the Add Profile window that appears:
- Ensure the VPN Type is set to WireGuard.
- Click Upload and select the
.conf fileyou saved in Part 1.

6. Save the Profile. The router will automatically populate the remaining fields (Private Key, Address, DNS, Public Key, etc.) from the file. You can optionally change the Description (e.g., to VPNUNLIMITED). Click Save.
7. Enable VPN. The newly created profile (e.g., VPNUNLIMITED) will appear in the Server List. Use the Enable toggle next to the profile to turn the VPN connection ON. The Status should change to Connected.
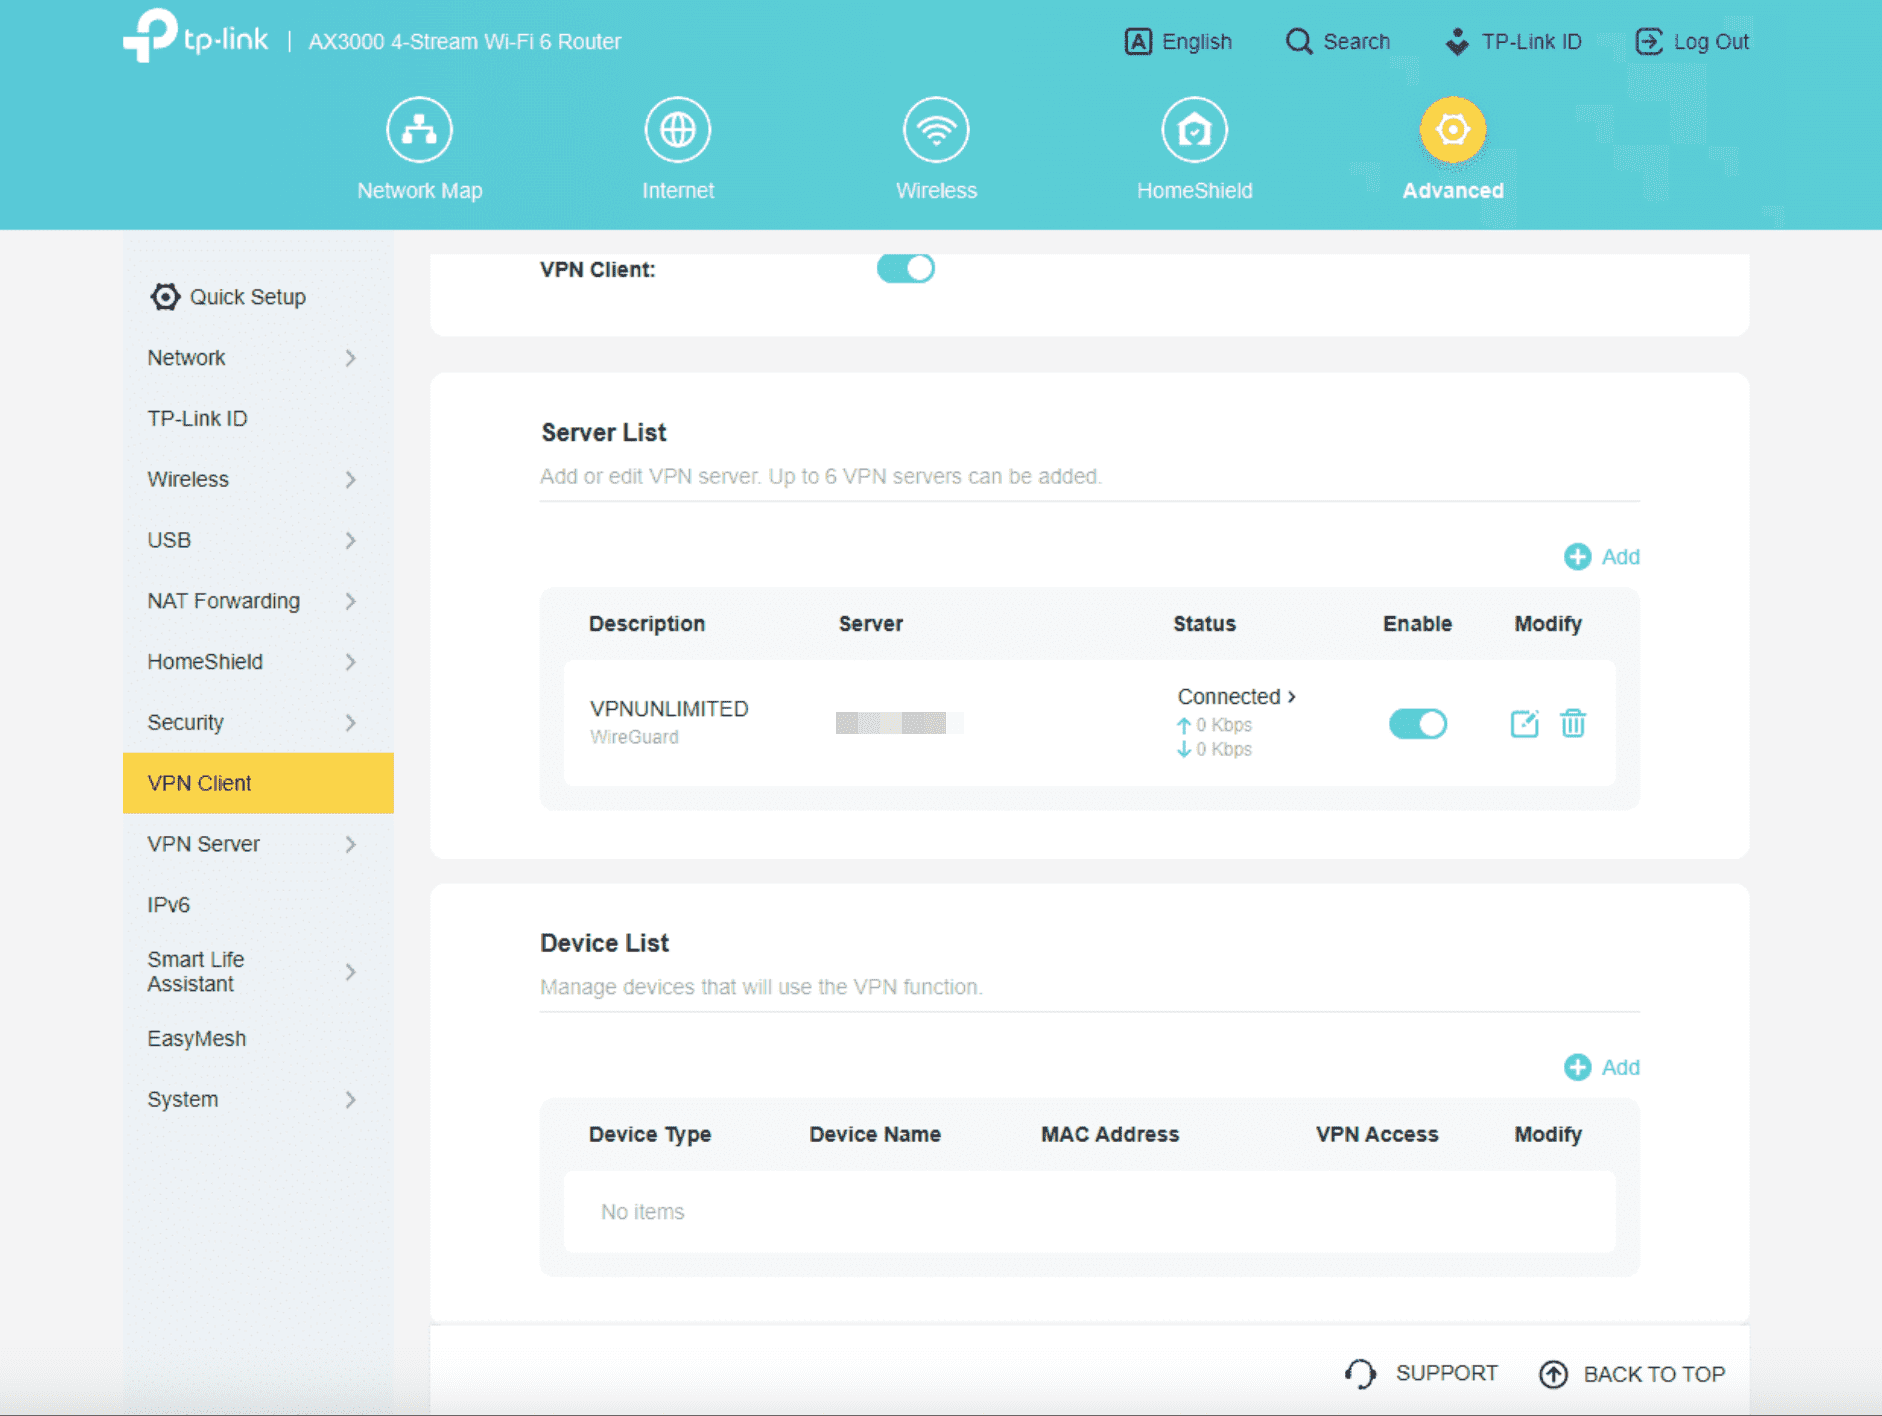
8. Select Devices. In the Device List section, click + Add. Select the devices you want to protect via VPN, and click Save. Only selected devices will use the VPN connection.

That’s it! Your WireGuard VPN connection is now active, protecting the devices you selected on your TP-Link router.
If you need other VPN configuration tutorials, check out the Manuals page or contact our customer support via [email protected].
Get VPN Unlimited right now!
Set up VPN Unlimited on your TP-Link router and secure all connected devices.