How to Add VPN Unlimited to Trusted on Your Windows PC Antivirus
The online world is full of cybersecurity hazards. So as not to fall victim of hackers stealing your private data, conducting identity thefts, etc., each netizen should take proper care of cyber protection. With the abundance of security tools it may be difficult to opt for a single one. Moreover, various security apps can offer different kinds of protection. A good line of defense would be to use a good antivirus and a reliable VPN app, like VPN Unlimited.
Taking an antivirus and a vpn software functions, they would complement each other in ensuring your cybersecurity and online privacy. However, antivirus and VPN coexistence may not always be as peaceful as desired.
Relationship of antivirus software with VPN
In our manual on how to install VPN Unlimited on Windows 10 we recommend you to disable your antivirus software, so that the installation process runs smoothly. Such a recommendation sometimes causes concerns among our customers like: I’m using antivirus to protect my computer, why should I ever disable it? Is the VPN app really secure, my antivirus gives out odd mistakes and doesn’t let me install it.
We can assure you there are no grounds for such worries, though antivirus and VPN relationships may indeed be complicated sometimes.
As mentioned, the conflict may appear during the installation or update process. For example, some of our users encountered such an error: you see a notification that an updated version is available and click Update. At some point during the update process, the below error pops up:

The reason is that some components of your security software may be conflicting with VPN Unlimited installer. You may press Ignore on this pop-up screen, the installation continues, but the VPN app does not seem to be working properly. Disappointing, isn’t it? The only solution to get the app back on track is to fully reinstall it, afresh. Surely not the best experience, running the entire uninstall/install process just to update the software.
How can you avoid that? Just disable your security software before installing or updating VPN Unlimited app. Once you have the VPN app on your device, turn your security software back on.
Also, VPN vs. antivirus antagonism may occur even after the installation process. Antivirus software may mistakenly detect VPN software components as malicious and block its proper work. But no worries, there is a solution for that, too. If you are facing such a false-positive detection, check out the below guides on how to add VPN Unlimited executable files to the exceptions of some popular antivirus programs.
How to add VPN Unlimited to Trusted in Malwarebytes settings
How can you avoid that? Just disable your security software before installing or updating VPN Unlimited app. Once you have the VPN app on your device, turn your security software back on.
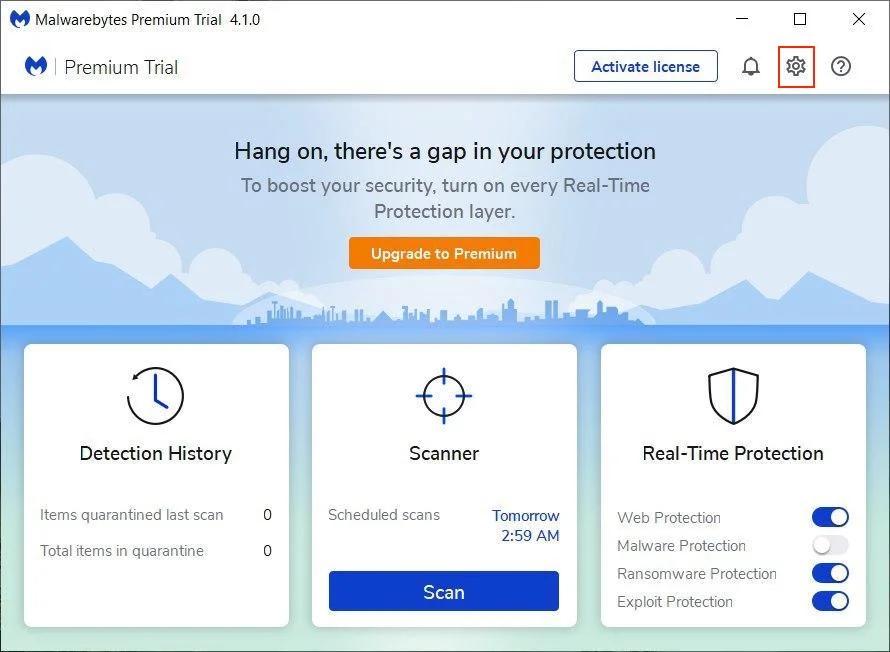
1. Open Malwarebytes app and press

2. Go to the Allow List tab:
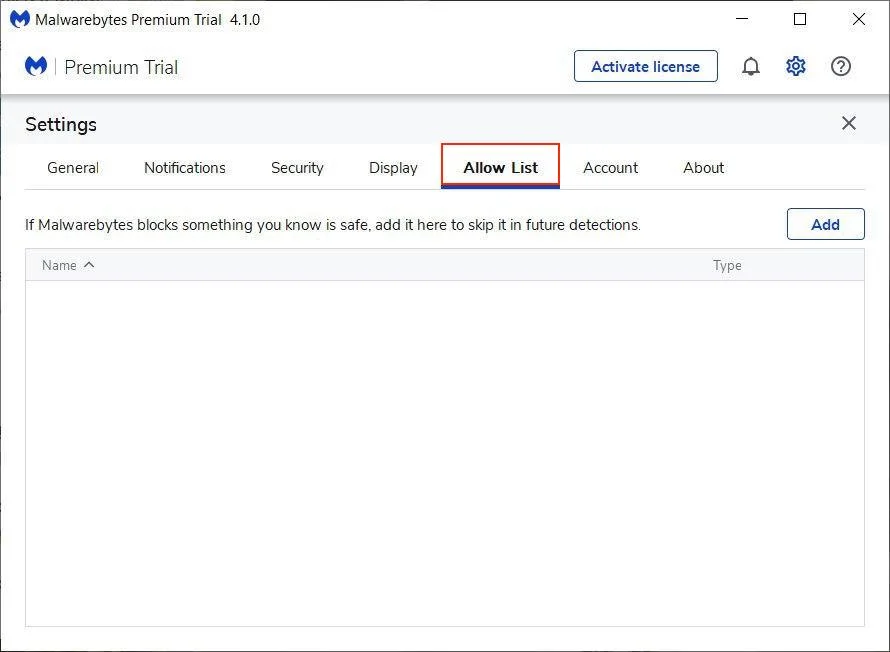
3. In order to add an item to the exclusion list, click Add.
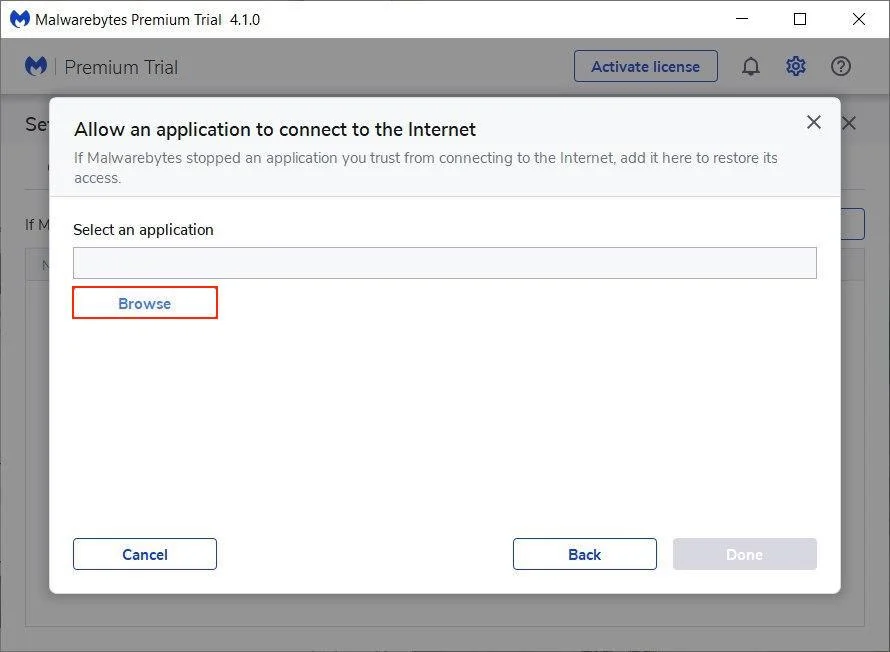
4. In the pop-up window choose Exclude an Application that Connects to the Internet option.

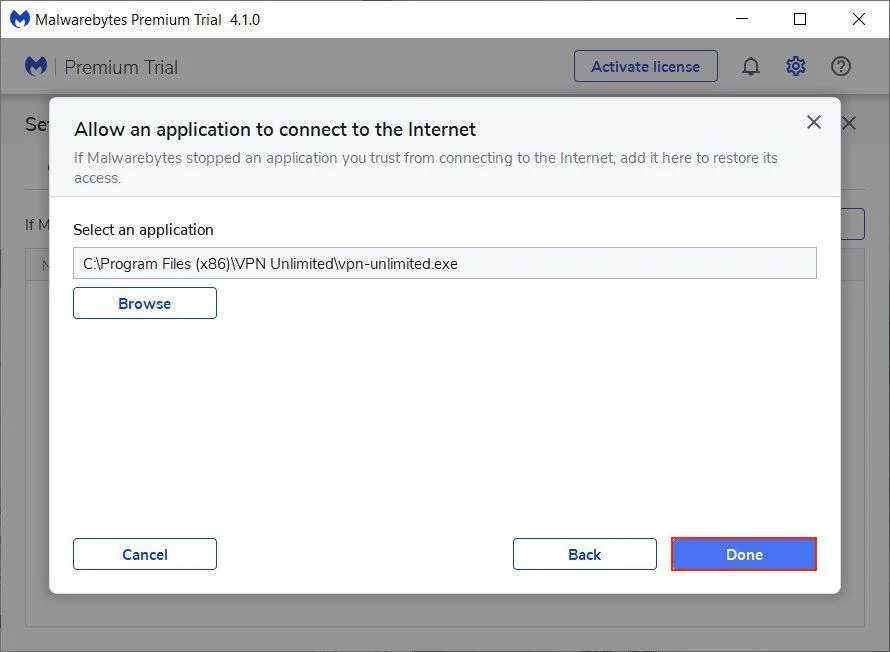
5. Next, you’ll need to specify the application you wish to add to trusted. Click Browse.
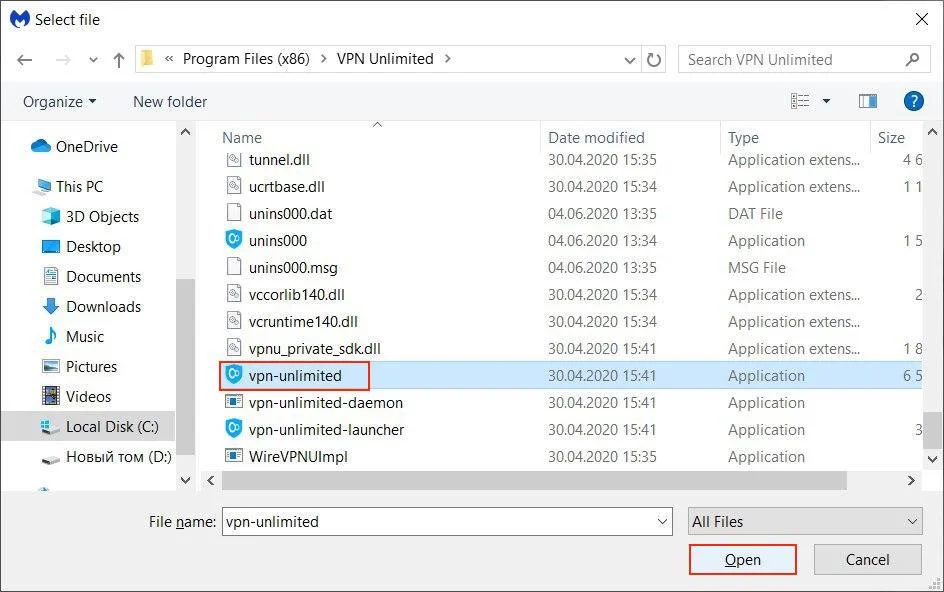
6. Navigate to Local Disc (C:) > Program Files > find VPN Unlimited folder > choose vpn-unlimited and click Open:
7. Press Done.
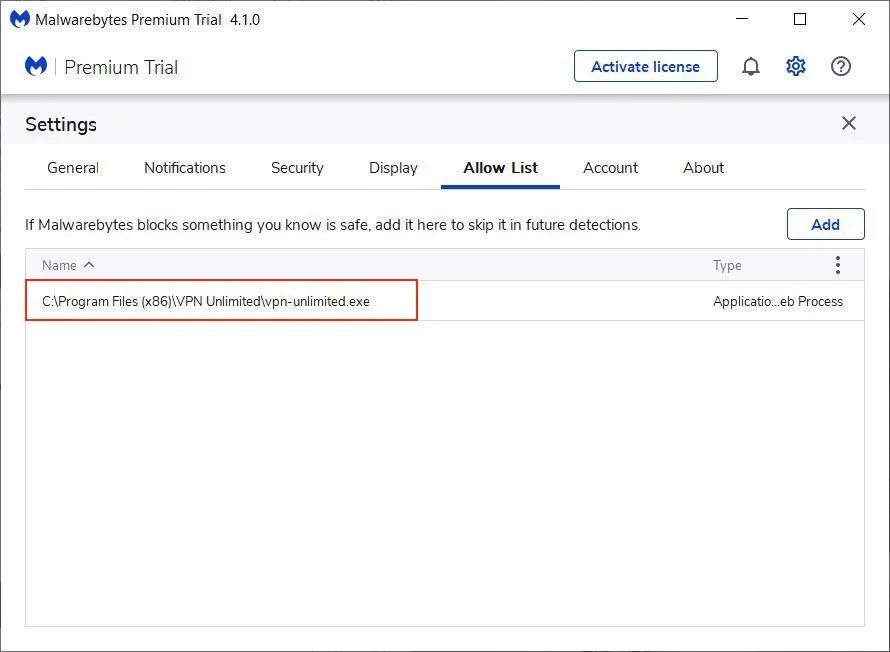
Vpn-unlimited file will then appear in the exclusions list:
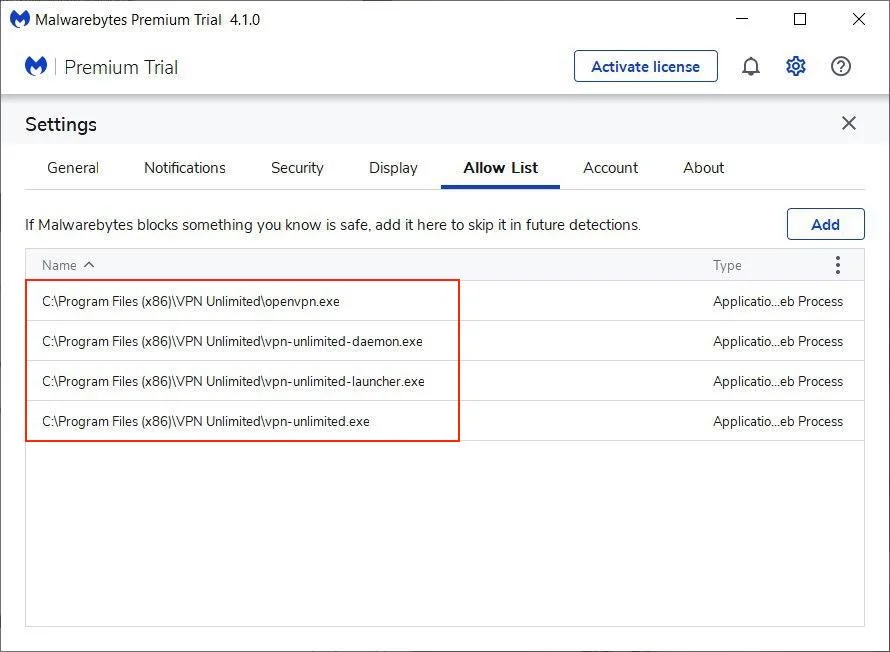
8. To make sure that no components of VPN Unlimited are blocked, repeat the steps 3-7 to add the following .exe files:
vpn-unlimited-launcher
vpn-unlimited-daemon
openvpn

Get started with our reliable VPN solution and make your browsing more secure!

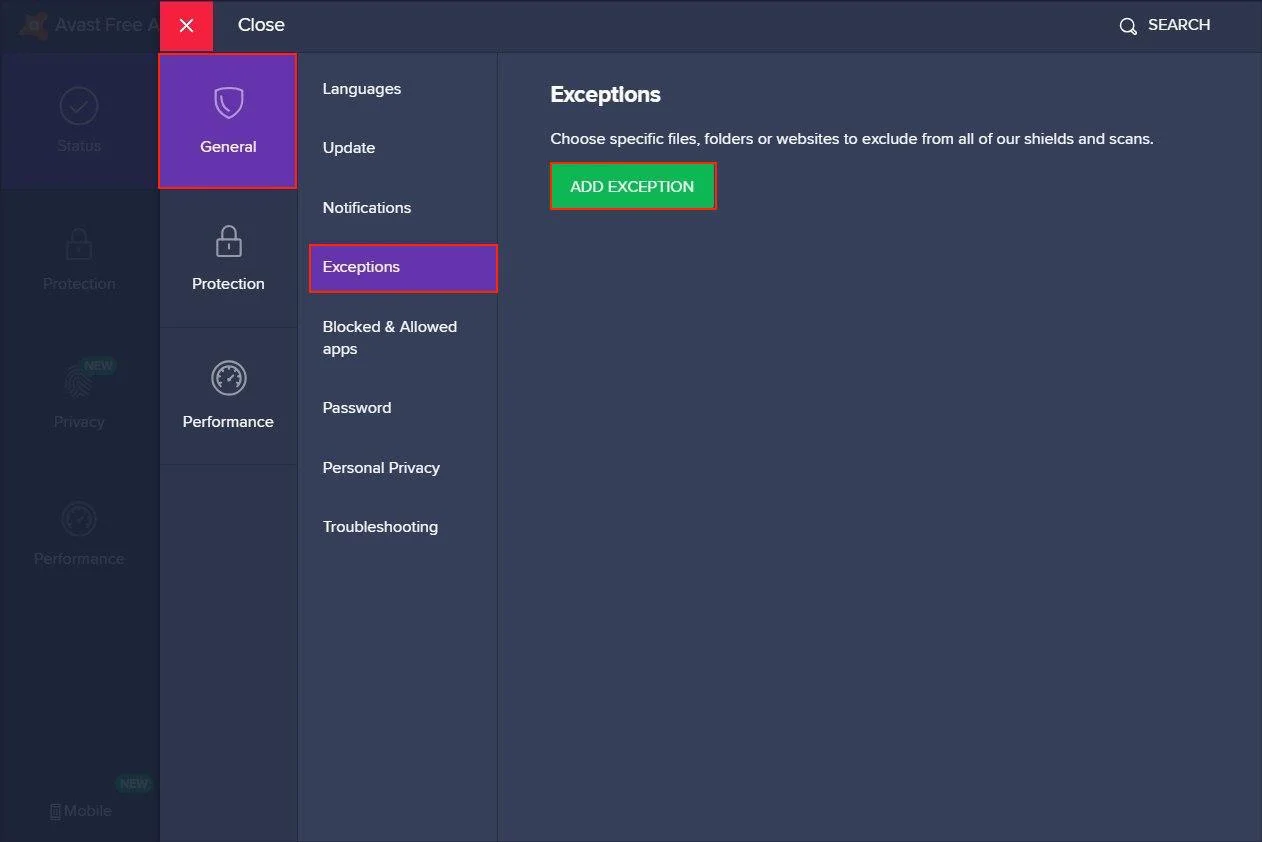
How to add VPN Unlimited to Avast exclusions
You’ll need to add VPN Unlimited to exclusions both in general and Avast Firewall setting. First, let’s find out how to do that in General settings:
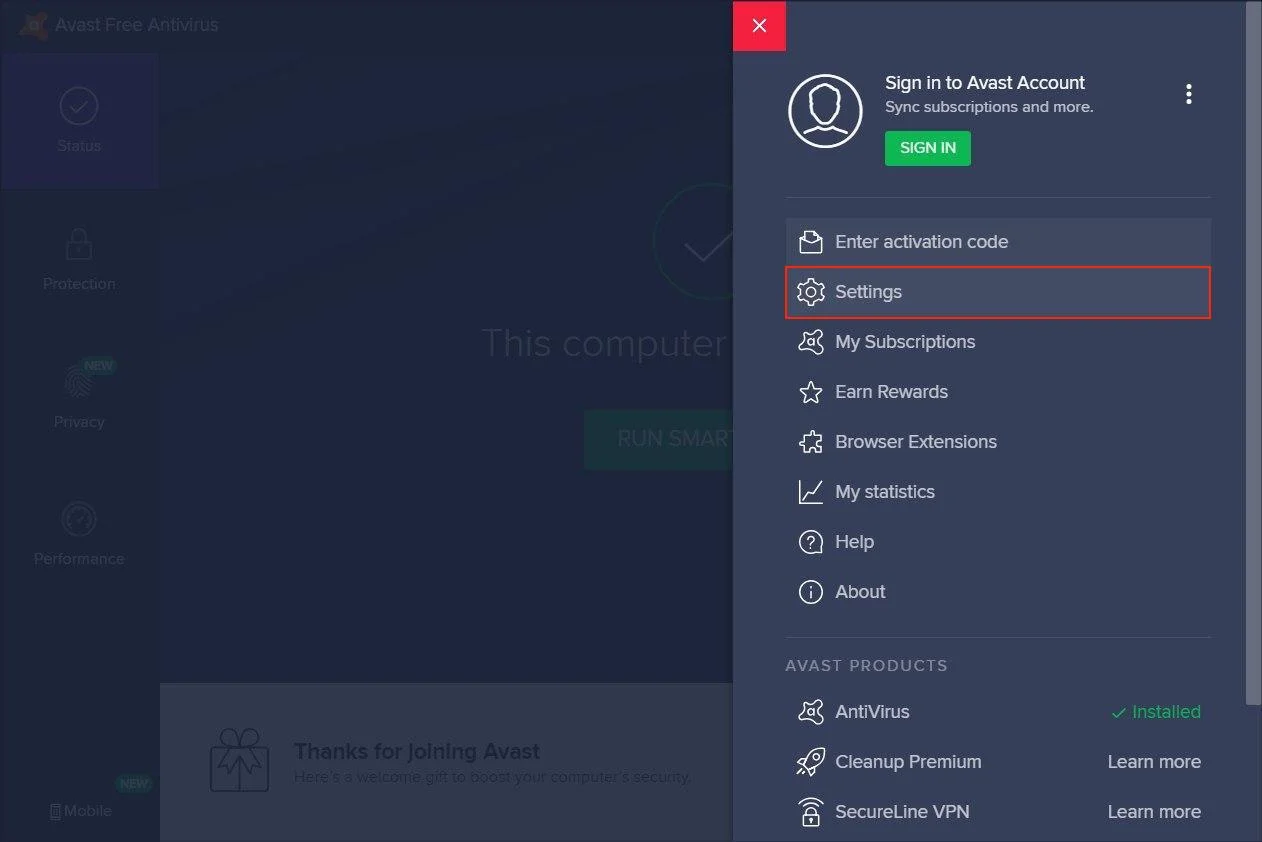
1. Open Avast Antivirus and click on the Menu icon > Settings:
2. Find Exclusions tab in the General settings section. Press Add Exception.
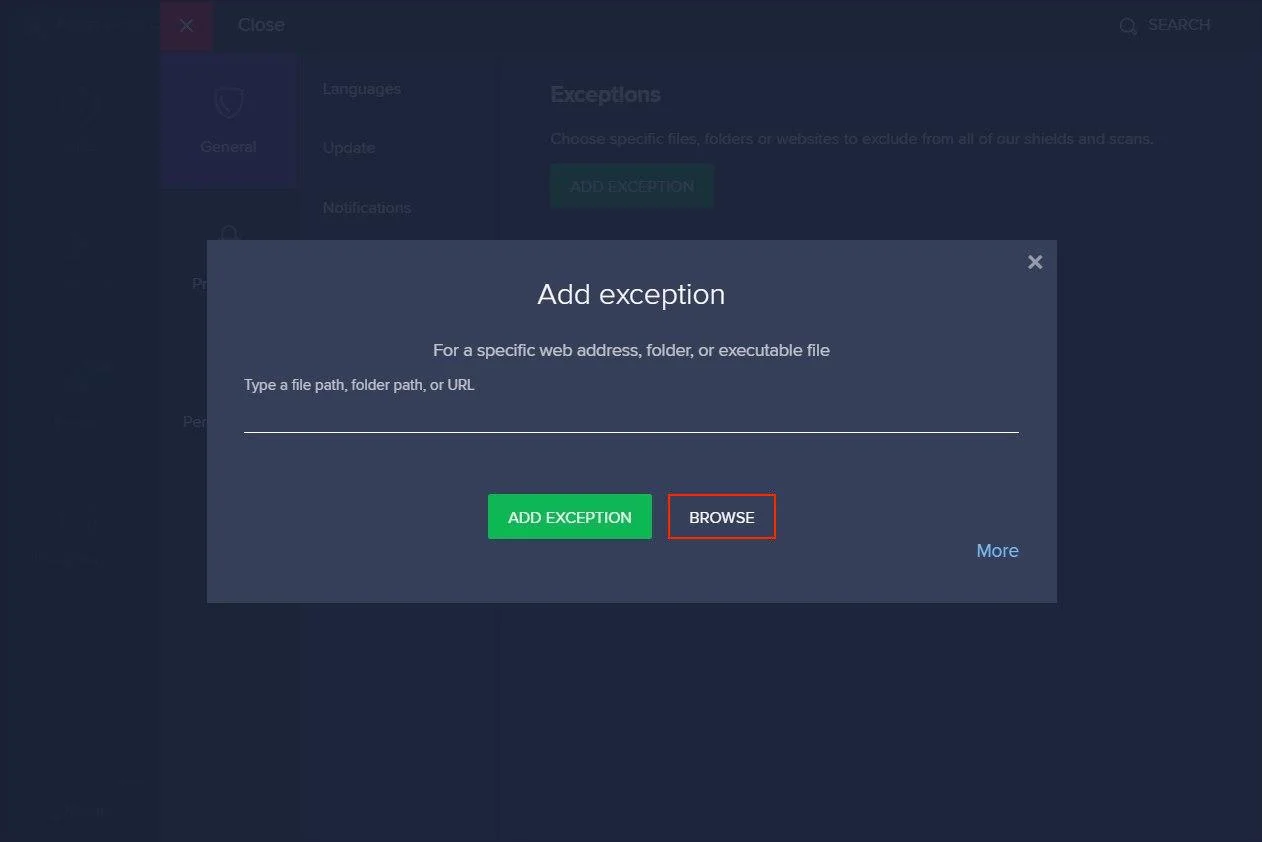
3. On the Add Extensions tab click Browse:
4. Navigate to Local Disc (C:) > Program Files > find VPN Unlimited folder and set a check mark in front of the folder.
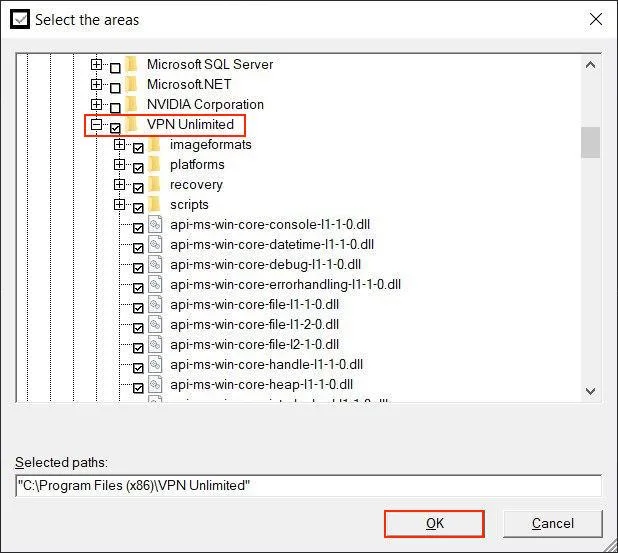
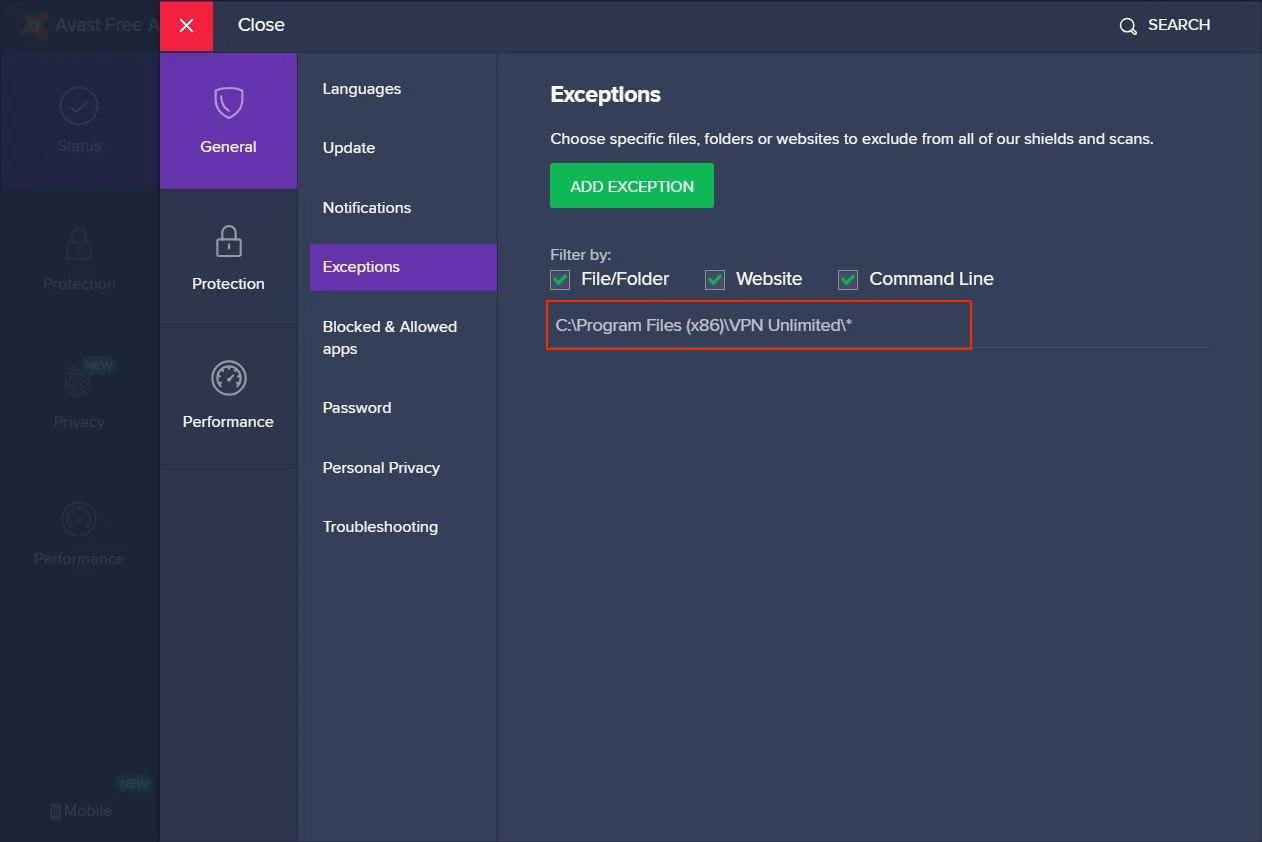
5. Click OK to proceed, and VPN Unlimited folder name will appear in File paths.
Once completed, proceed to Avast Firewall Settings:
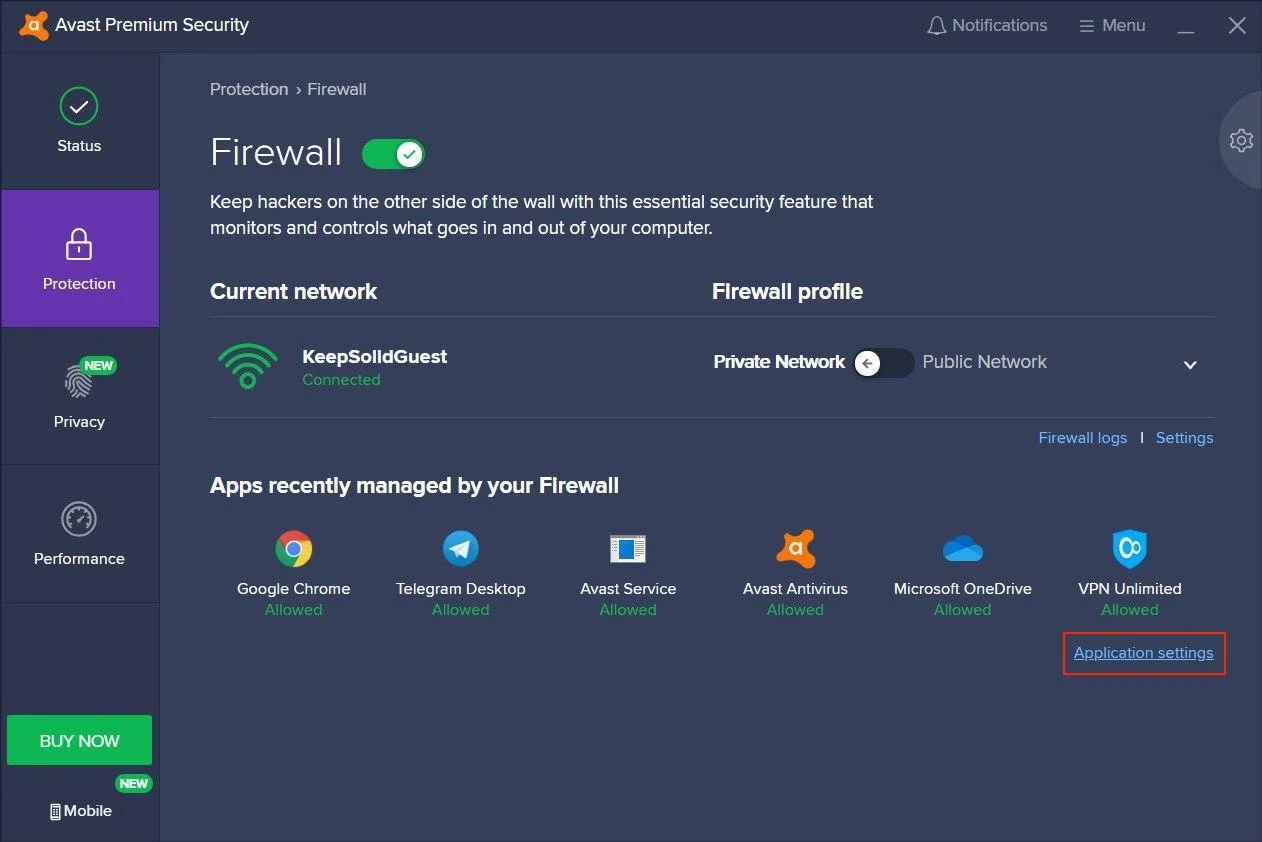
1. Navigate to Protection tab > Firewall.

2. Find Application settings at the bottom and click on it:
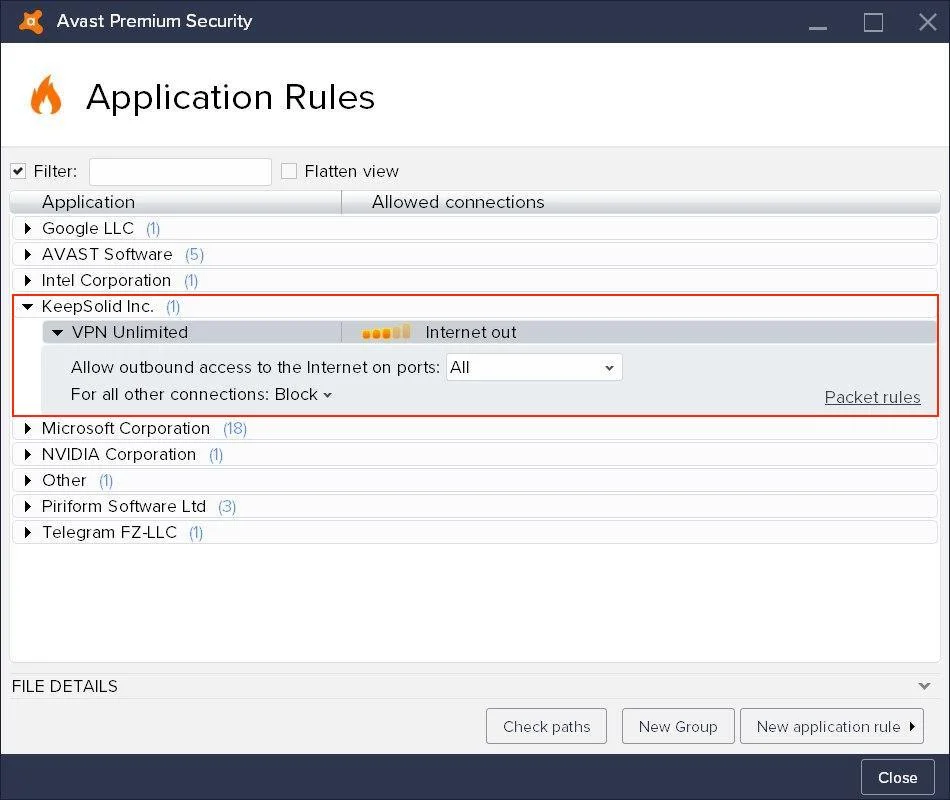
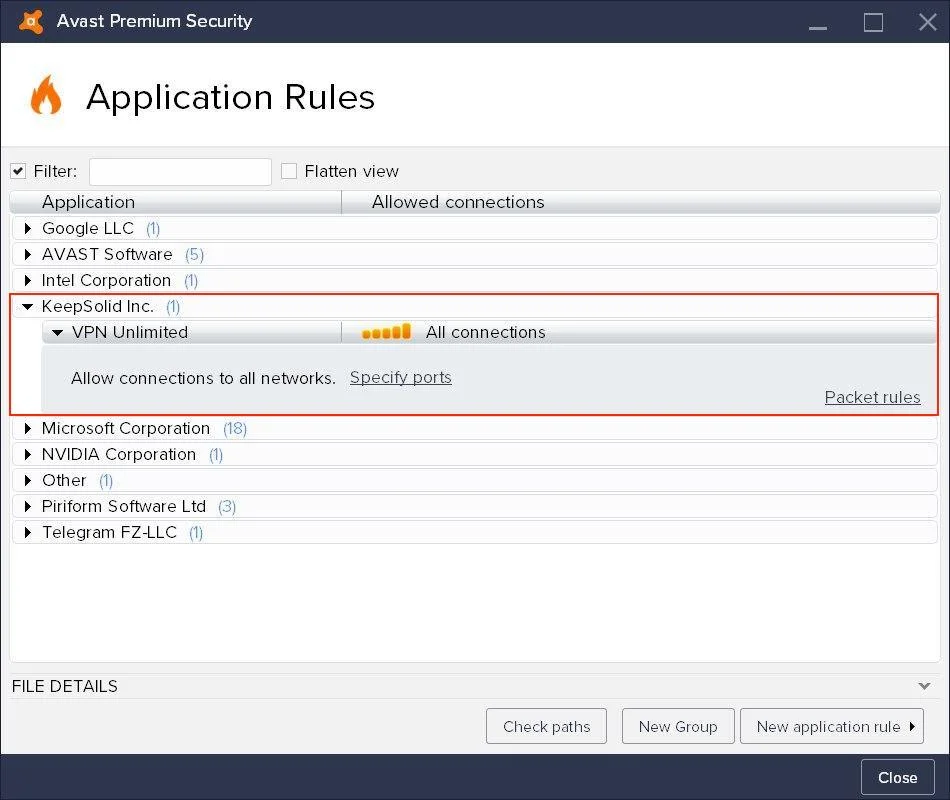
3. Locate KeepSolid Inc. and check the signal bars on the right - they should be full and state All connections. In case they are not full and not all connections are allowed (as on the screenshot below), edit the rule correspondingly:
4. After you allow all connections for VPN Unlimited, click Close:
That’s it. You’ve successfully added VPN Unlimited to trusted services in your Avast Antivirus settings.
Get VPN Unlimited right now and start enjoying a secure and private internet with absolutely no borders!
How to add VPN Unlimited to McAfee exclusions
Let’s find out how to add the VPN Unlimited application to the exclusions. Here is step-by-step instruction:
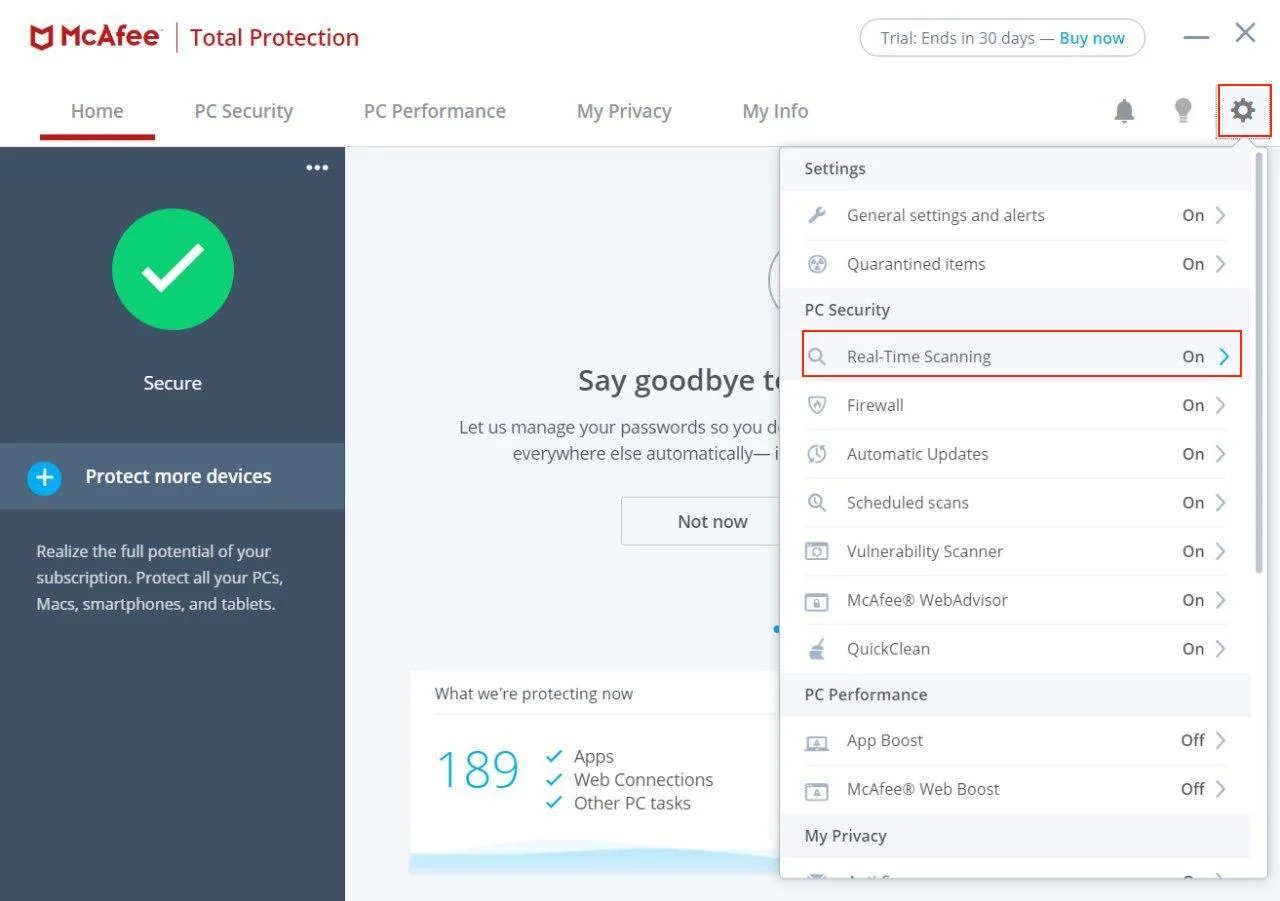
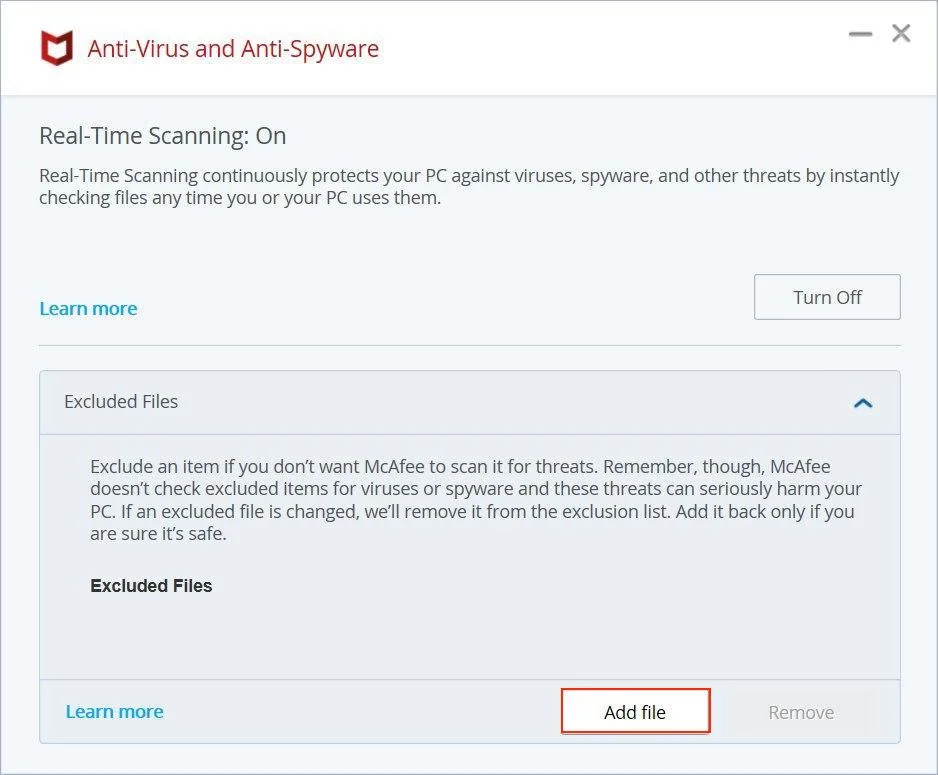
1. Open the app and press button in the upper right corner. Press Real-Time Scanning.
2. Go to the Excluded Files section and press Add file.
3. Navigate to Local Disc (C:) > Program Files > find VPN Unlimited folder > choose vpn-unlimited and click Open.
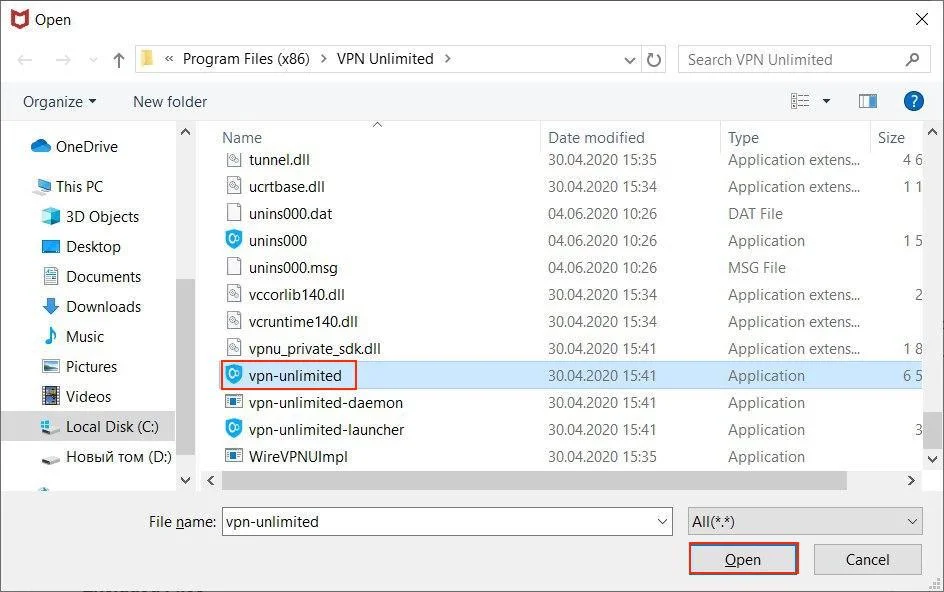
Repeat the same steps to add the following files to trusted as well:
-
vpn-unlimited-launcher
-
vpn-unlimited-daemon
-
openvpn
4. All mentioned files will appear in the excluded files list.
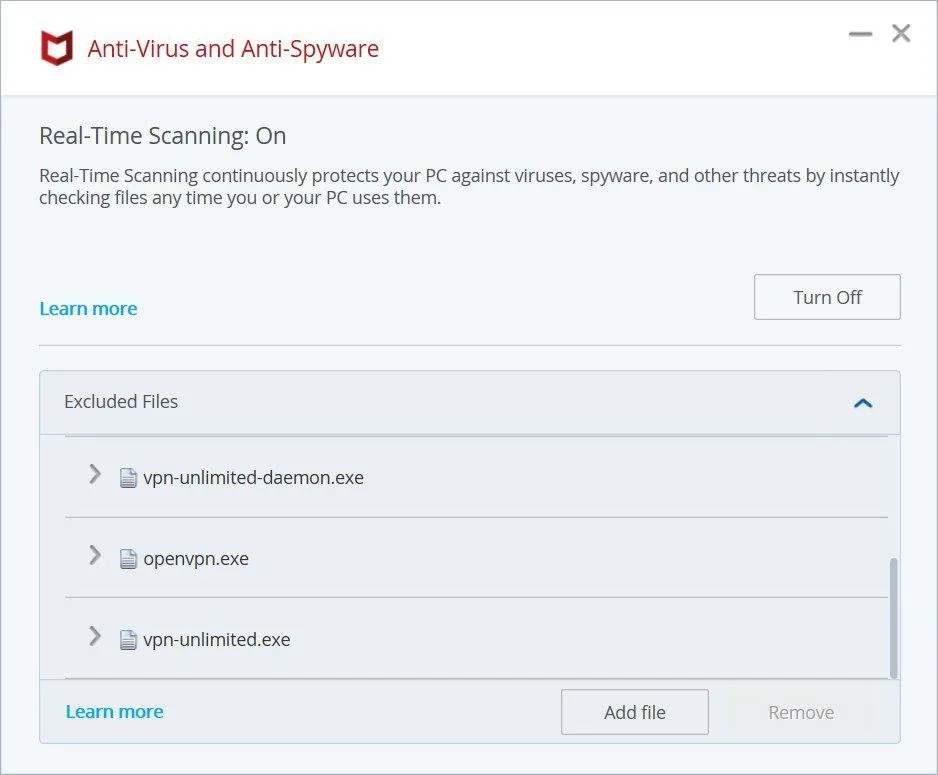
Now, VPN Unlimited is trusted in your antivirus settings, and you can enjoy the secure online presence under the protection of antivirus software with vpn app.
Download VPN Unlimited on your device, press the only one button to connect our high-speed VPN servers, and start surfing the web privately and anonymously.


