Trusted Networks in VPN Unlimited
The trusted networks feature allows you to add the WiFi networks you consider completely secure to trusted. The result? VPN connection will be automatically disabled while on the trusted internet connections. You may ask: VPN software protects my online activities, why would I ever wish to disable it? The answers might prove not so obvious, so let’s check out some of the most tangible cases.

When connected to a VPN server, you may lose access to other devices in your local area network (LAN), if any. That is caused by VPN software changing your real IP address to a virtual one, leading to you no longer being recognized as a part of, and allowed in, your local network.
Sure your network is secure, and need constant access to your LAN devices, e.g. a printer? Then add this secure network to trusted and VPN connection will be disabled automatically. It is far more convenient than manually disabling/enabling VPN connection on each occasion.
-min_3544.png)
Another benefit you gain by adding networks to trusted is avoiding speed loss. Let’s be honest, using a VPN does affect connection speed. The very fact that the data is encrypted by a VPN service inevitably reduces the speed to some extent. Besides that, it also depends on such factors as VPN server workload, the distance from you to the server, and possible throttling of VPN protocols by ISPs. To speed up your VPN connection, check out this instruction.
Note, that the speed loss is generally compensated by such undeniable benefits as data privacy and enhanced security. However, if your network is already secure and private, why damage the speed? Just add it to trusted and enjoy your online experience to full extent.
-min_3547.png)
To recap - do you need Trusted Networks?

Trust a network if:
- The network is completely secure (such as your home network)
- You don’t need to hide your activities from ISP
- There is no geo-blocking

Don’t trust a network if:
- It’s an unsecured public WiFi (airport, cafe, etc.)
- You want to avoid ISP surveillance
- You need to bypass geo-restrictions
How to Add Secure Networks to Trusted
Android
Navigate to the app’s Menu > Settings and tap Trusted Networks. On the Trusted Networks screen, tap Enable the Trusted Networks feature in VPN Unlimited app and add the desired networks.
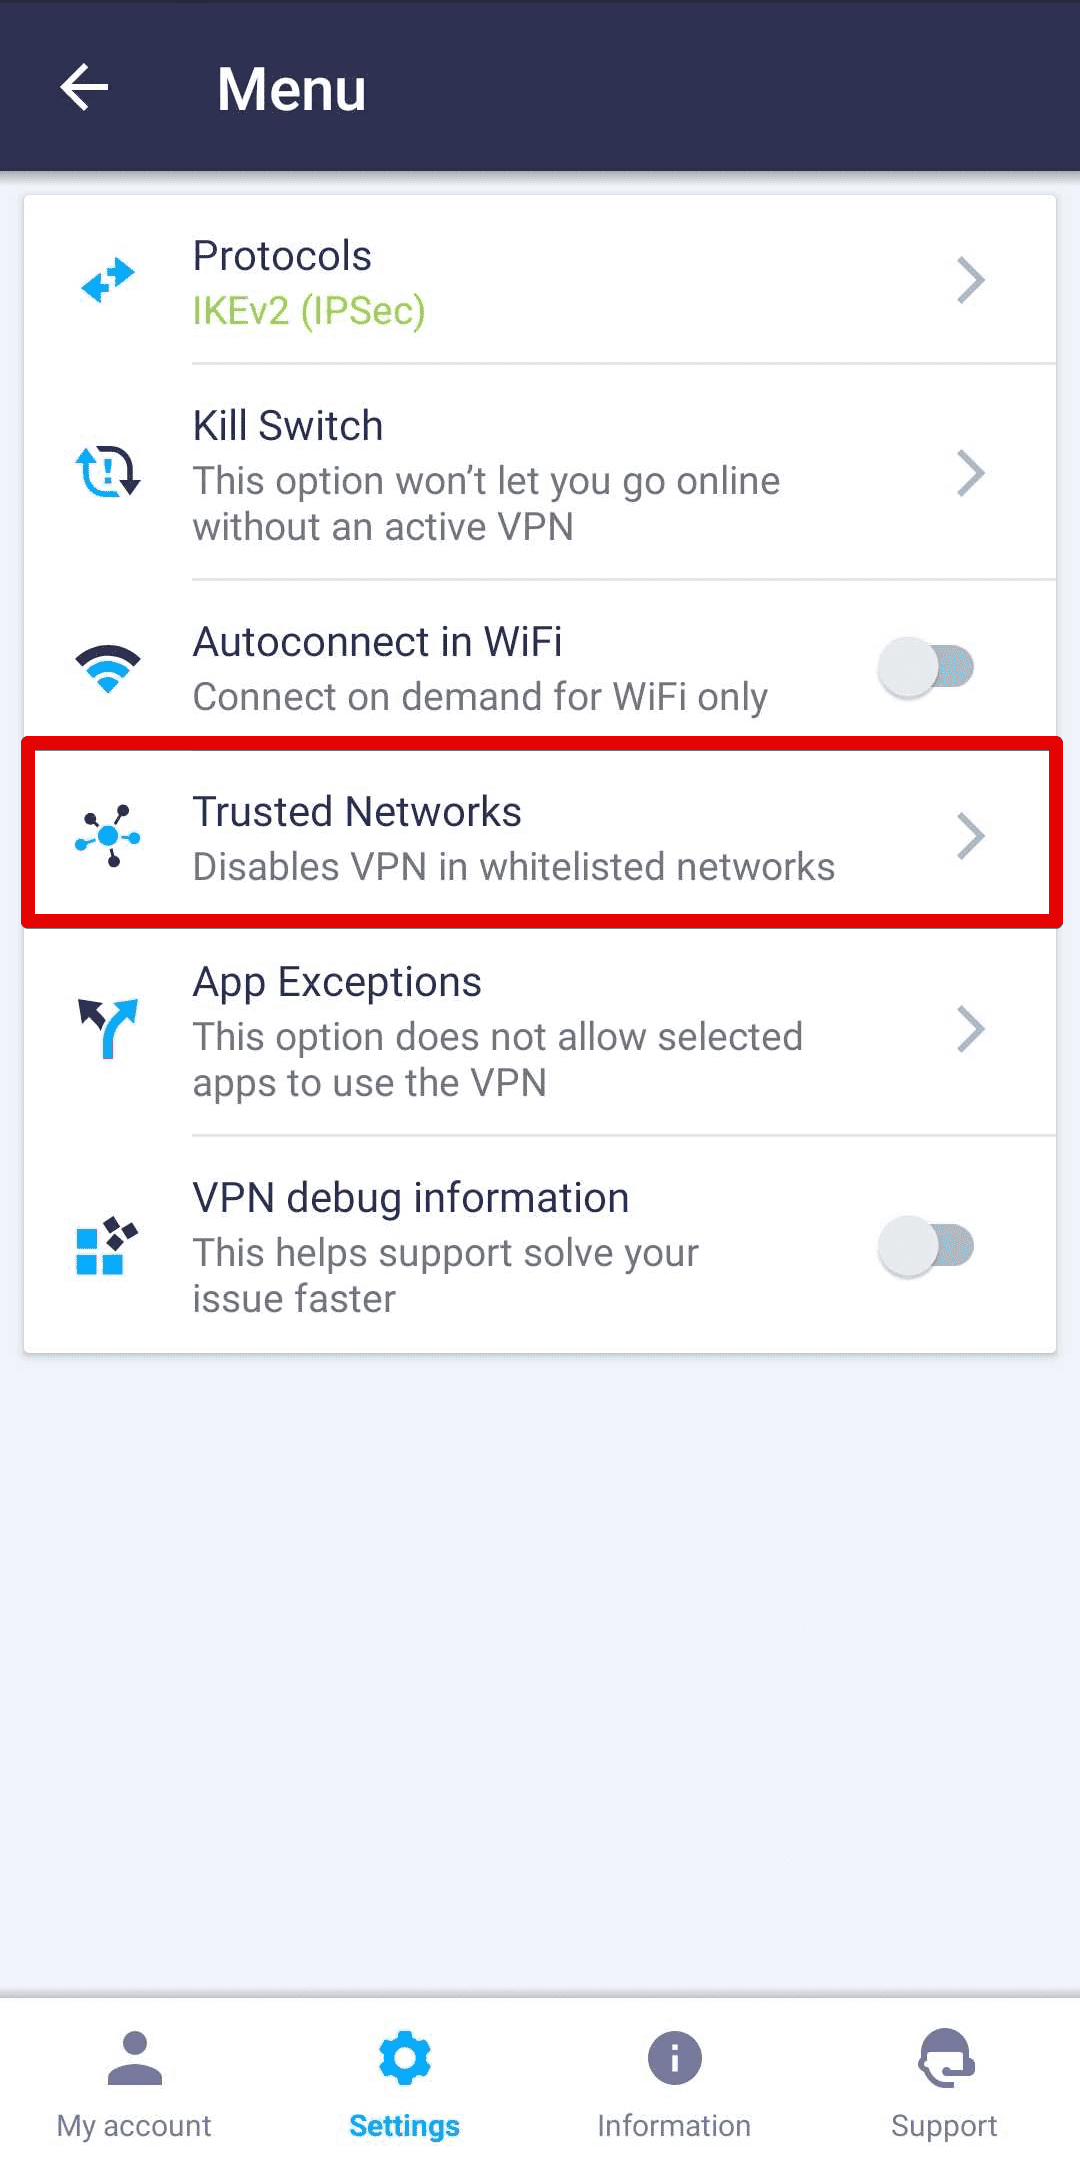
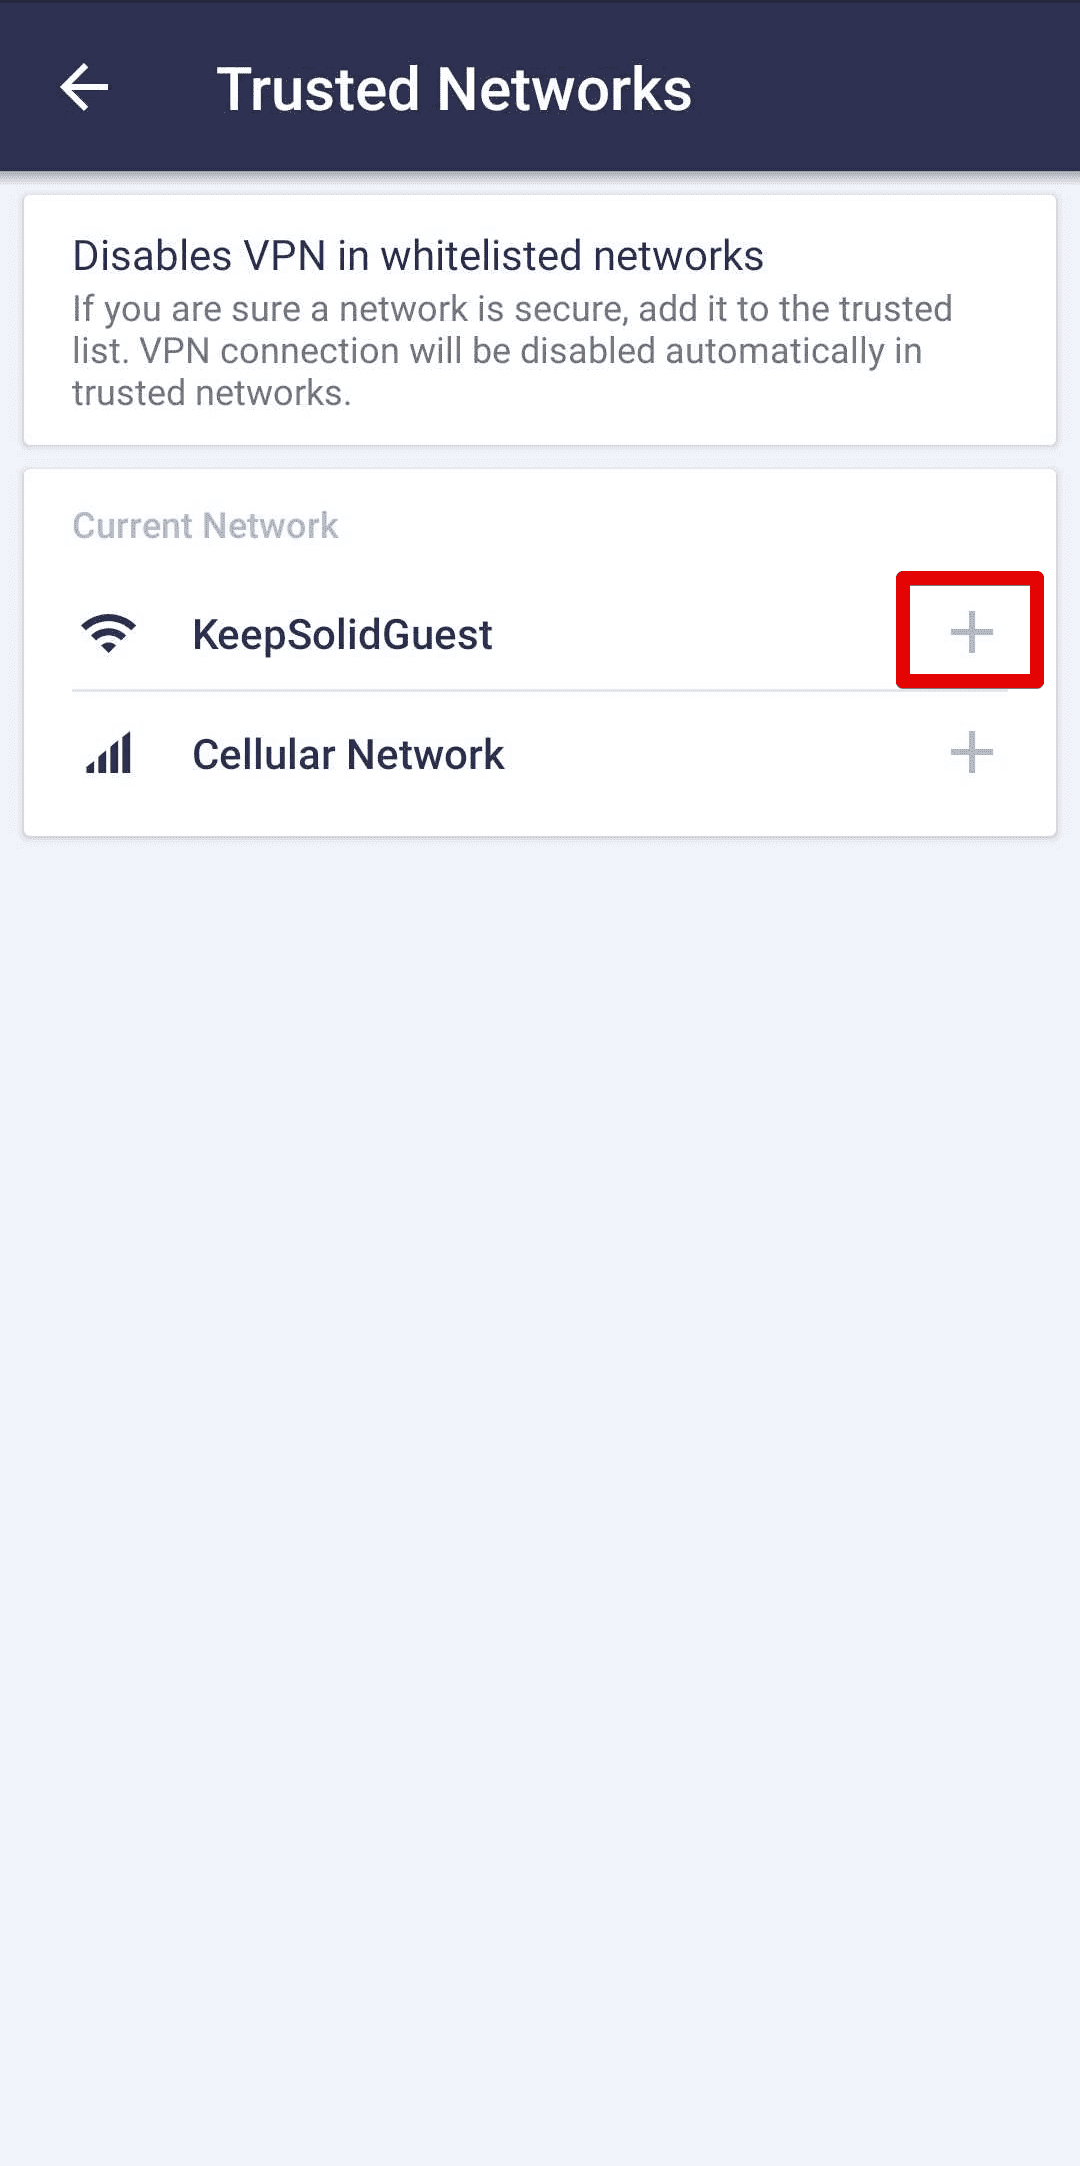
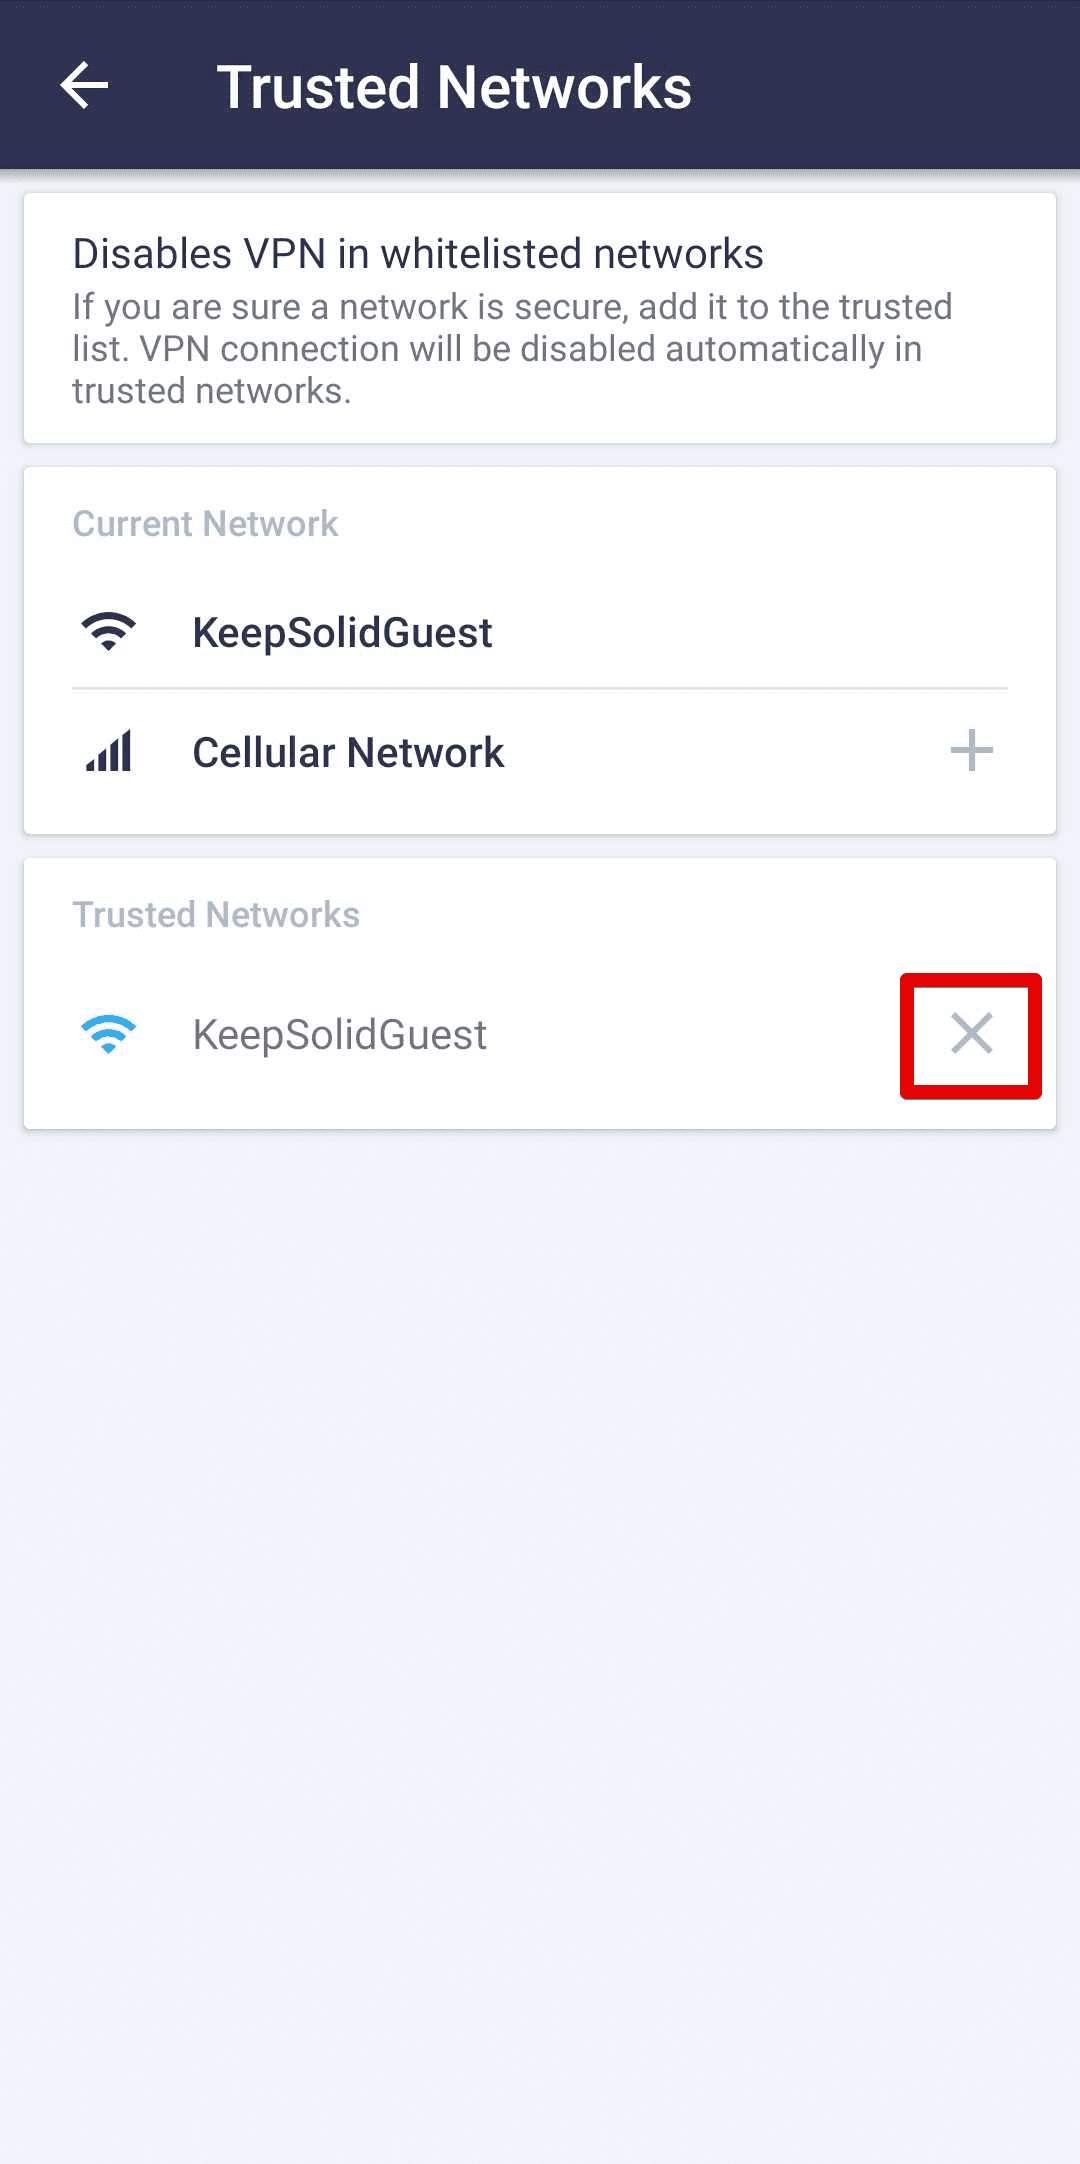
After this, the chosen network appears in the Trusted Networks list. To remove it, just tap X.
Note: On Android 9 and higher, in order to use the Trusted Networks feature, please allow our app to access your location. This permission is required to detect the WiFi network you are connected to only.
iOS
Open the app’s Menu > Settings and tap Trusted Networks.
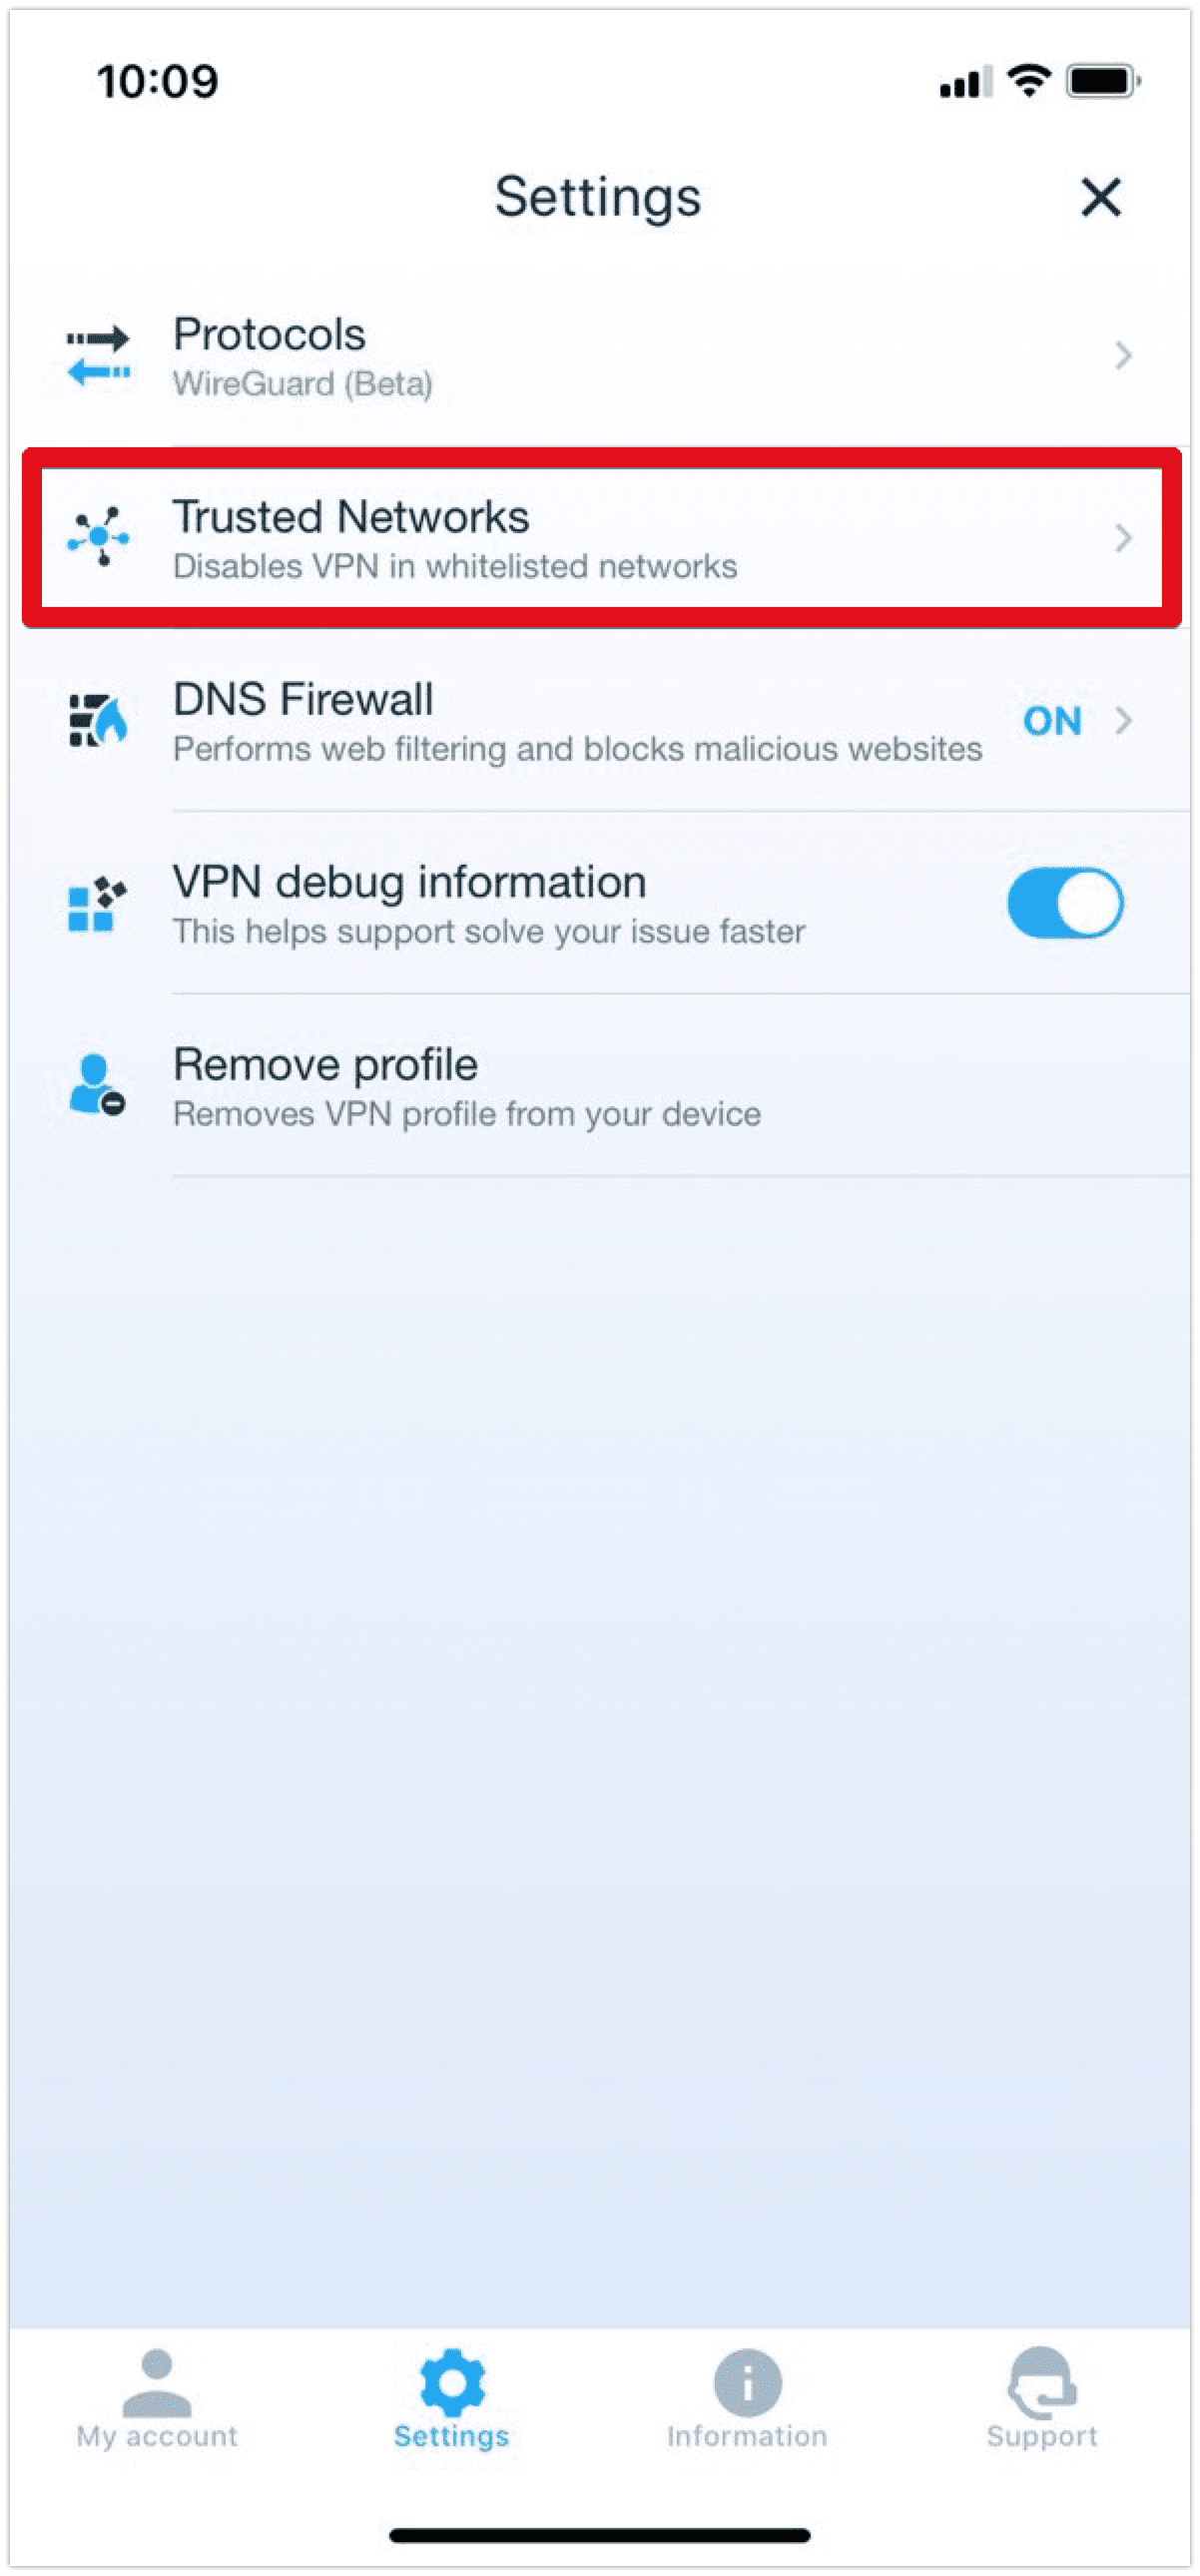
Now you need to enable location access in you iOS settings. For this, tap Go to Settings > move the slider to On.
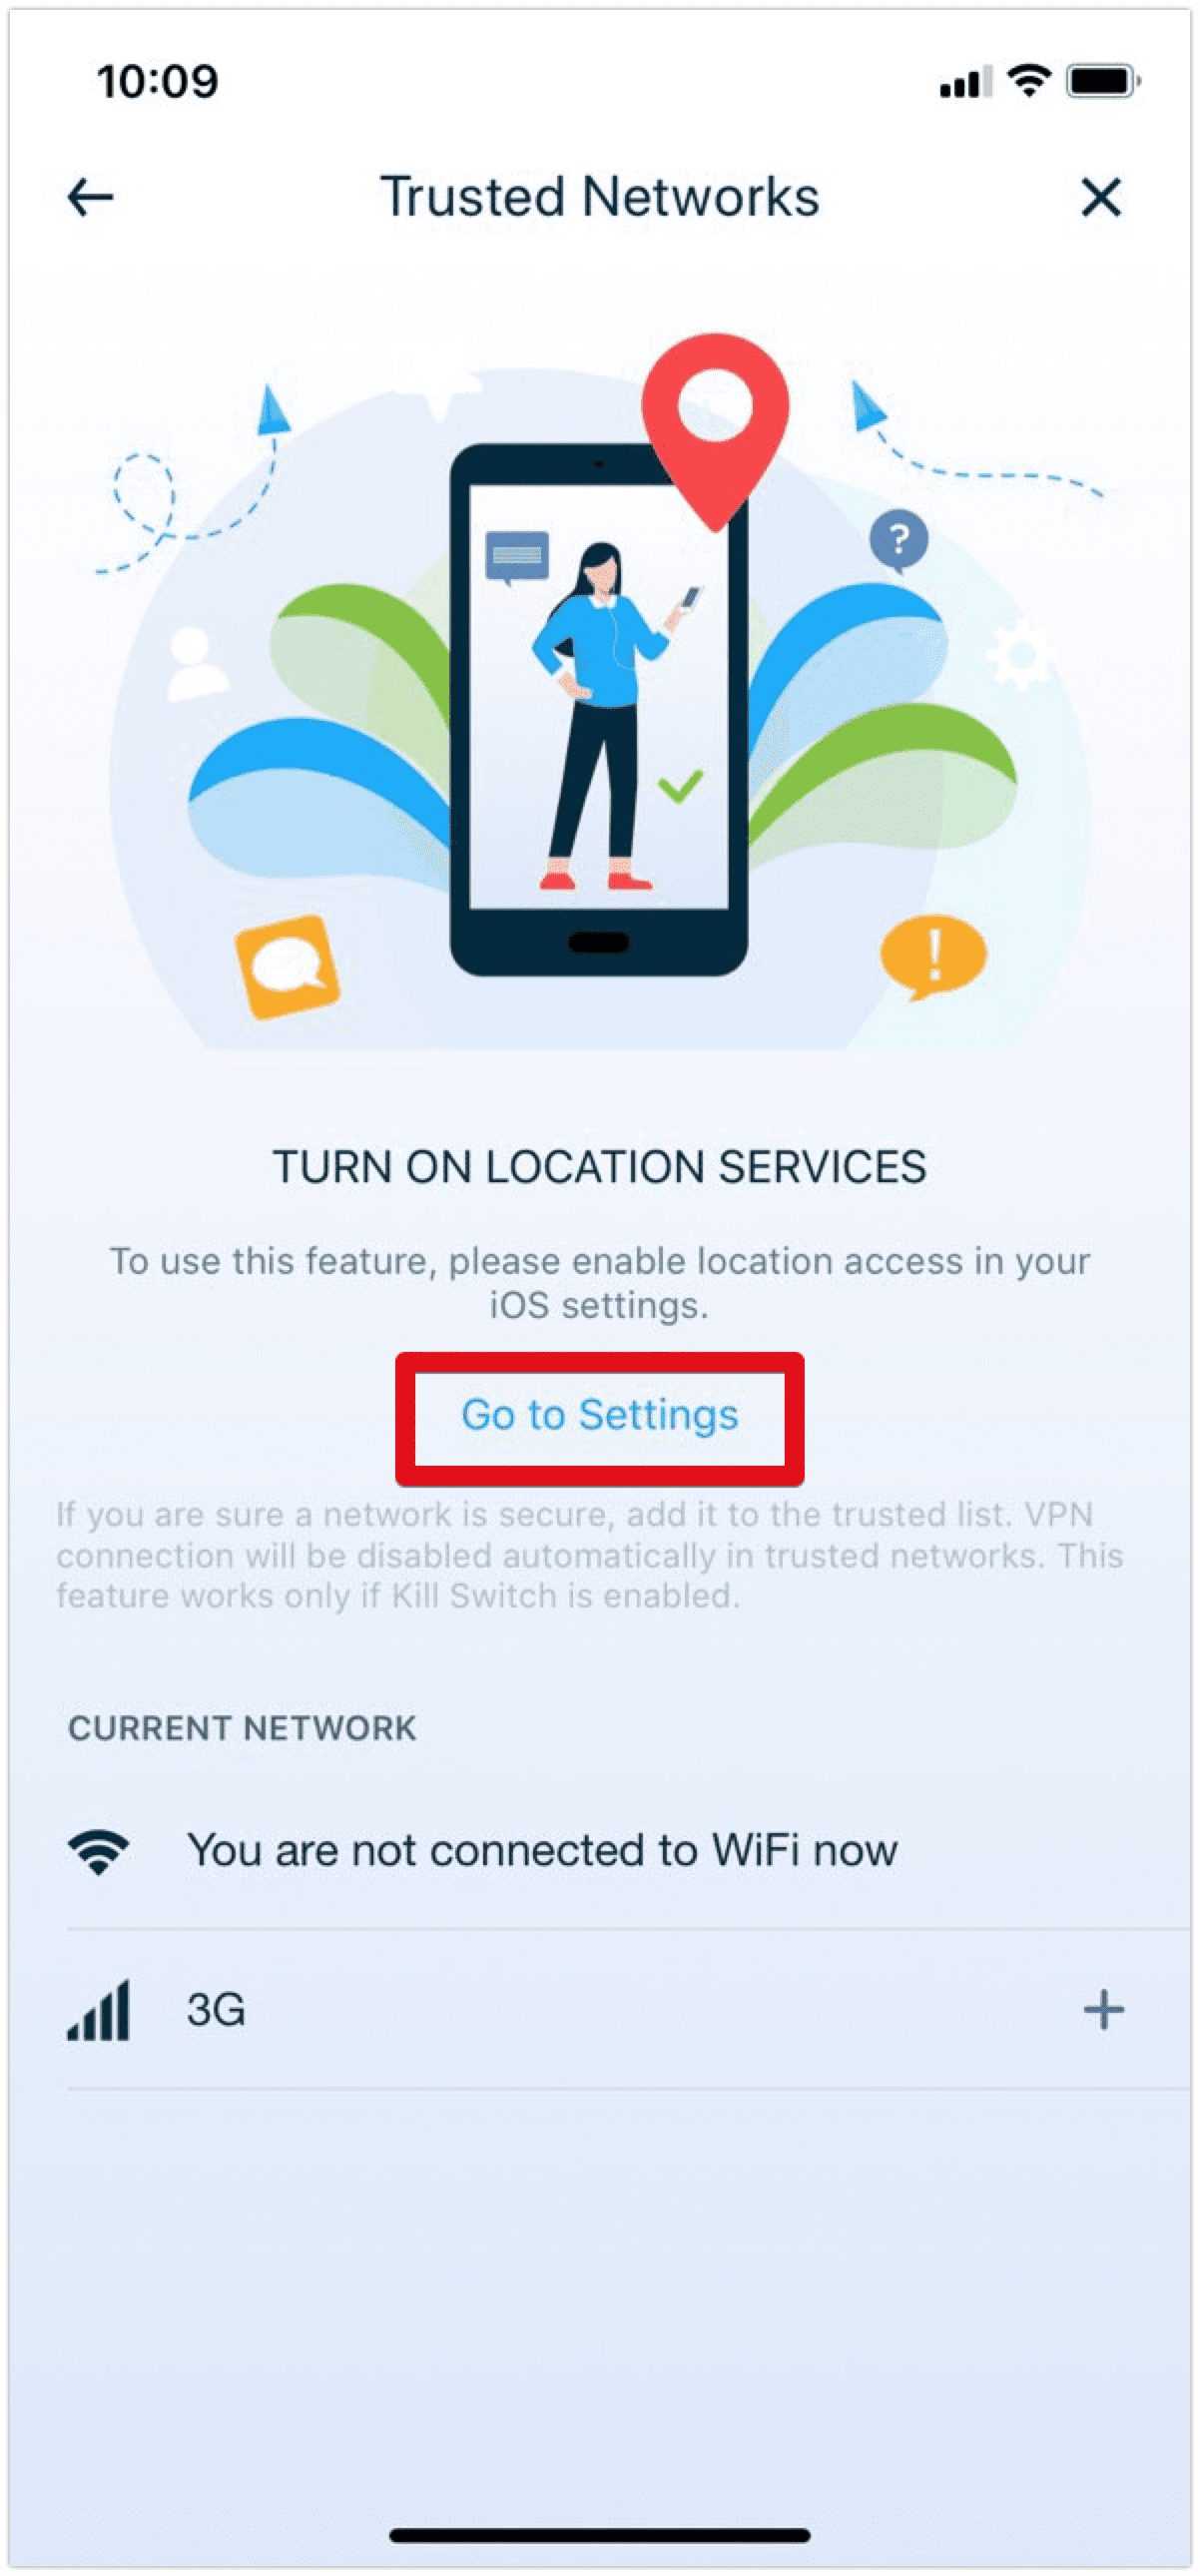
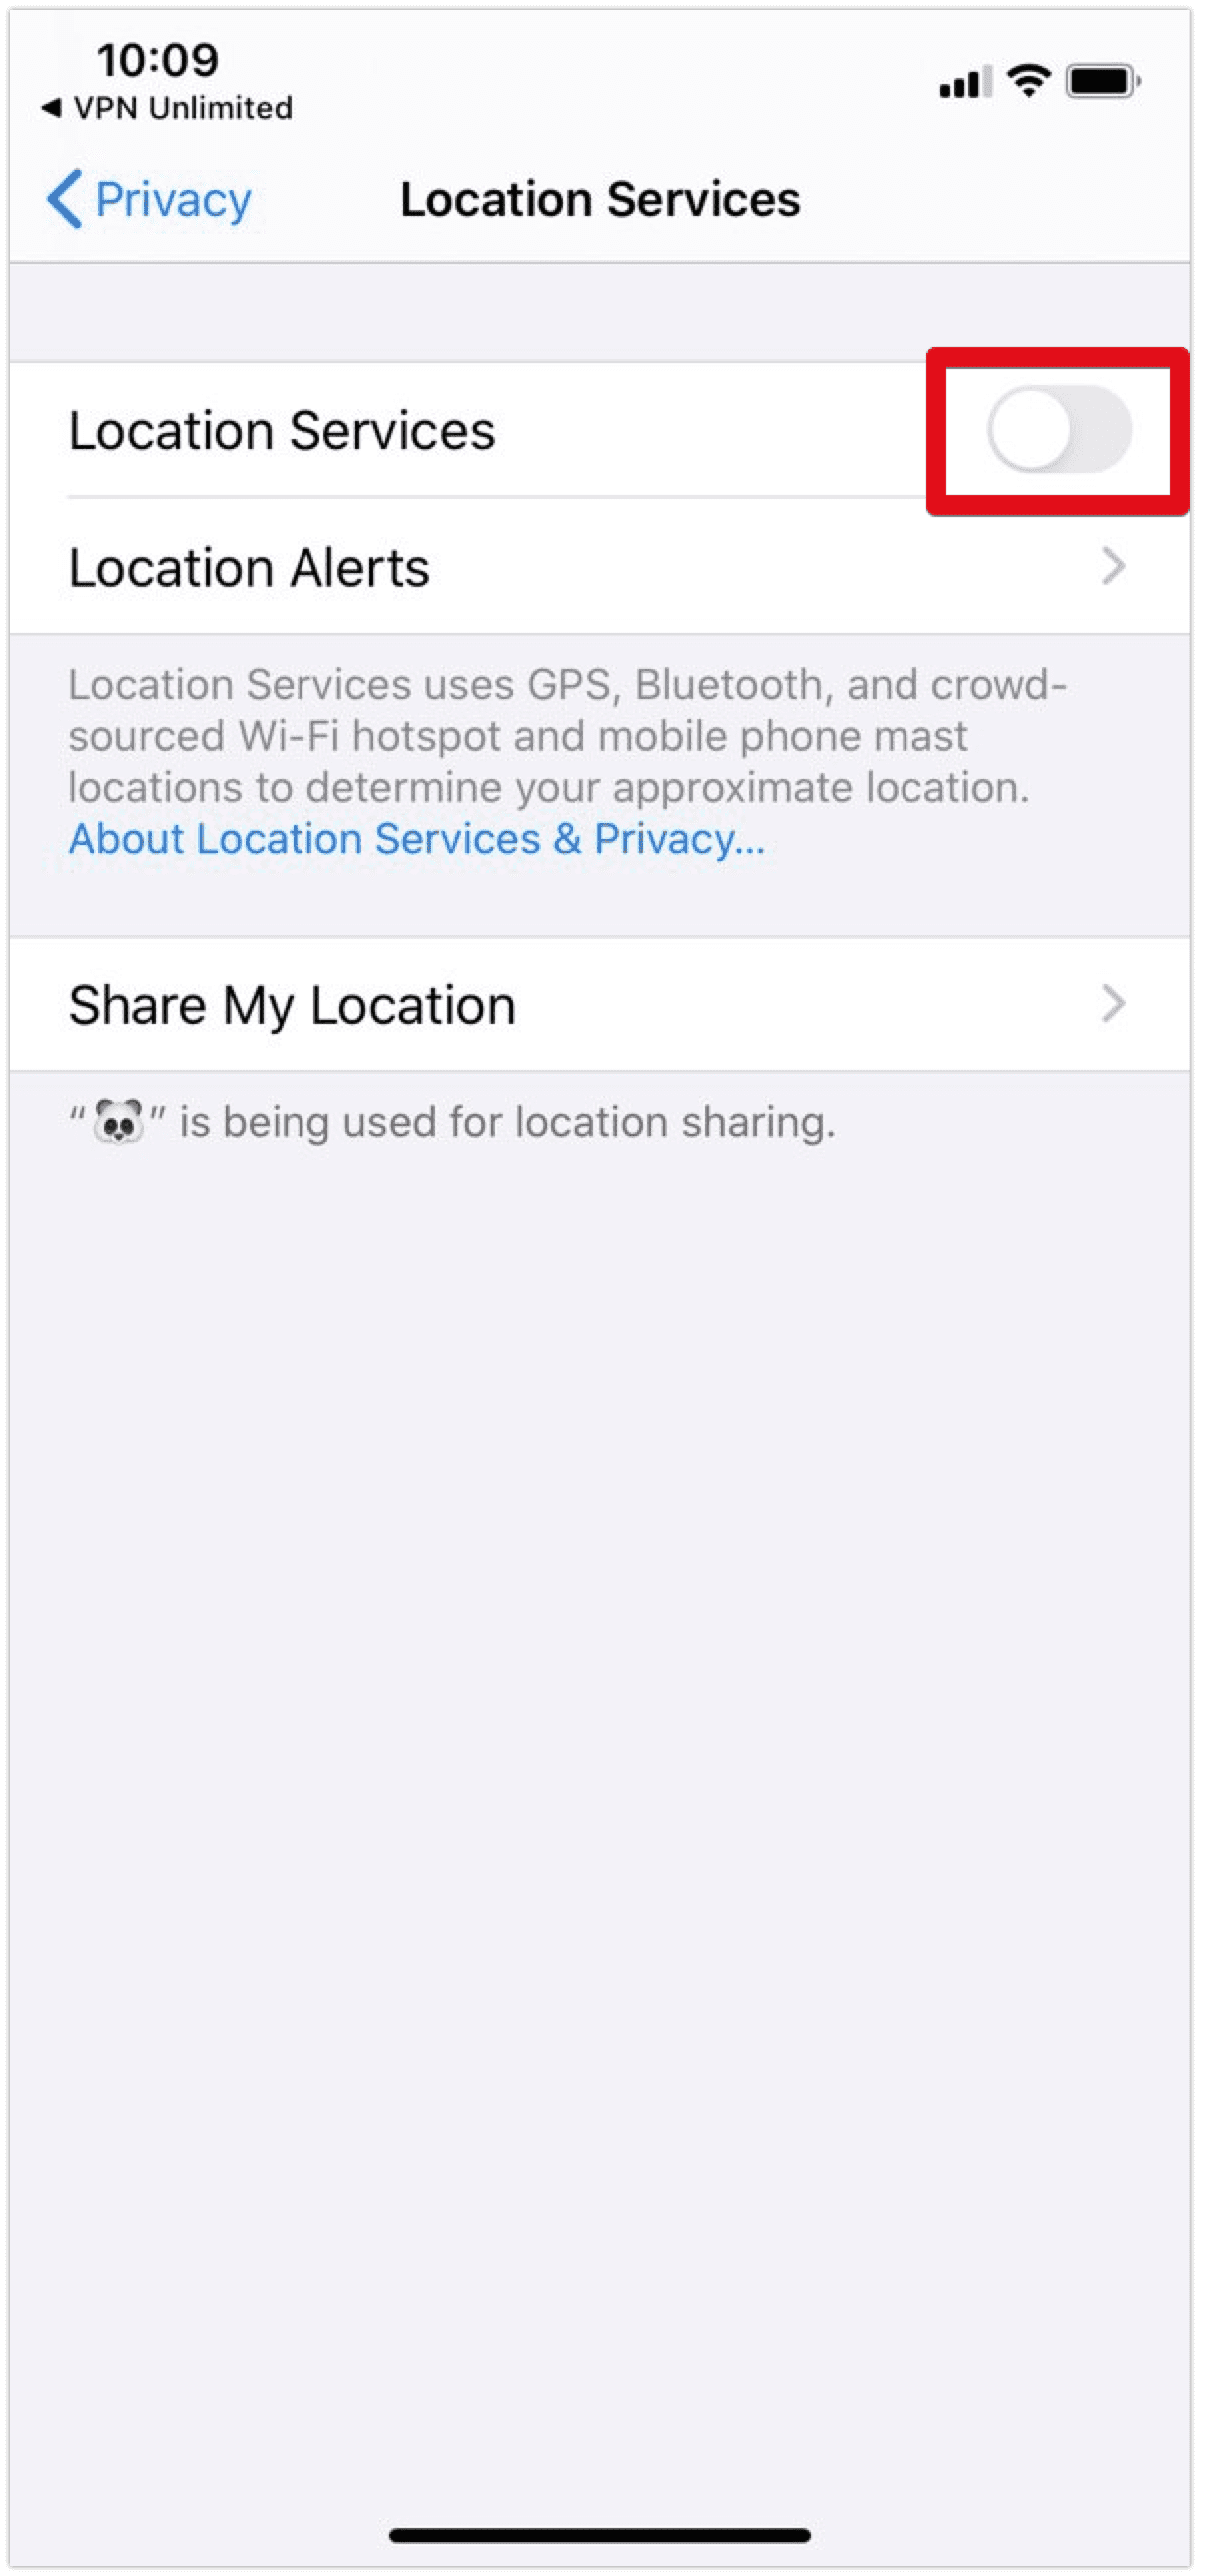
Then go back to the app and tap Allow to access location services > Allow While Using App.
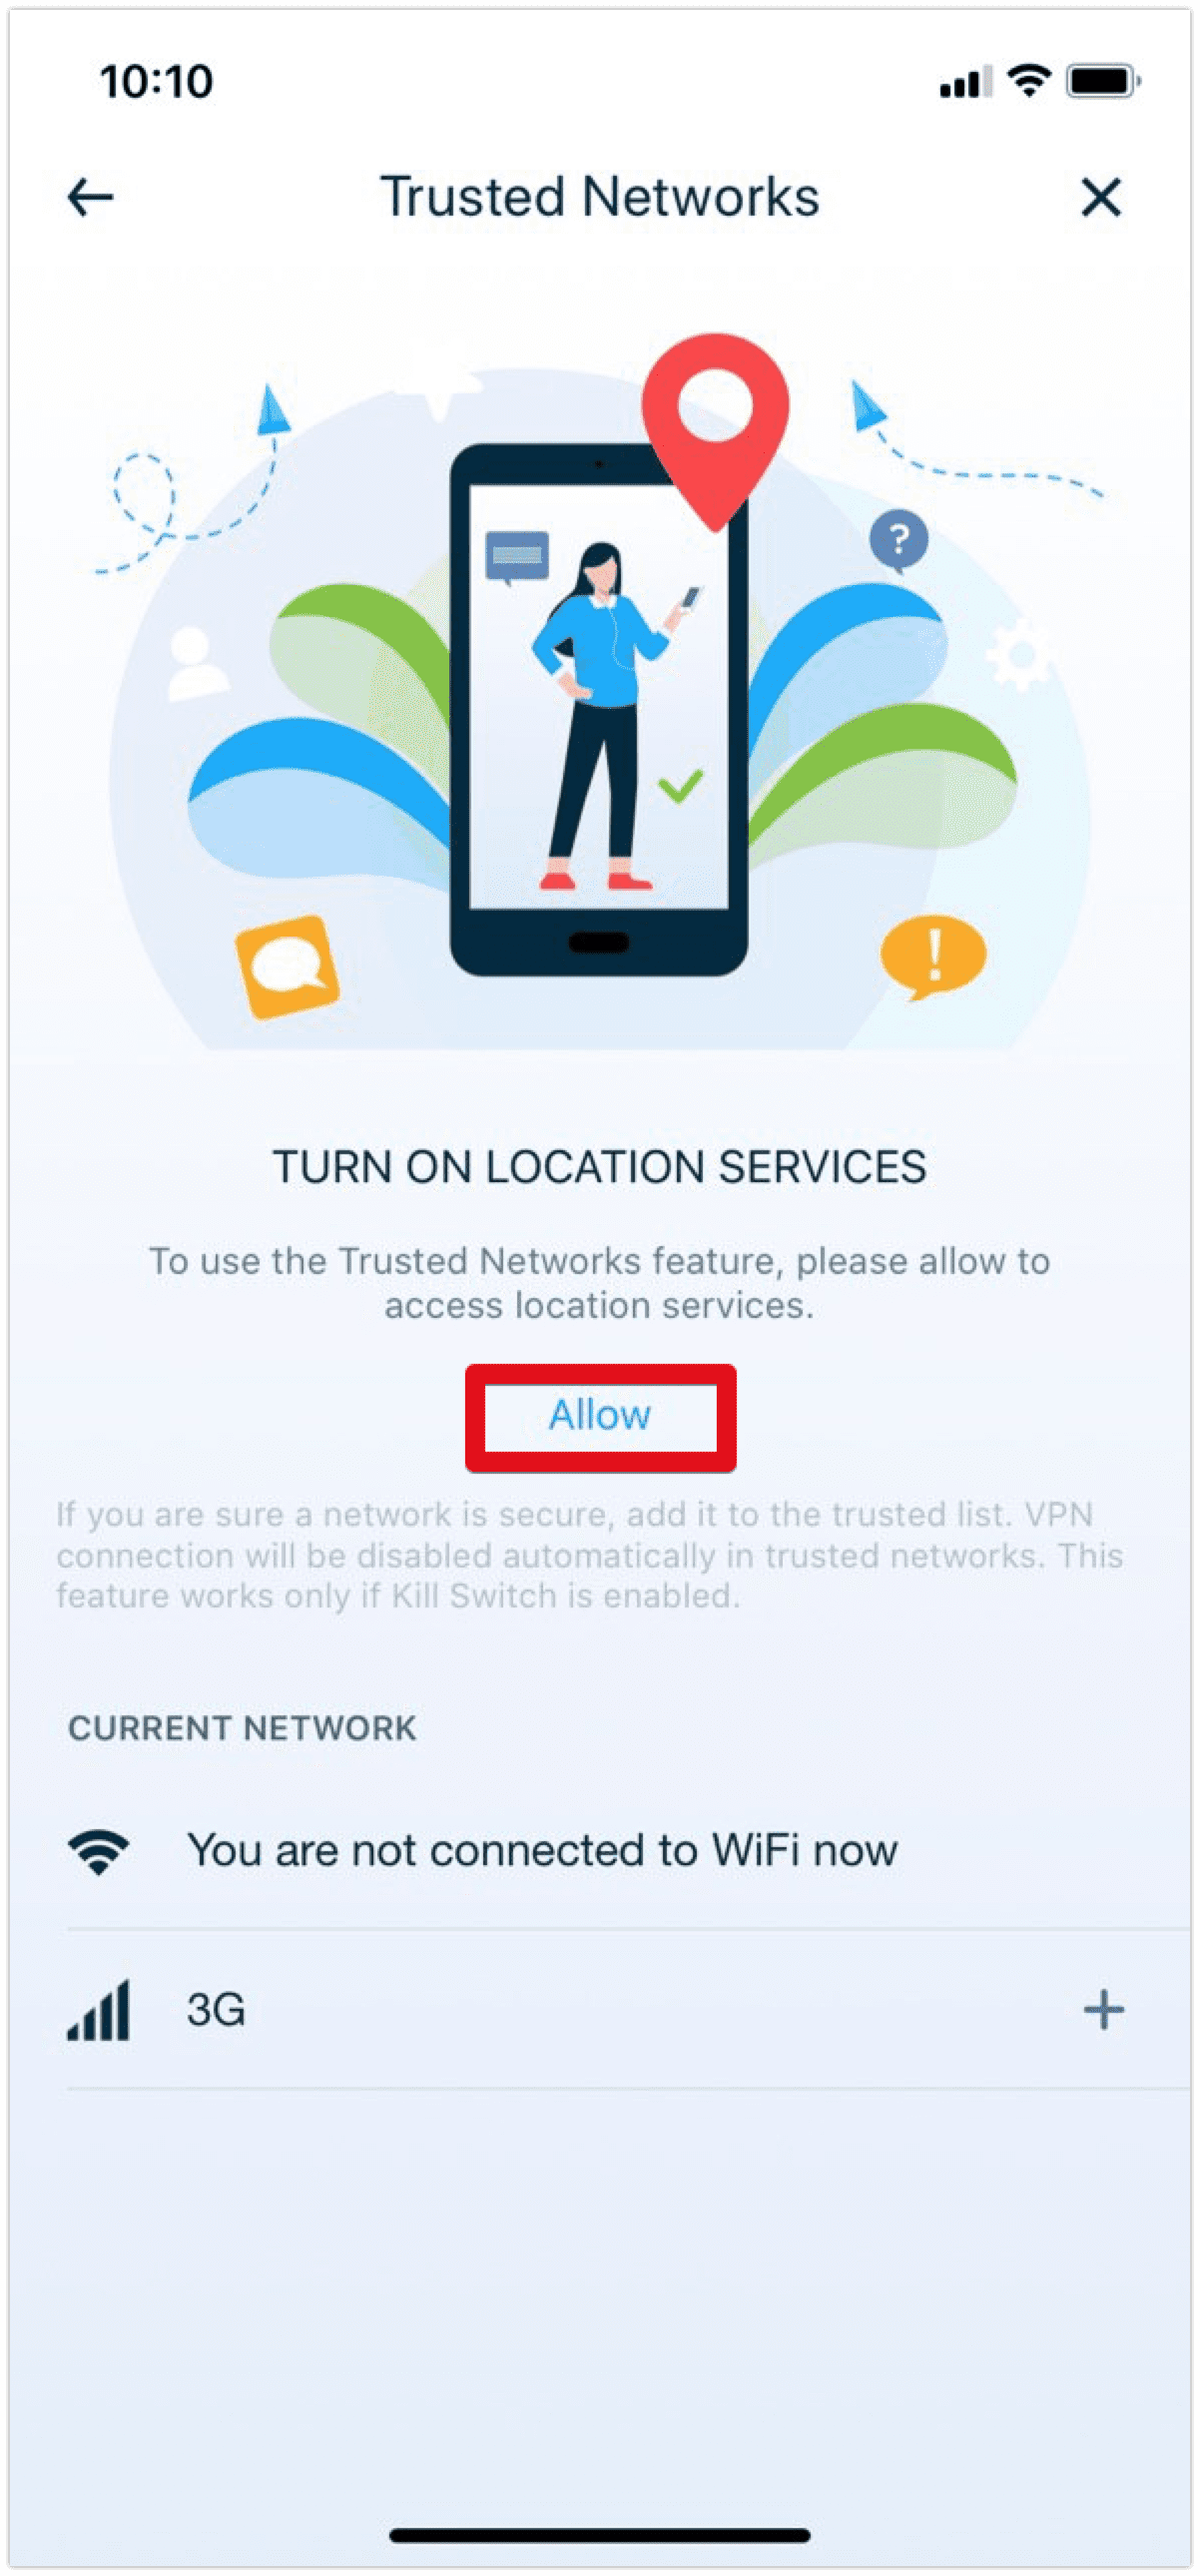
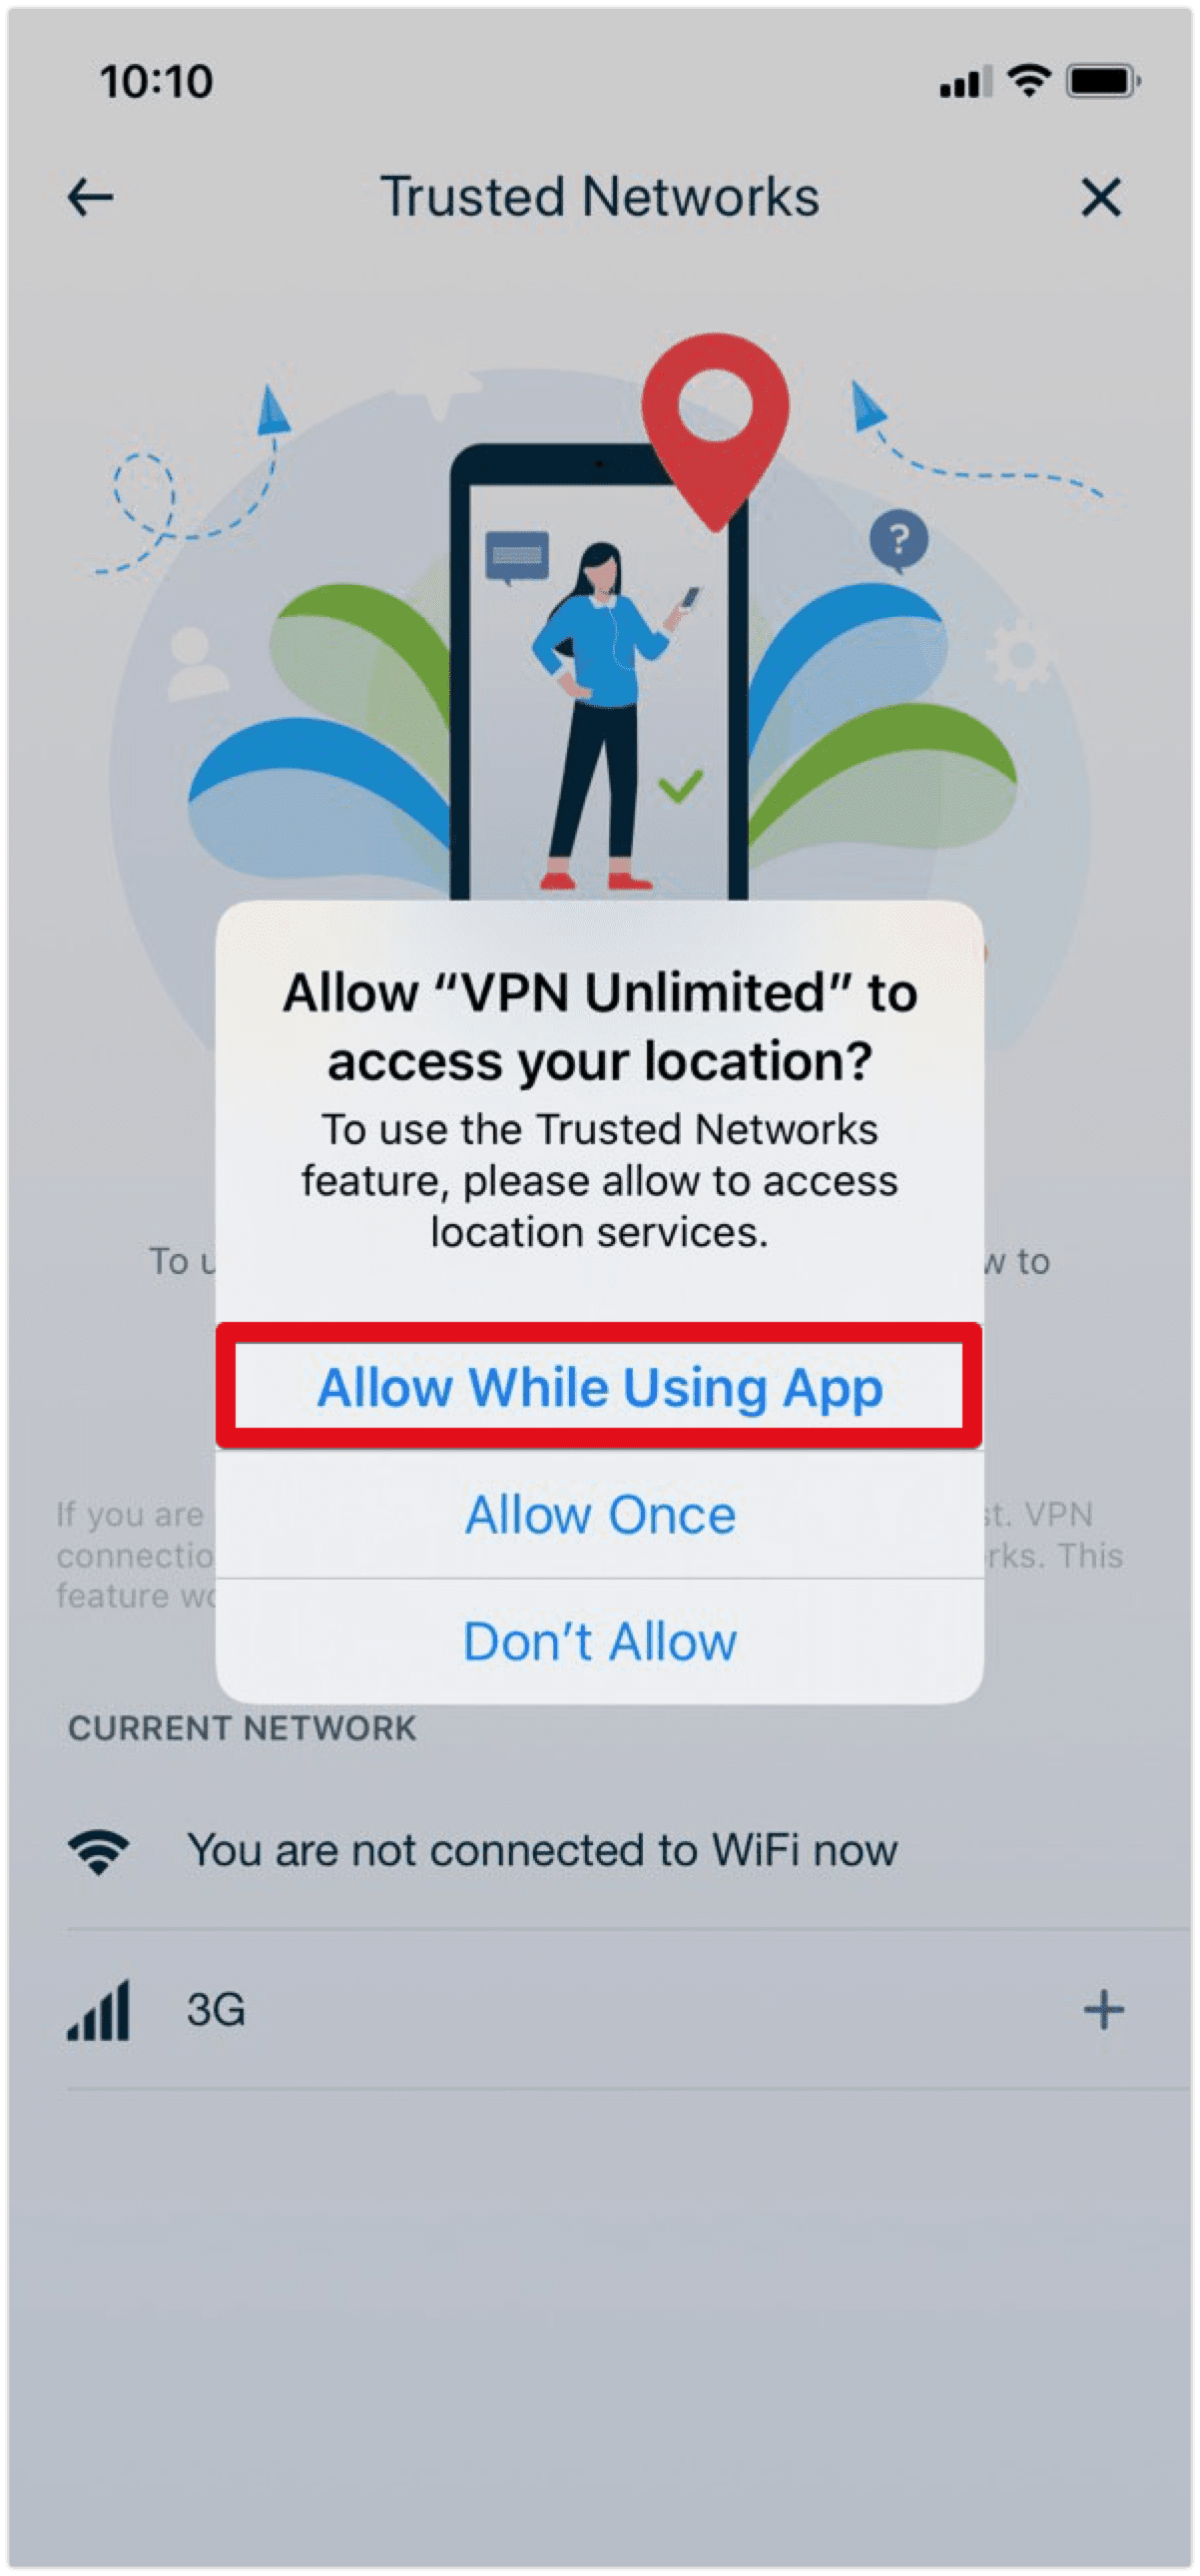
Choose the network you want to trust and tap Plus next to it’s name.
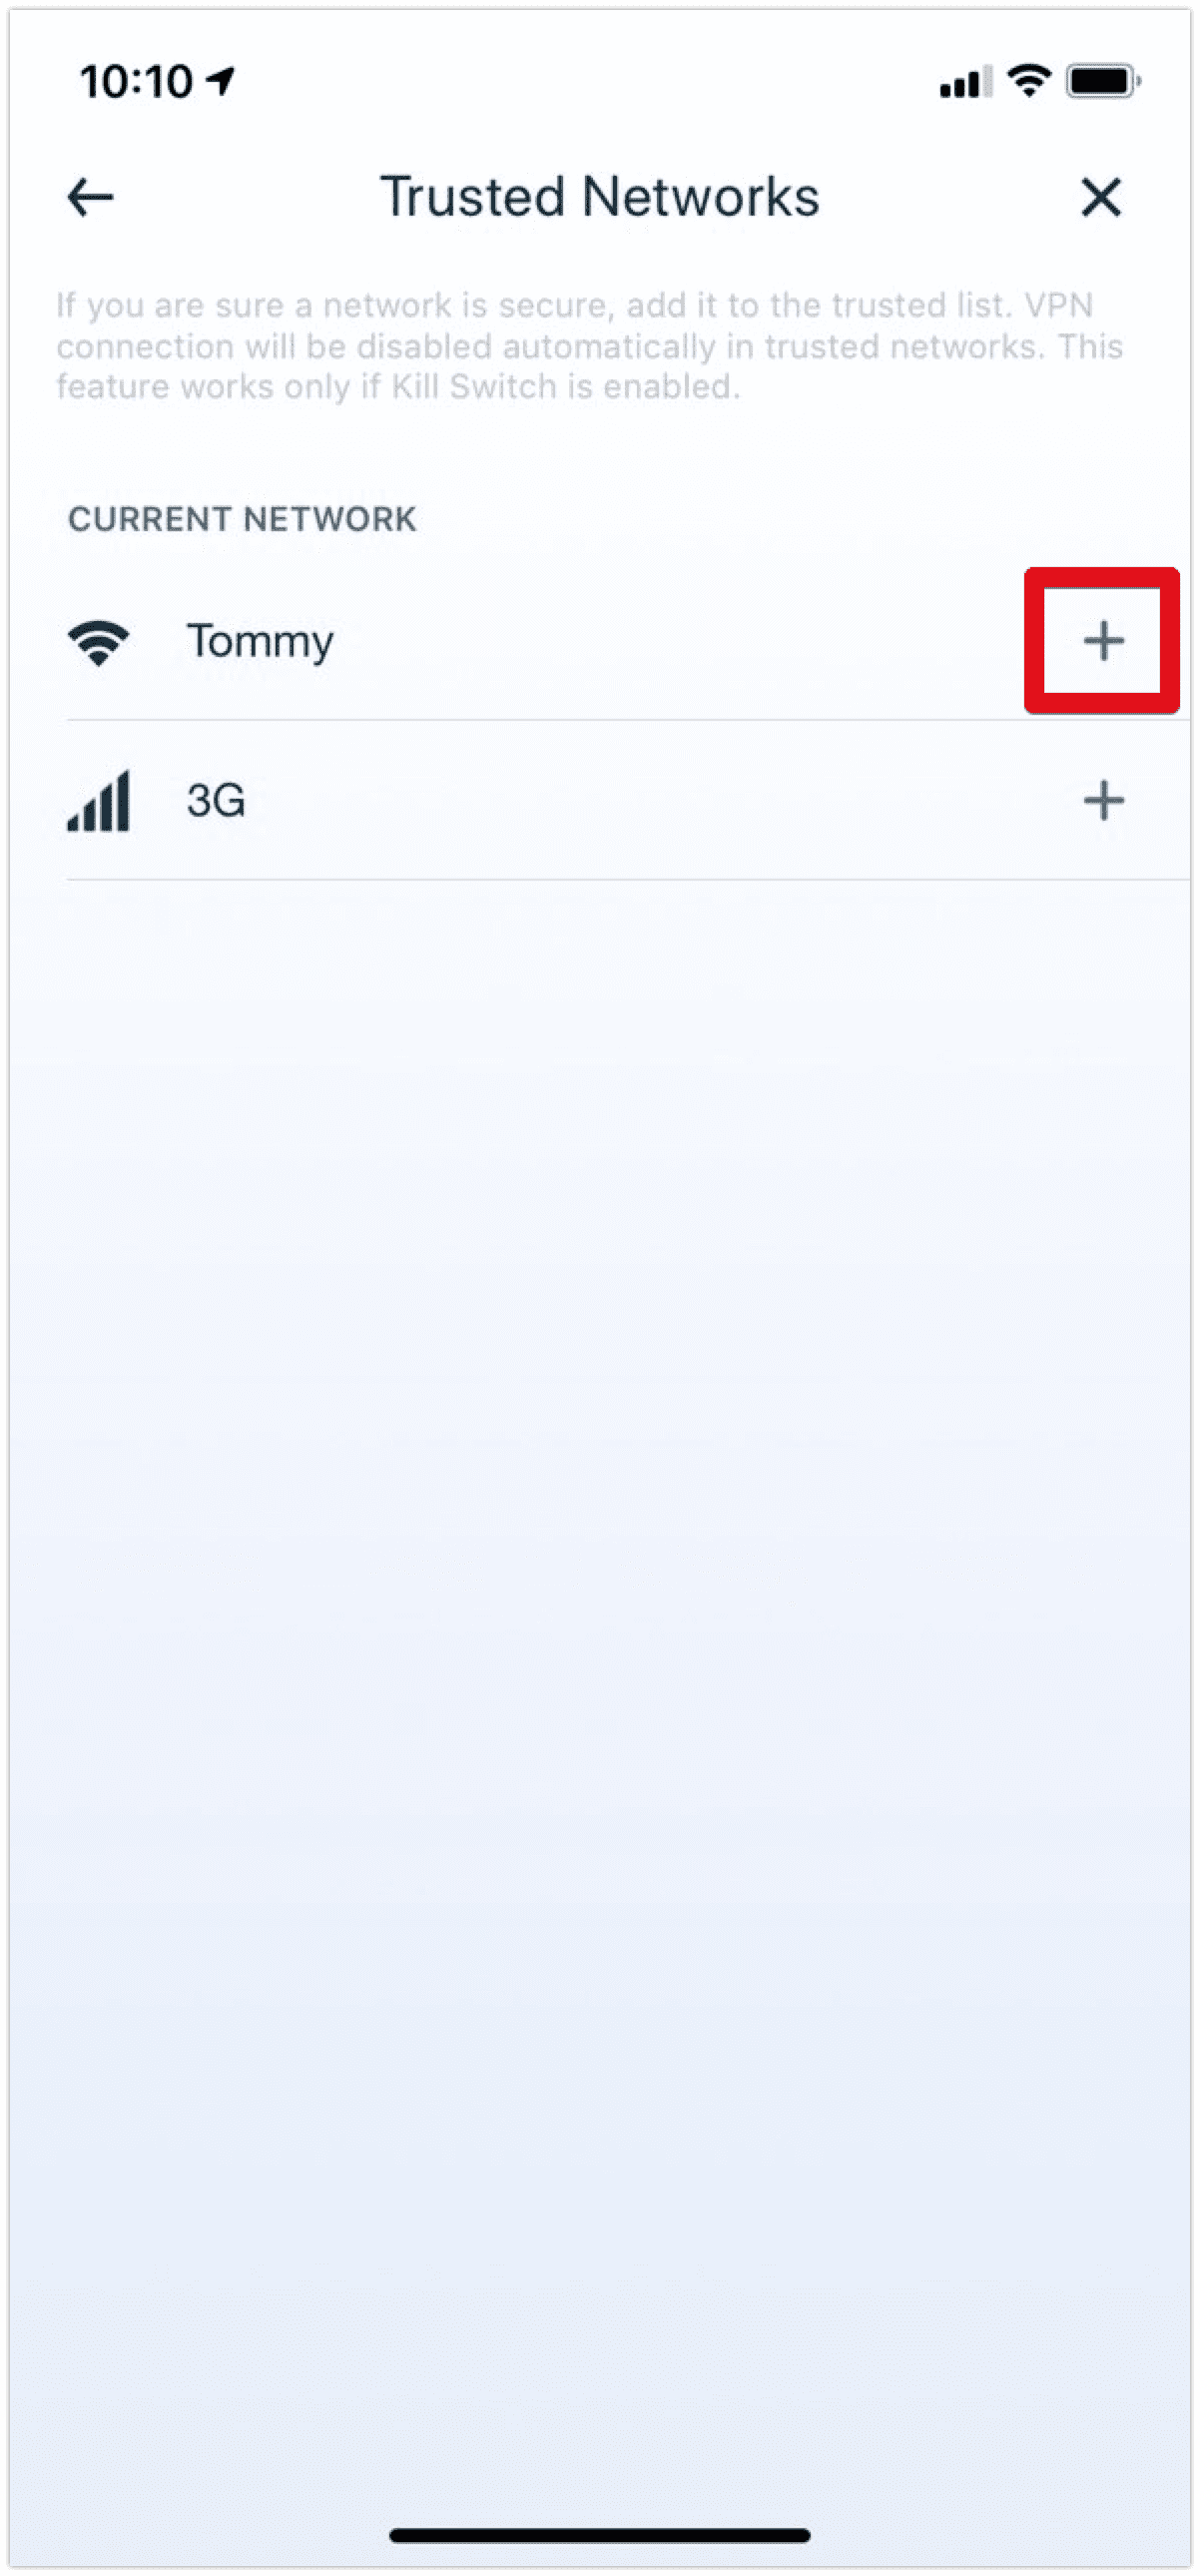
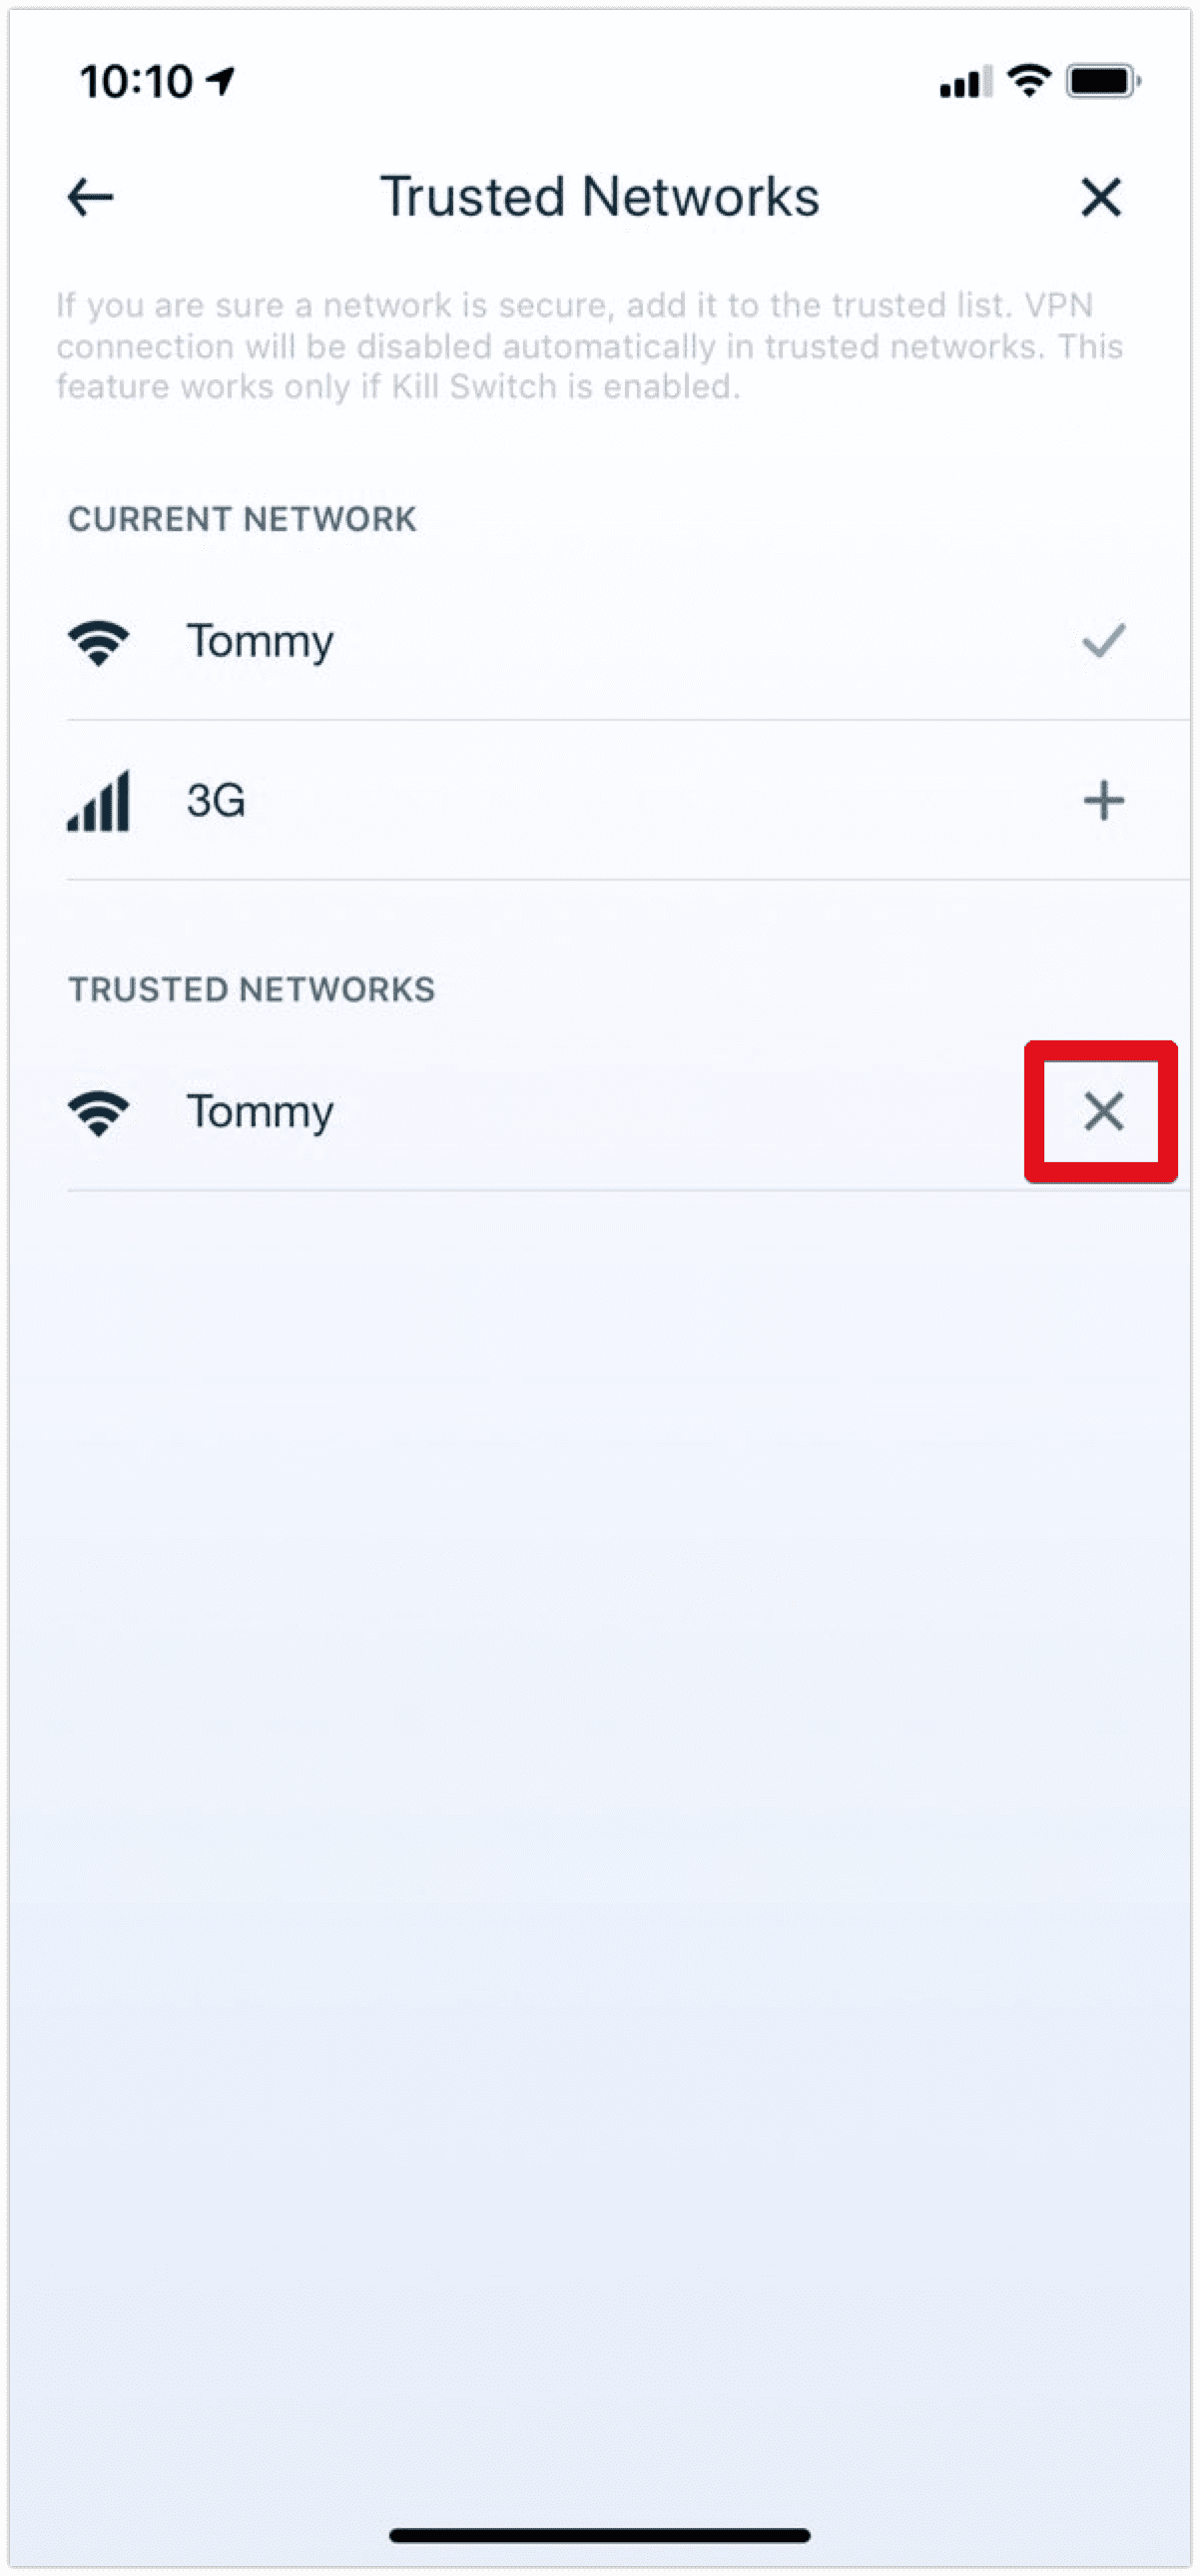
The selected network will then be added to the Trusted Networks list. To remove it, just tap X.
Note: Using the Trusted Networks feature with IKEv2 protocol requires an activated Kill Switch. You can check its status here: Menu > Settings > Kill Switch.
Also note that if you manually disable VPN connection, Kill Switch and Trusted Networks features will be turned off.
macOS
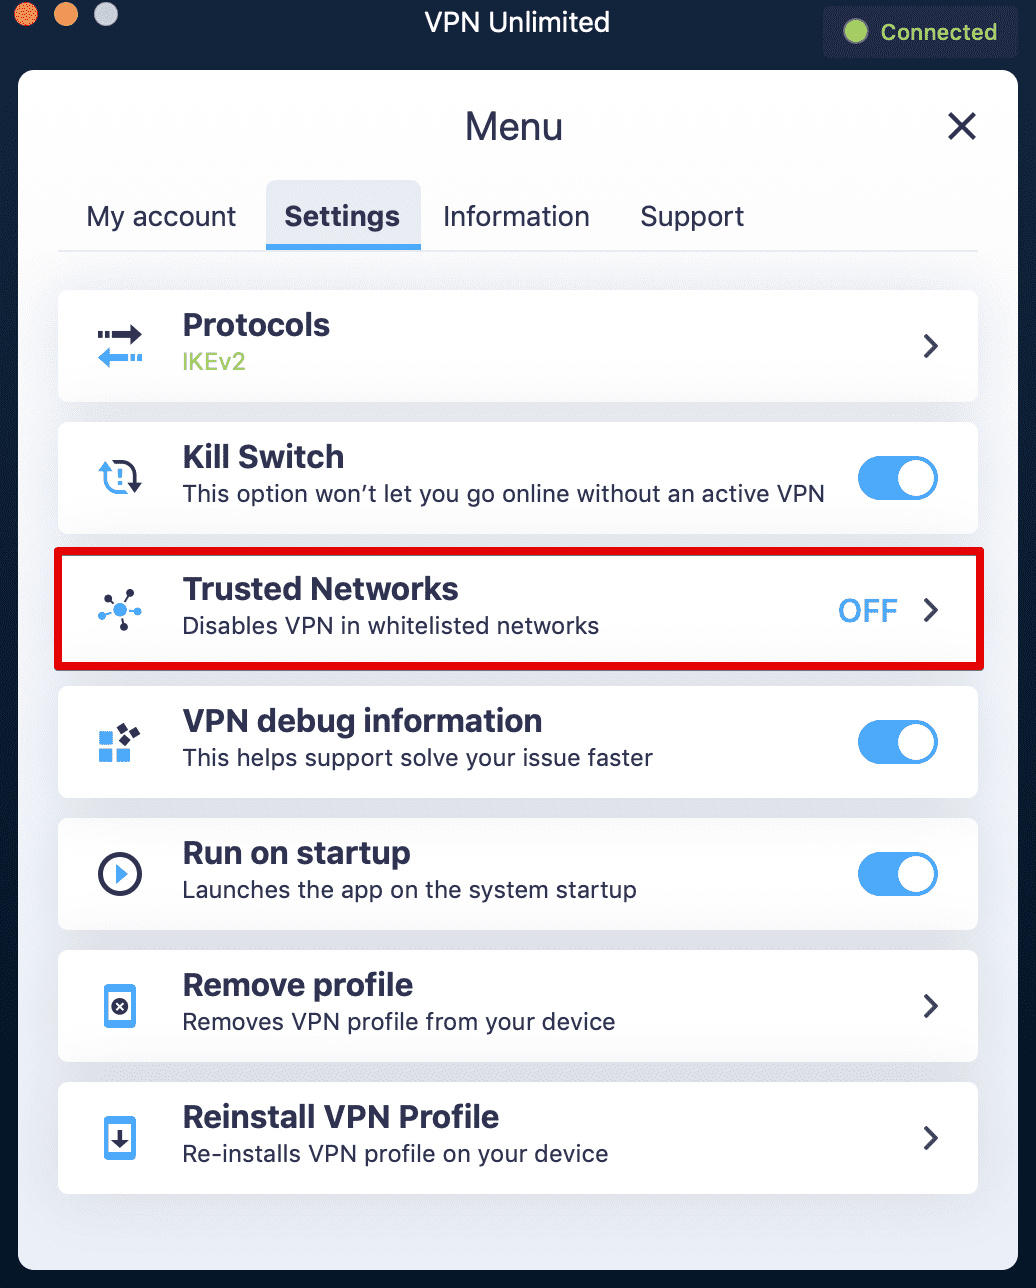
Go to the app’s Menu > Settings and click on Trusted Networks. Add the desired networks to trusted by clicking Plus next to the network’s name on the Trusted Networks screen.
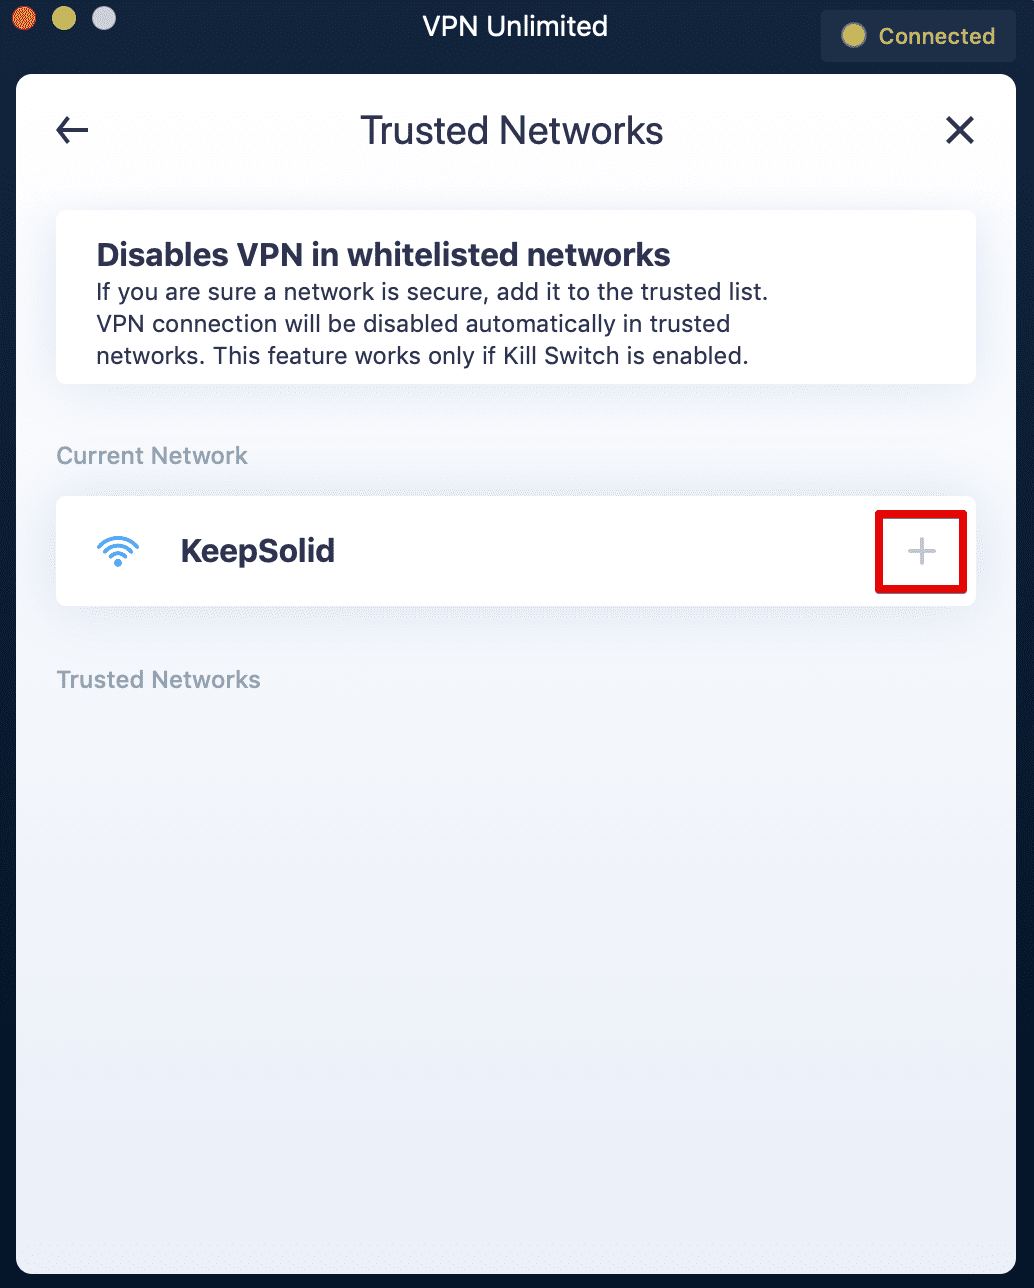
That’s it! Now you can see your secure network in the Trusted Networks list. To remove it, just click X.
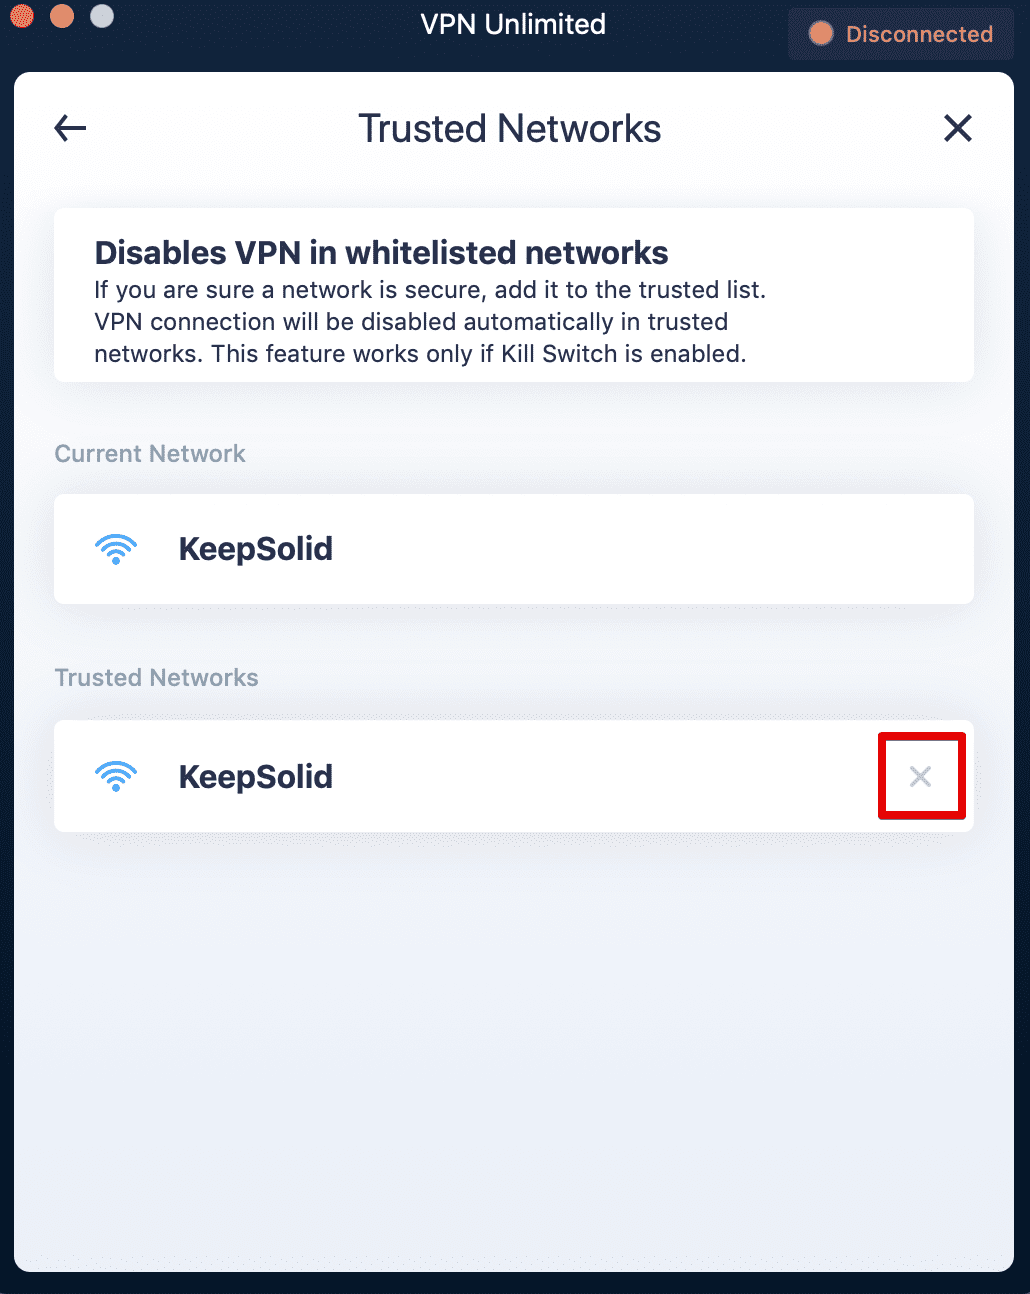
Note: If you’re using IKEv2 protocol, the Trusted Networks feature requires an activated Kill Switch. You can ensure that it is enabled in Menu > Settings > Kill Switch.
Also note that if you manually disable VPN connection, Kill Switch and Trusted Networks features will be turned off.
Windows 7 and higher
It is important to know that in VPN Unlimited app for Windows Standalone, Local Area Networks (LAN) can’t be added to Trusted Networks. This is caused by the peculiarities of the VPN Unlimited application for Windows. But you can easily add WiFi networks to trusted ones. Follow the steps below to explore safe internet in WiFi networks you consider completely secure.
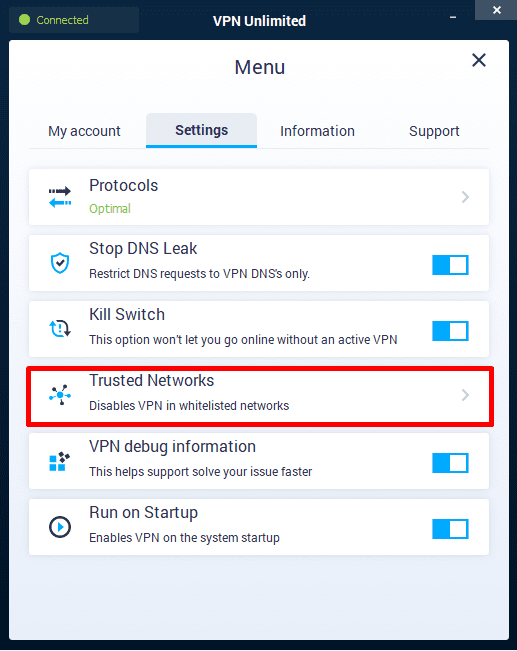
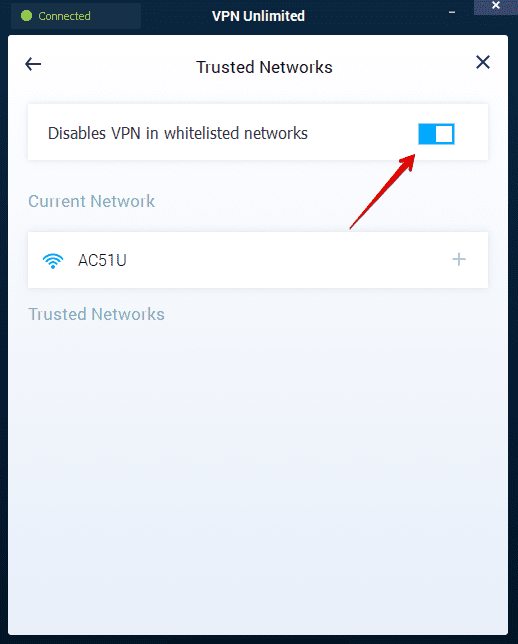
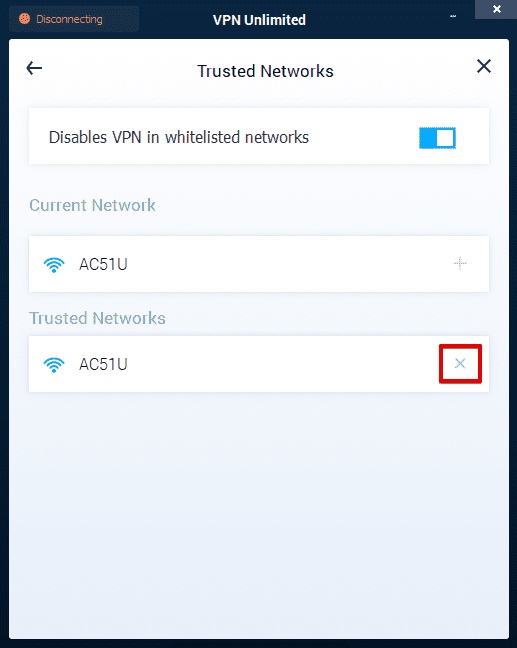
Navigate to the app’s Menu > Settings and choose the Trusted Networks option. On the Trusted Networks screen, turn the toggle on to enable the feature.
Then, click Plus next to the network you want to trust.
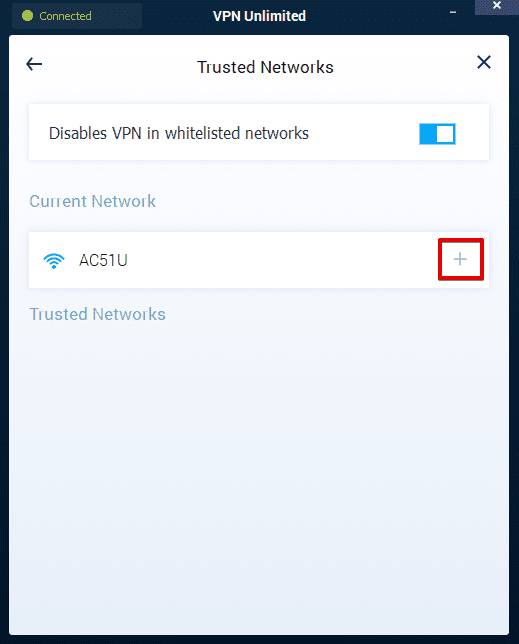
The selected network will appear in the Trusted Networks list. To remove it, just click X.
Ready to give it a try?
Enjoy the unaffected internet experience at home or in other reliable networks. And at the same time, stay reliably protected everywhere else!