pfSense OpenVPN configuration guide
for VPN Unlimited users
How to Install VPN Unlimited on Different Platforms & Create KeepSolid ID
Detailed installation guides on different platforms:
- How to install VPN Unlimited on macOS 10.14 and higher (Standalone Version)
- How to install VPN Unlimited on macOS 10.14 and higher (App Store version)
- How to install and get started with VPN Unlimited on iOS
- How to install VPN Unlimited Application on Android
- How to install VPN Unlimited application on Windows XP SP3
- How to install VPN Unlimited Application on Windows 7
- How to set up VPN Unlimited Application on Windows 8/8.1
- How to Install and Get Started with VPN Unlimited App on Windows 10
- How to install VPN Unlimited on Linux
How to create a new KeepSolid ID
- After installing the VPN Unlimited app, you will see the line "Create KeepSolid ID", сlick on it to start the process.
- Enter your email address in the designated field.
- Create a password and enter it in the password field.
- Repeat your password in the provided field to confirm it.
- Check the box next to the statement "By continuing, you agree to our…".
- Tap the "Sign up" button to complete the registration.
Connecting to a VPN server for the first time, you will be requested to allow adding VPN configurations and downloading a VPN profile. For more details, please refer to the manuals provided above on how to install VPN Unlimited on different platforms.
Want to cover your pfSense with VPN protection and secure all connected devices? Configure pfSense OpenVPN® client using our comprehensive tutorial. It will walk you through the steps to set up VPN connection using the OpenVPN protocol on pfSense 2.4.4 router.
To get more information about the OpenVPN protocol, check out our detailed article What is OpenVPN protocol.
I. Get OpenVPN configurations for pfSense VPN setup
Before the pfSense OpenVPN setup you’ll need to get the OpenVPN settings in your KeepSolid User Office and download the configuration file. For this, complete a few simple steps described in our tutorial.
II. Set up pfSense OpenVPN client
Once you get all the required VPN configurations, carefully follow the steps below.
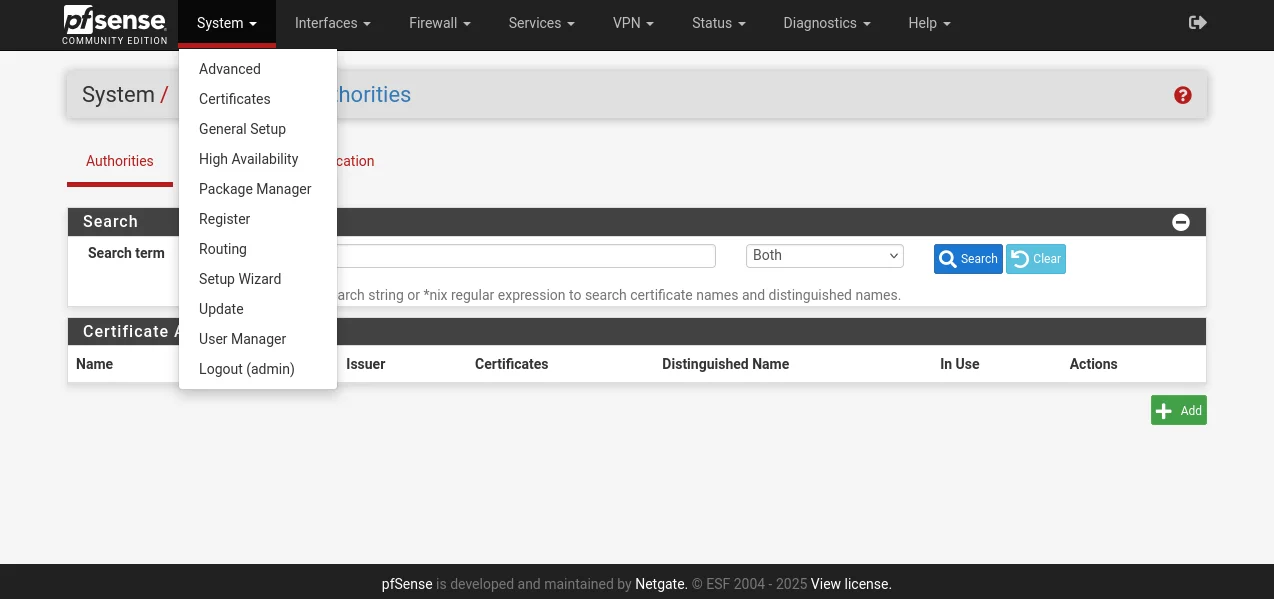
1. Open your pfSense router interface and navigate to System > Certificates > Authorities and click Add.
If you don't know how to access your router interface, check out our instruction on how to find your router IP.
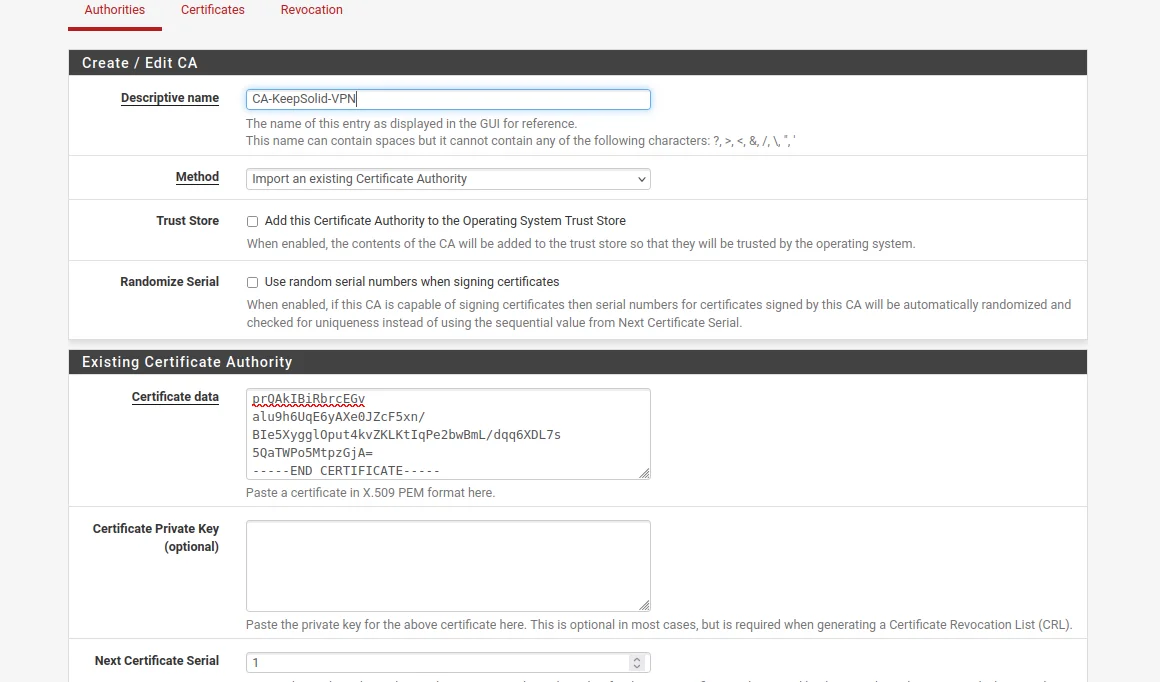
2. Complete the following fields:
-
Descriptive name: Enter any name of your choice
-
Method: Select Import an existing Certificate Authority
-
Certificate data: Paste the text from the configuration file, which appears between <CA> and </CA>, including BEGIN CERTIFICATE and END CERTIFICATE lines
-
Serial for next certificate: Enter any number of your choice
3. When you finish, click Save.
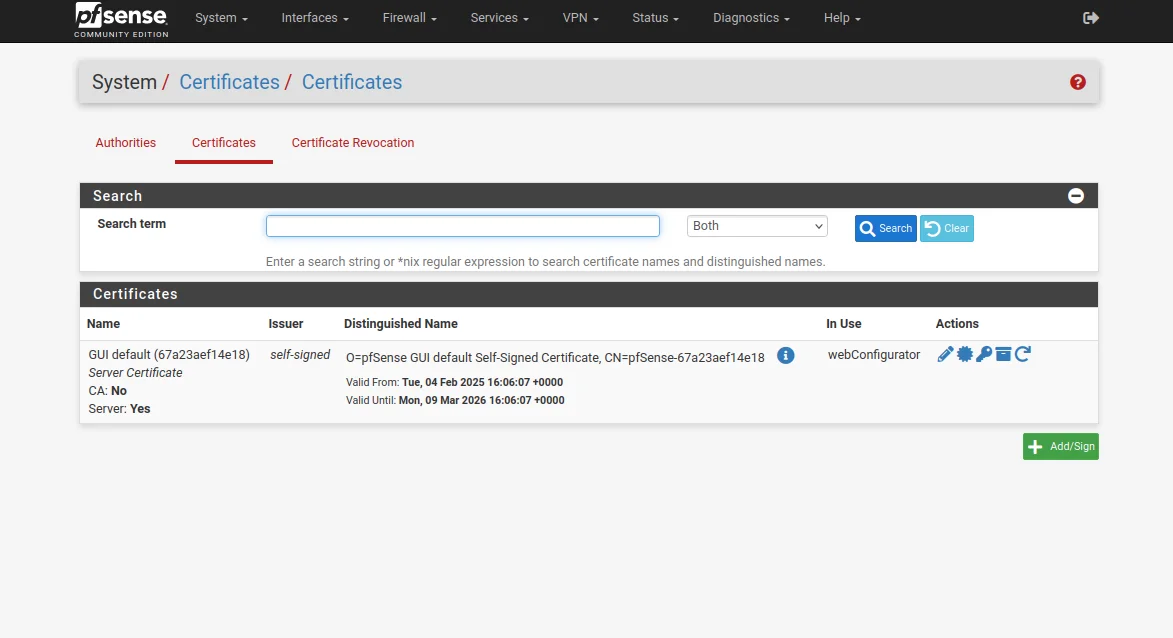
4. Go to System > Certificates > Certificates and click Add.
5. Complete the fields in the following way:
-
Descriptive name: Enter any name of your choice
-
Method: Select Import an existing Certificate Authority
-
Certificate data: Paste the text from the configuration file, which appears between <CERT> and </CERT>, including BEGIN CERTIFICATE and END CERTIFICATE lines
-
Private key data: Paste the text from the configuration file, which appears between <KEY> and </KEY>, including BEGIN PRIVATE KEY and END PRIVATE KEY lines
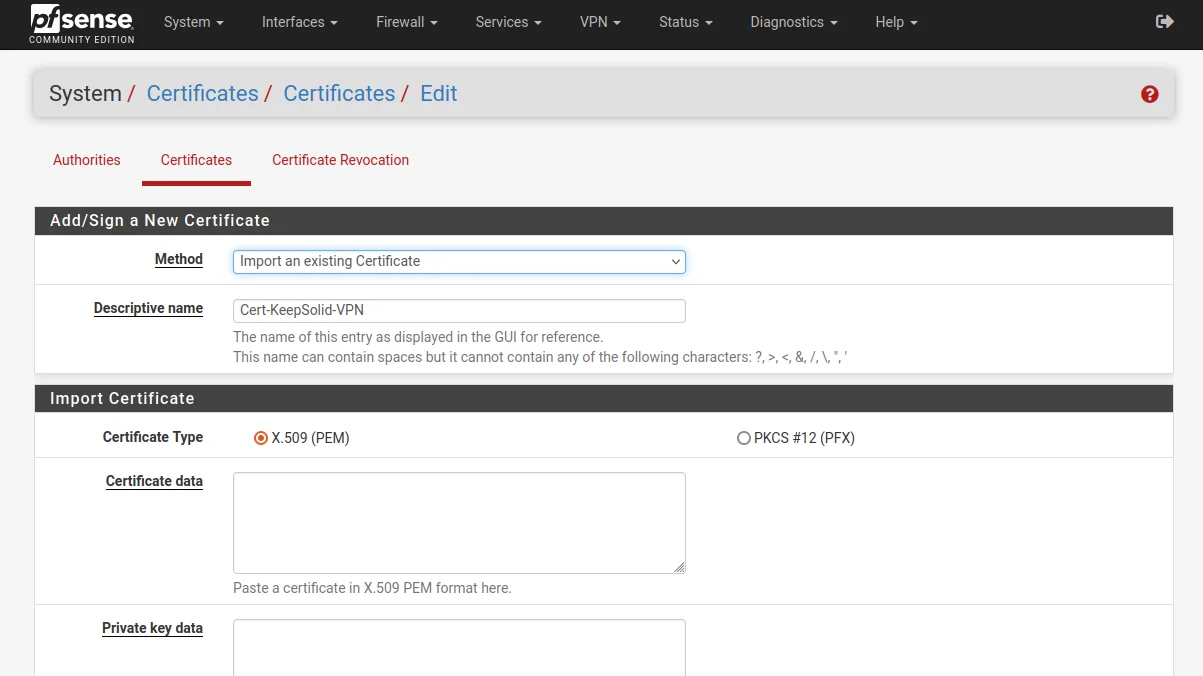
6. Once completed, click Save.
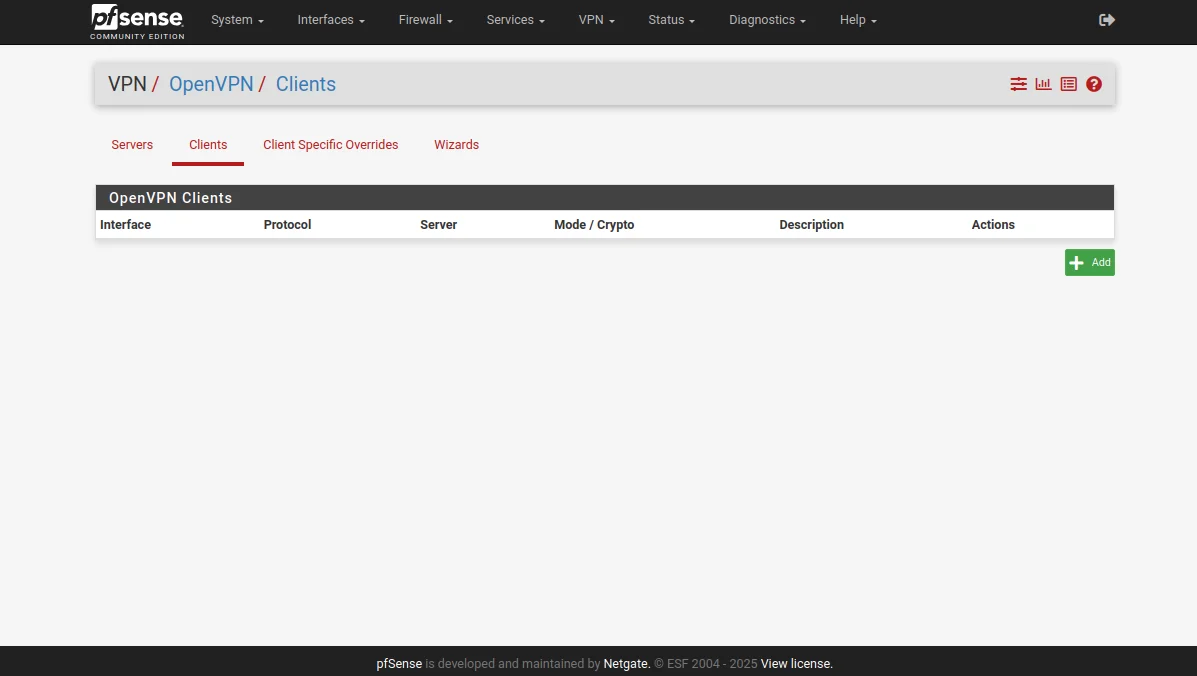
7. Go to VPN > OpenVPN > Clients and click Add.
8. Complete General Information section of the pfSense OpenVPN client as shown below. As you can see, most of the fields are left default.
FYI: If you face a problem with DNS on newer versions of pfSense and your OpenVPN client doesn't work properly, make sure that you specify an IP address instead of a domain name in the settings as Server host or address. This may be necessary due to DNS implementation features in recent versions of pfSense that can cause problems with VPN server name resolution.
- Disable this client: Leave it unchecked
- Server mode: Peer to Peer (SSL/TLS)
- Protocol: UDP on IPv4 only
- Device mode: tun – Layer 3 Tunnel Mode
- Interface: WAN
- Local port: Leave the field blank
- Server host or address: Type the selected VPN server address (you can find it in the Domain name field of the OpenVPN configurations you’ve previously generated)
- Server port: 1197
- Proxy host or address: Leave the field blank
- Proxy port: Leave it blank
- Proxy Authentication: None
- Description: You can leave the field blank

In User Authentication Settings you don't need to make any changes.
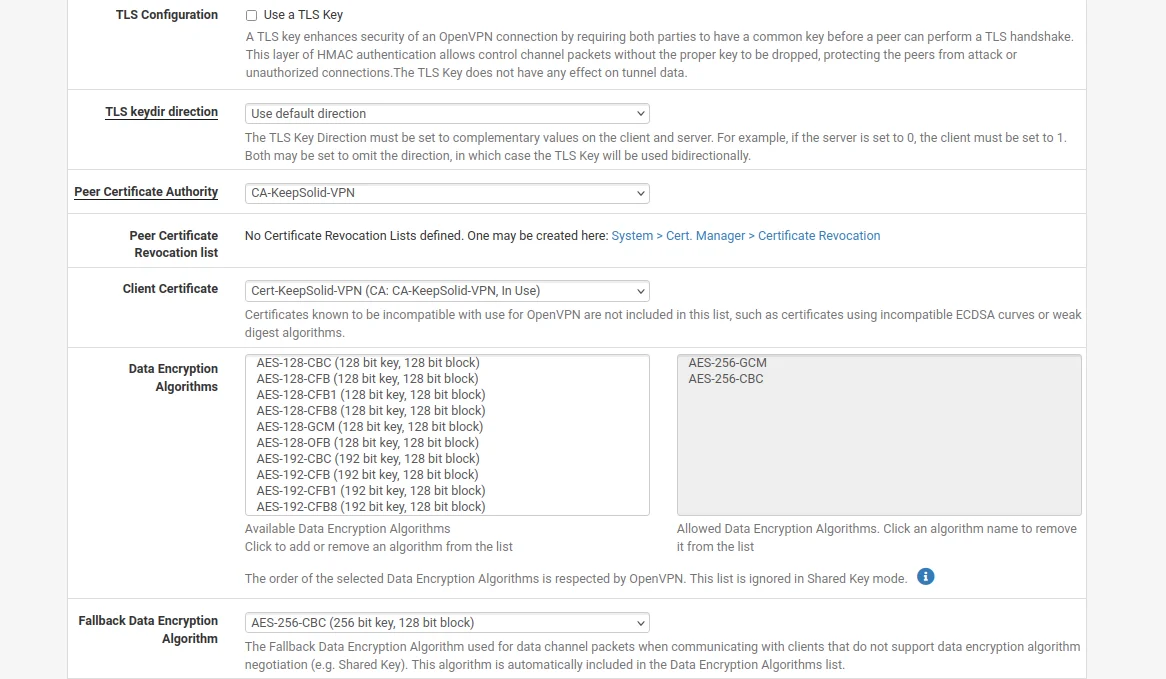
9. Then, navigate to the Cryptographic Settings and complete this section in the following way:
- Use a TLS Key: Leave it unchecked
- Peer Certificate Authority: Select VPN Unlimited certificate you've previously added
- Client Certificate: In the dropdown list select VPN Unlimited certificate
- Encryption Algorithm: Select the option AES-256-CBC (256 bit key, 128 bit block)
- Enable NCP: Check this option
- NCP Algorithms: Scroll the list of available NCP Encryption Algorithms and find AES-256-GCM. Click on it to add it to the Allowed NCP Algorithms list on the right.
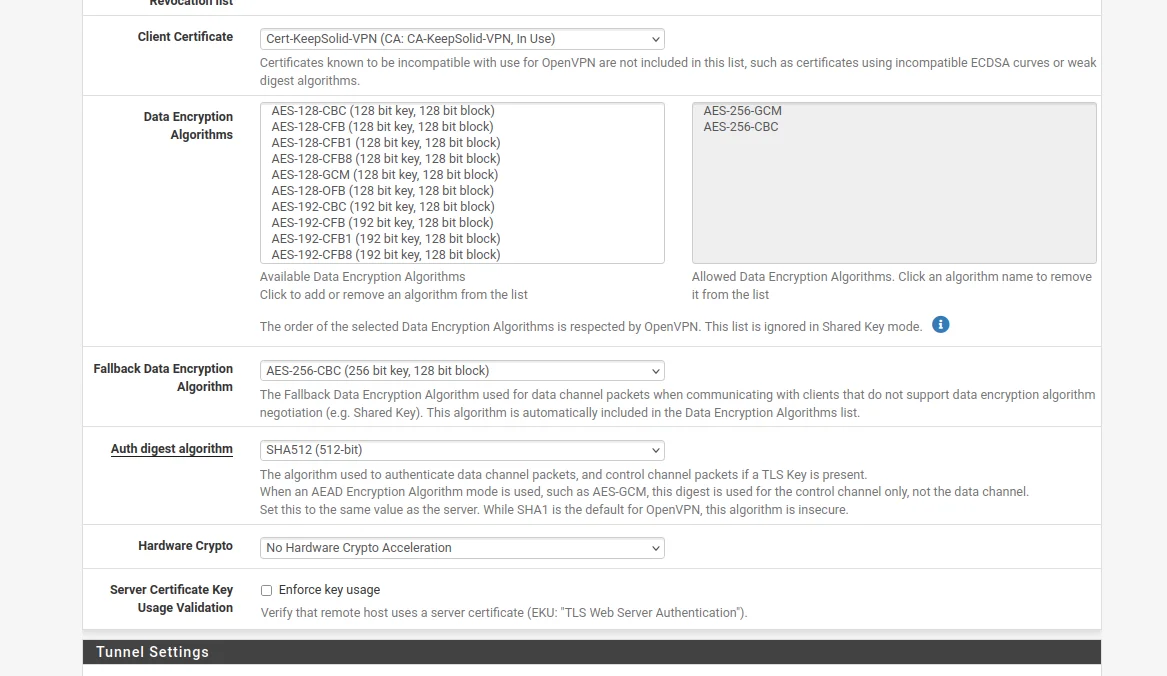
- Auth digest algorithm: Select SHA512 (512-bit)
10. In the Tunnel Settings of the pfSense VPN client, navigate to Allow Compression and select "Refuse any non-stub compression (Most secure)" to ensure compression is disabled.

11. Navigate to the Advanced Configuration section and input the following data within the Custom options field:
reneg-sec 0;
persist-tun;
persist-key;
remote-random;
remote-cert-tls server;
route-metric 1;

12. Once you've filled out the fields, click Save at the bottom of the page.
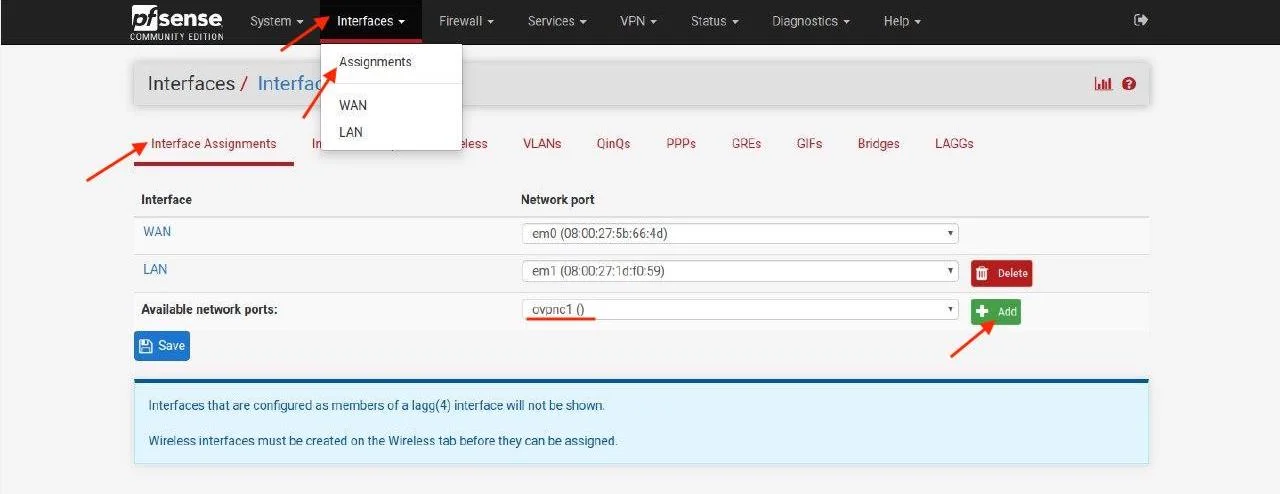
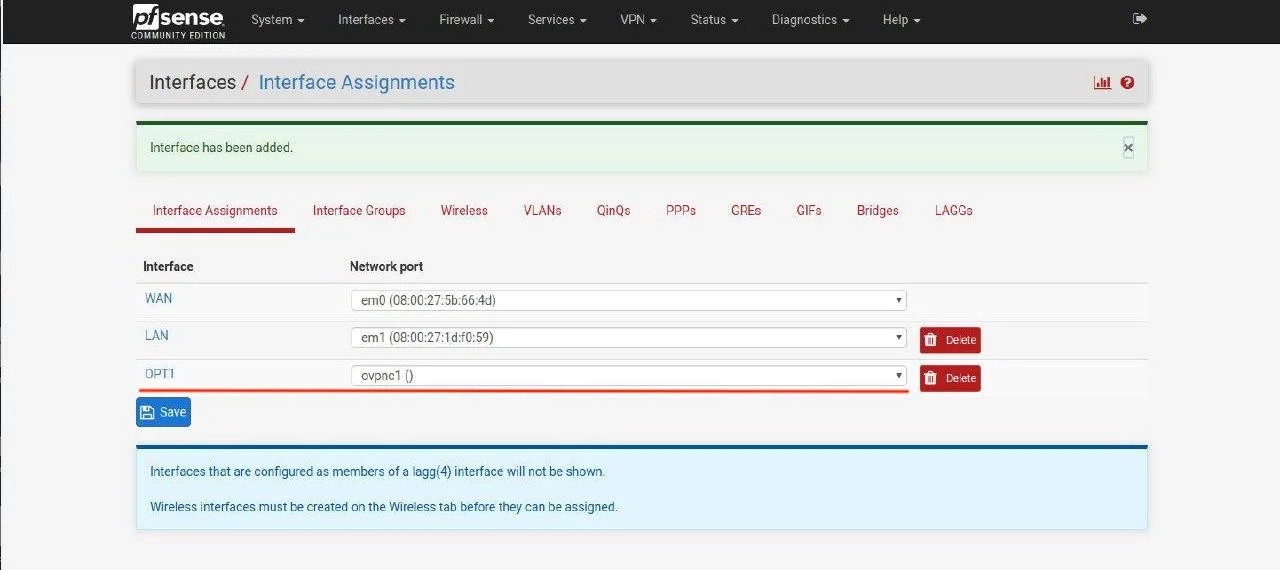
13. Go to Interfaces > Assignments and click Add.
The network port name most likely will be named ovpnc1. Please make sure that the new interface is selected as ovpnc1 (it can be ovpnc2, ovpnc3, etc, depending whether you have other ovpn interfaces or not).
14. When you finish, click Save.
15. Go to Interfaces > OPT1 (your new interface name from the previous step).
Complete the fields as shown below. As you can see, most of them should be left empty.
-
Enable: Set the checkbox for Enable interface
-
Description: Enter any name of your choice, for example, KeepSolid-VPN
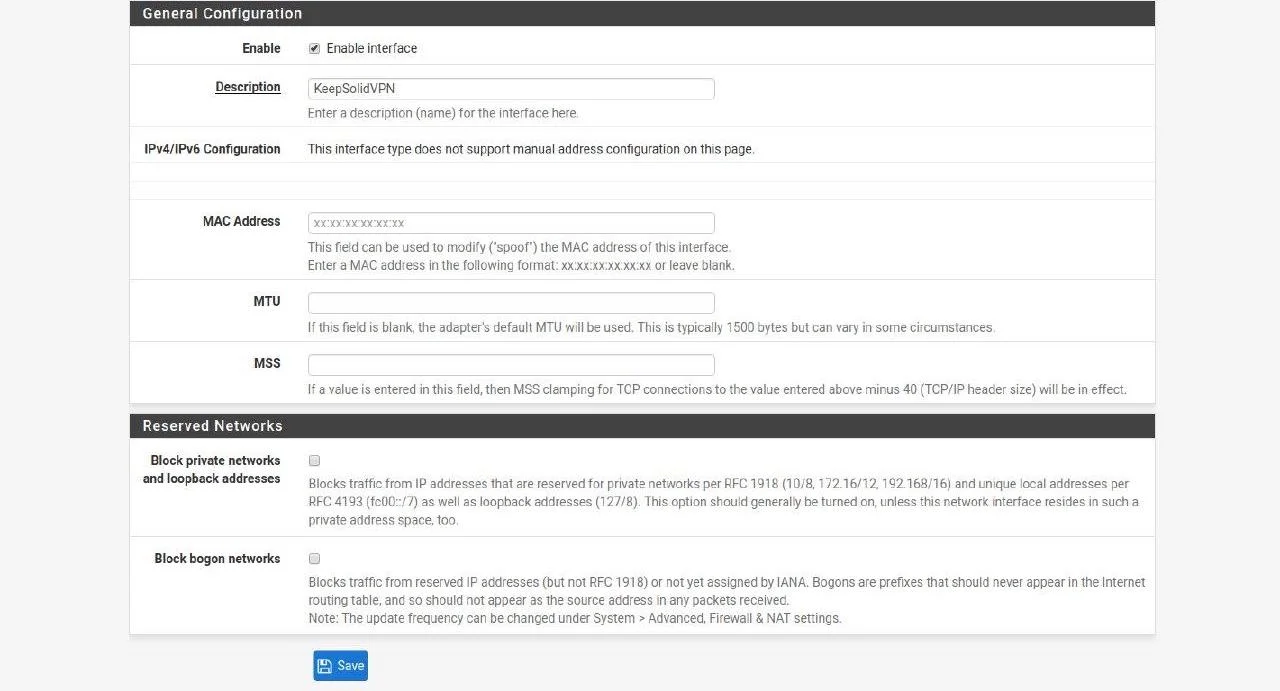
16. No other changes are required. Click Save and Apply Changes.
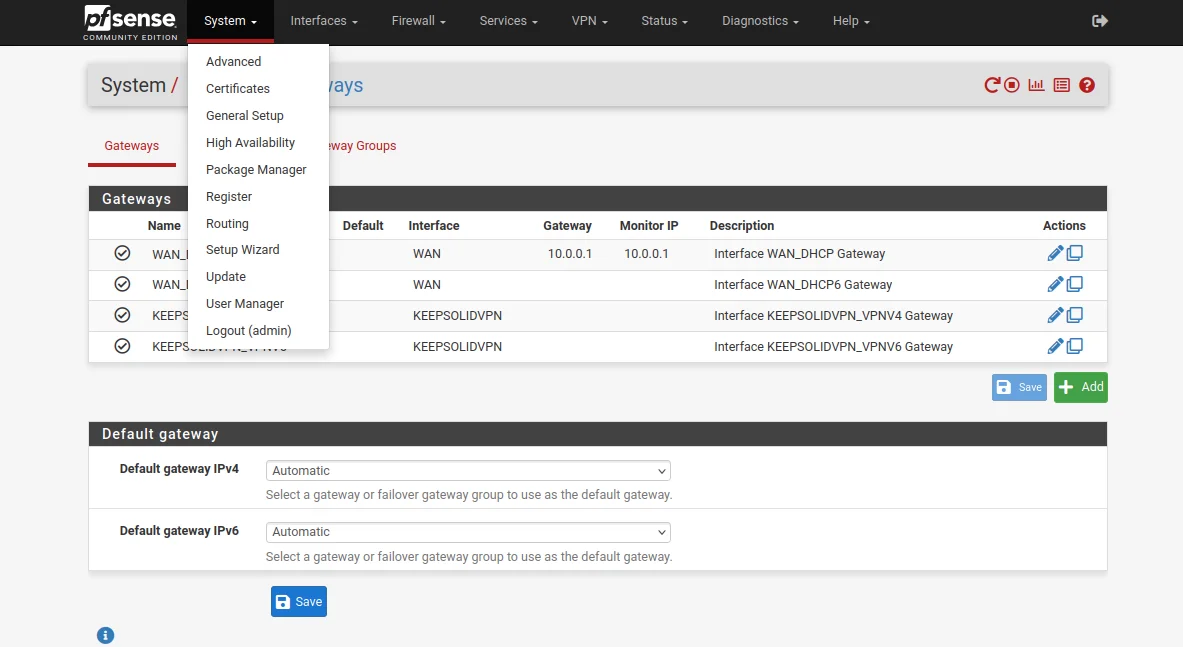
17. Go to System > Routing and click Add.
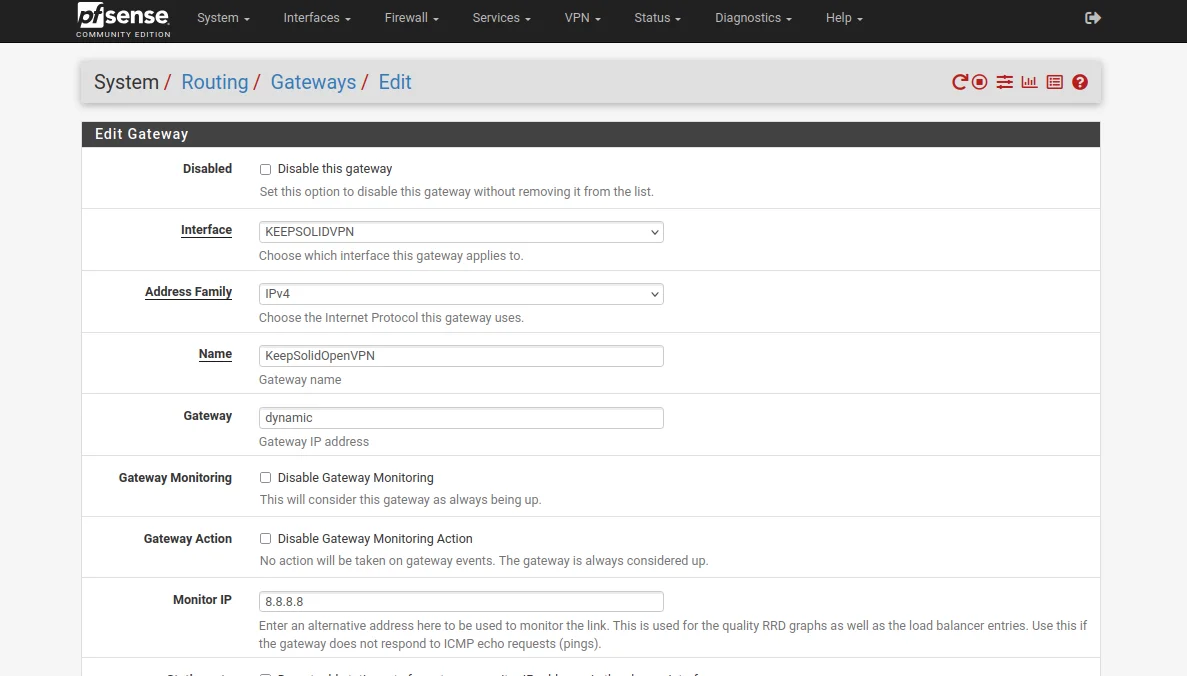
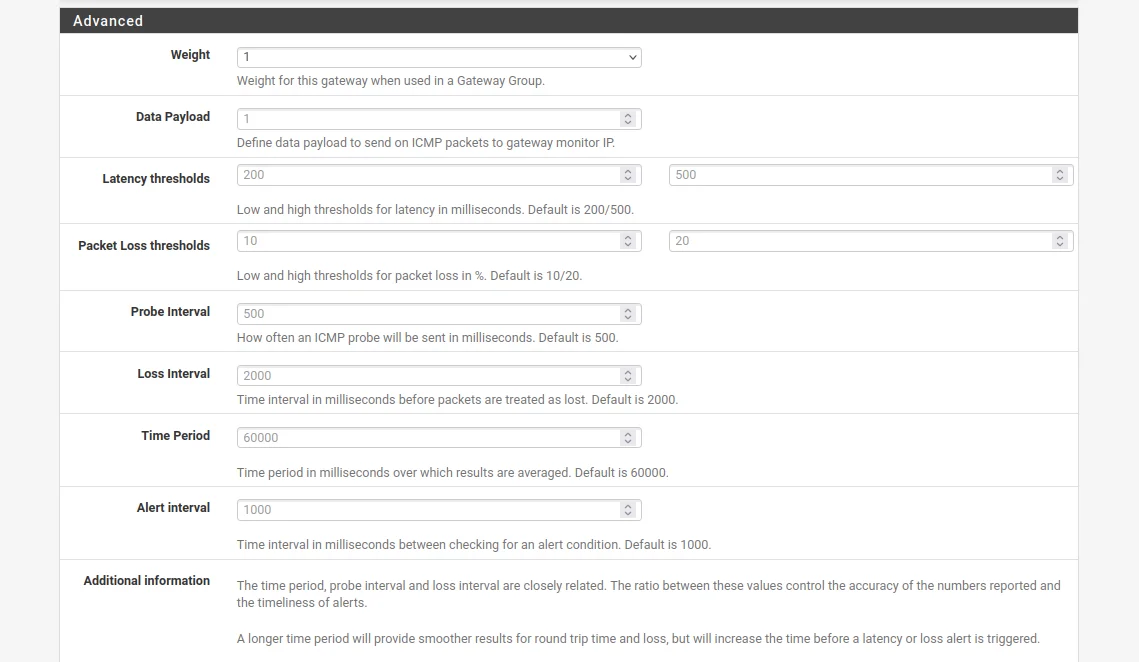
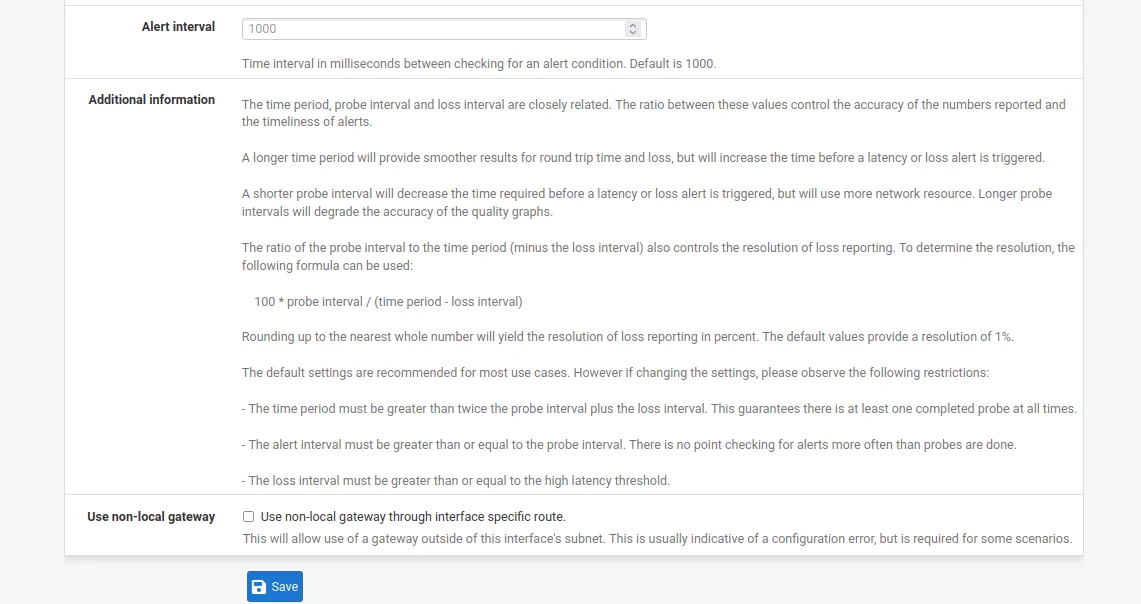
18. Complete the fields of the pfSense VPN gateway as shown below and click Save and Apply Changes.
As you can see, most of the fields are left default or empty.

19. Go to Firewall > Aliases > IP and click Add.

20. Complete the fields as shown below.
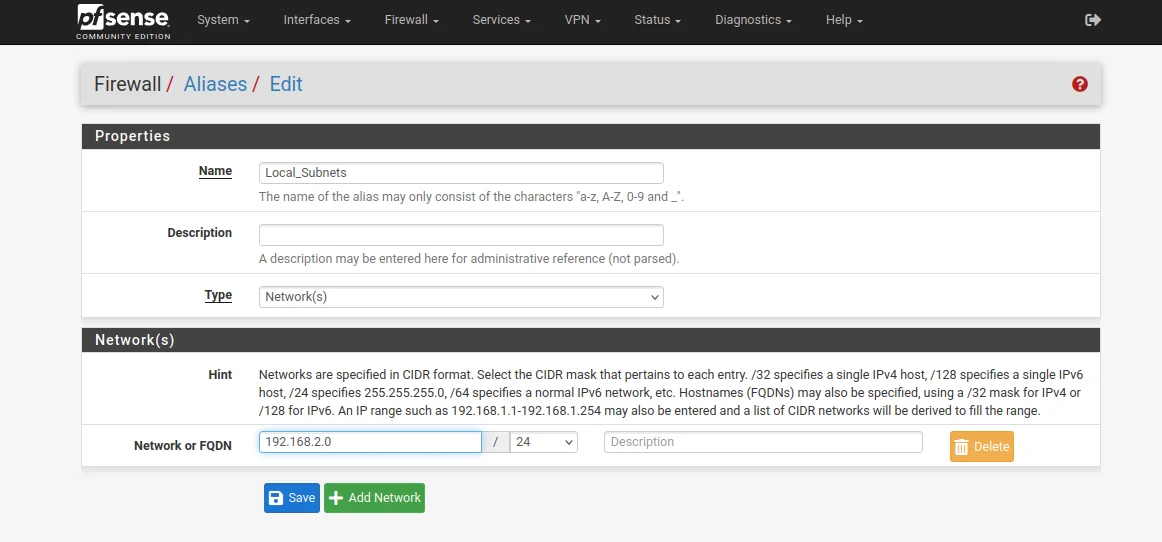
21. When you finish, click Save and Apply Changes.
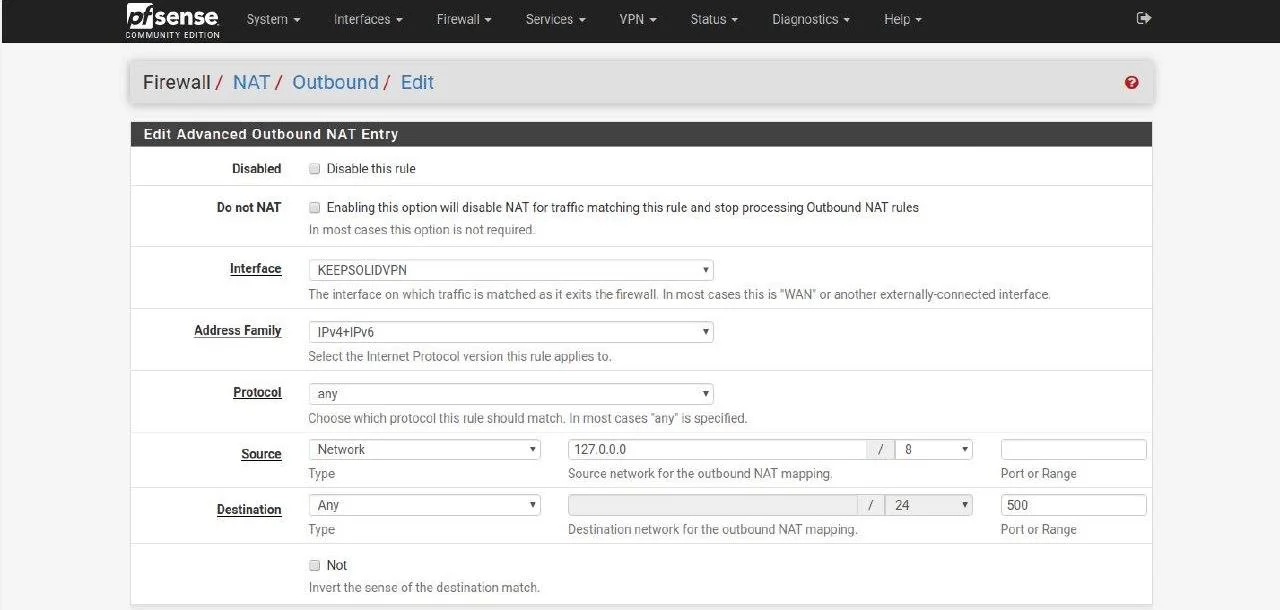
22. Then, go to Firewall > NAT > Outbound.
23. Set the Mode to Manual, then click Save and Apply Changes.

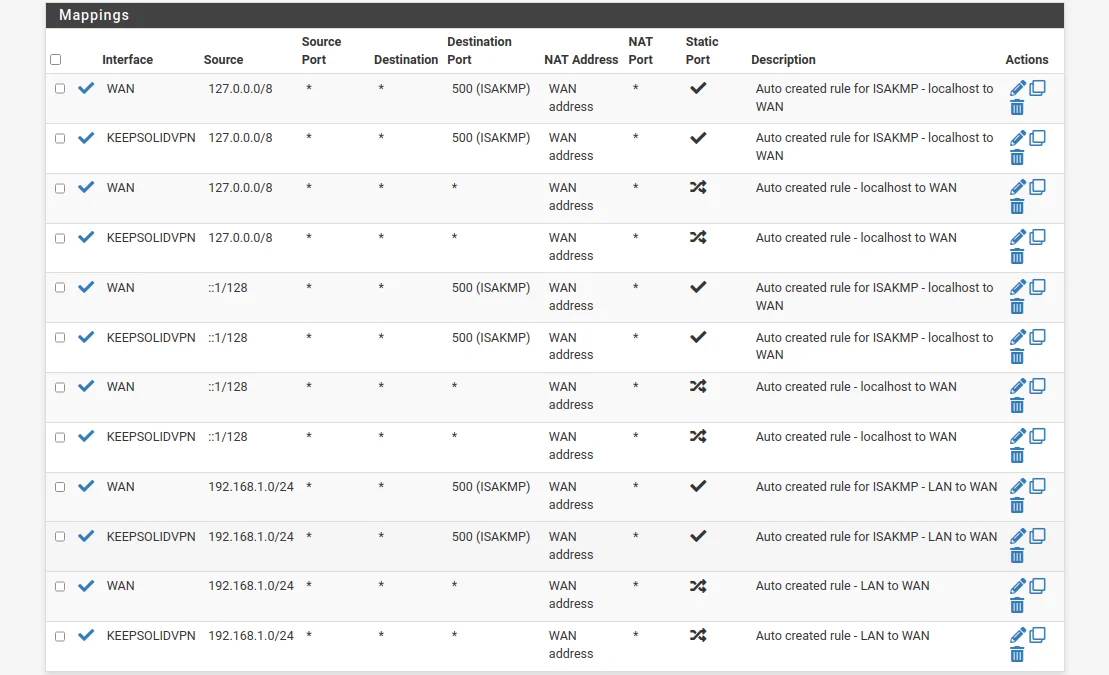
24. After that, you have to make copies of your WAN connections.
Click

![]()
Your Mappings list should be as follows:
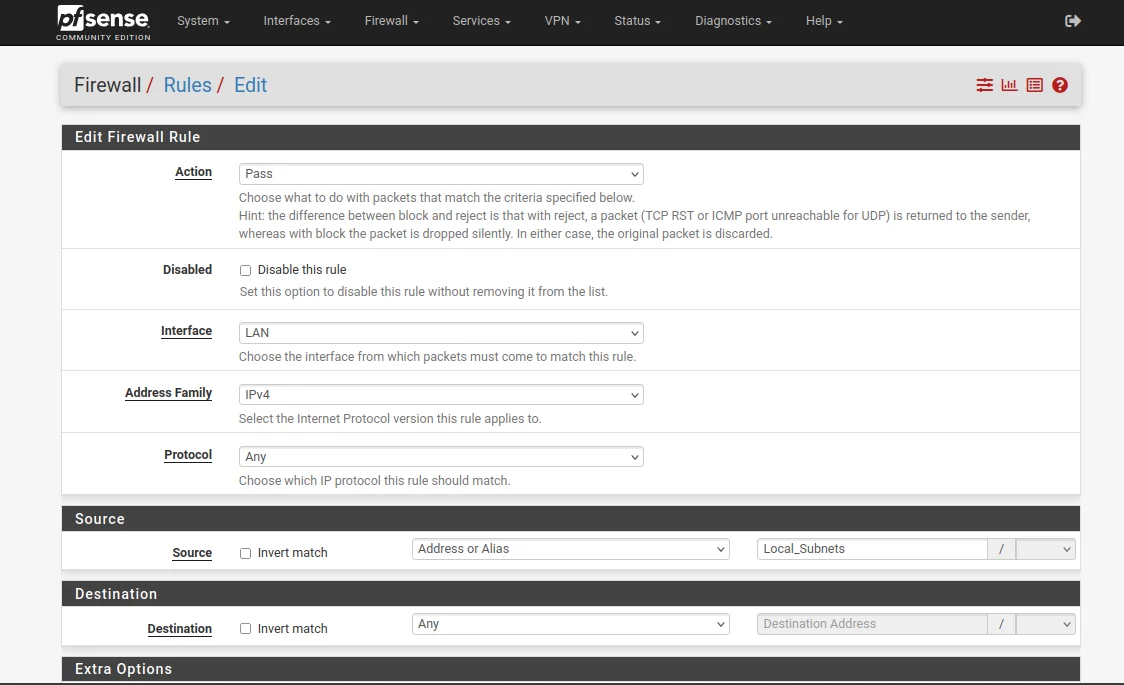
25. Go to Firewall > Rules > LAN and click Add.
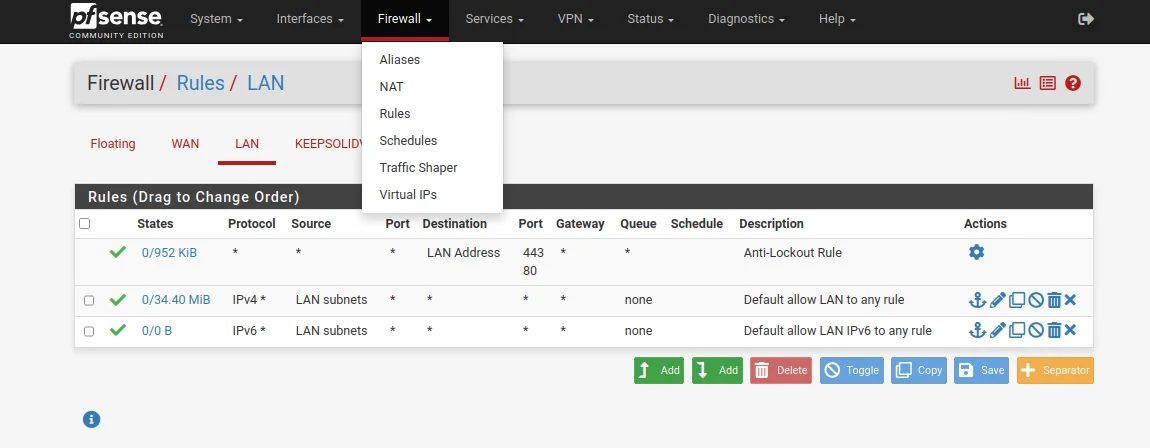
26. Complete the fields as shown in the screenshots below and click Save. Most of the fields are left default or empty.


27. As the final step to complete the pfSense VPN configuration, go to Diagnostics > Reboot and wait a few moments for your pfSense router to restart.

That’s about it! You’ve completed the pfSense VPN setup and now have a running OpenVPN connection on your pfSense router. If you need VPN configuration guides for other devices, be sure to check our Manuals page to find the one you need. Need any assistance? Feel free to contact our customer support, we’ll gladly assist you!
“OpenVPN” is a registered trademark of OpenVPN Inc.


