How to Install and Get Started with VPN Unlimited App on Windows 10
Looking for a way to protect your Windows PC while browsing the internet? Great, you have landed in the right place. Our reliable VPN app for Windows 10 is at your disposal! VPN Unlimited supports most popular platforms including Windows and allows 5 simultaneous connections and more, depending on your subscription.
This guide contains step-by-step instructions on how to install the VPN Unlimited app and VPN TAP driver on your Windows PC, how to manage its first launch and enable a secure connection, how to update the app to the latest version, and how to disable VPN on Windows 10.
Note: VPN Unlimited is also available as a part of the MonoDefense® security bundle.
1. How to Install VPN on Windows 10
To download our VPN for Windows 10, follow this link and click the Download Standalone button to get the Standalone version of the VPN Unlimited app.
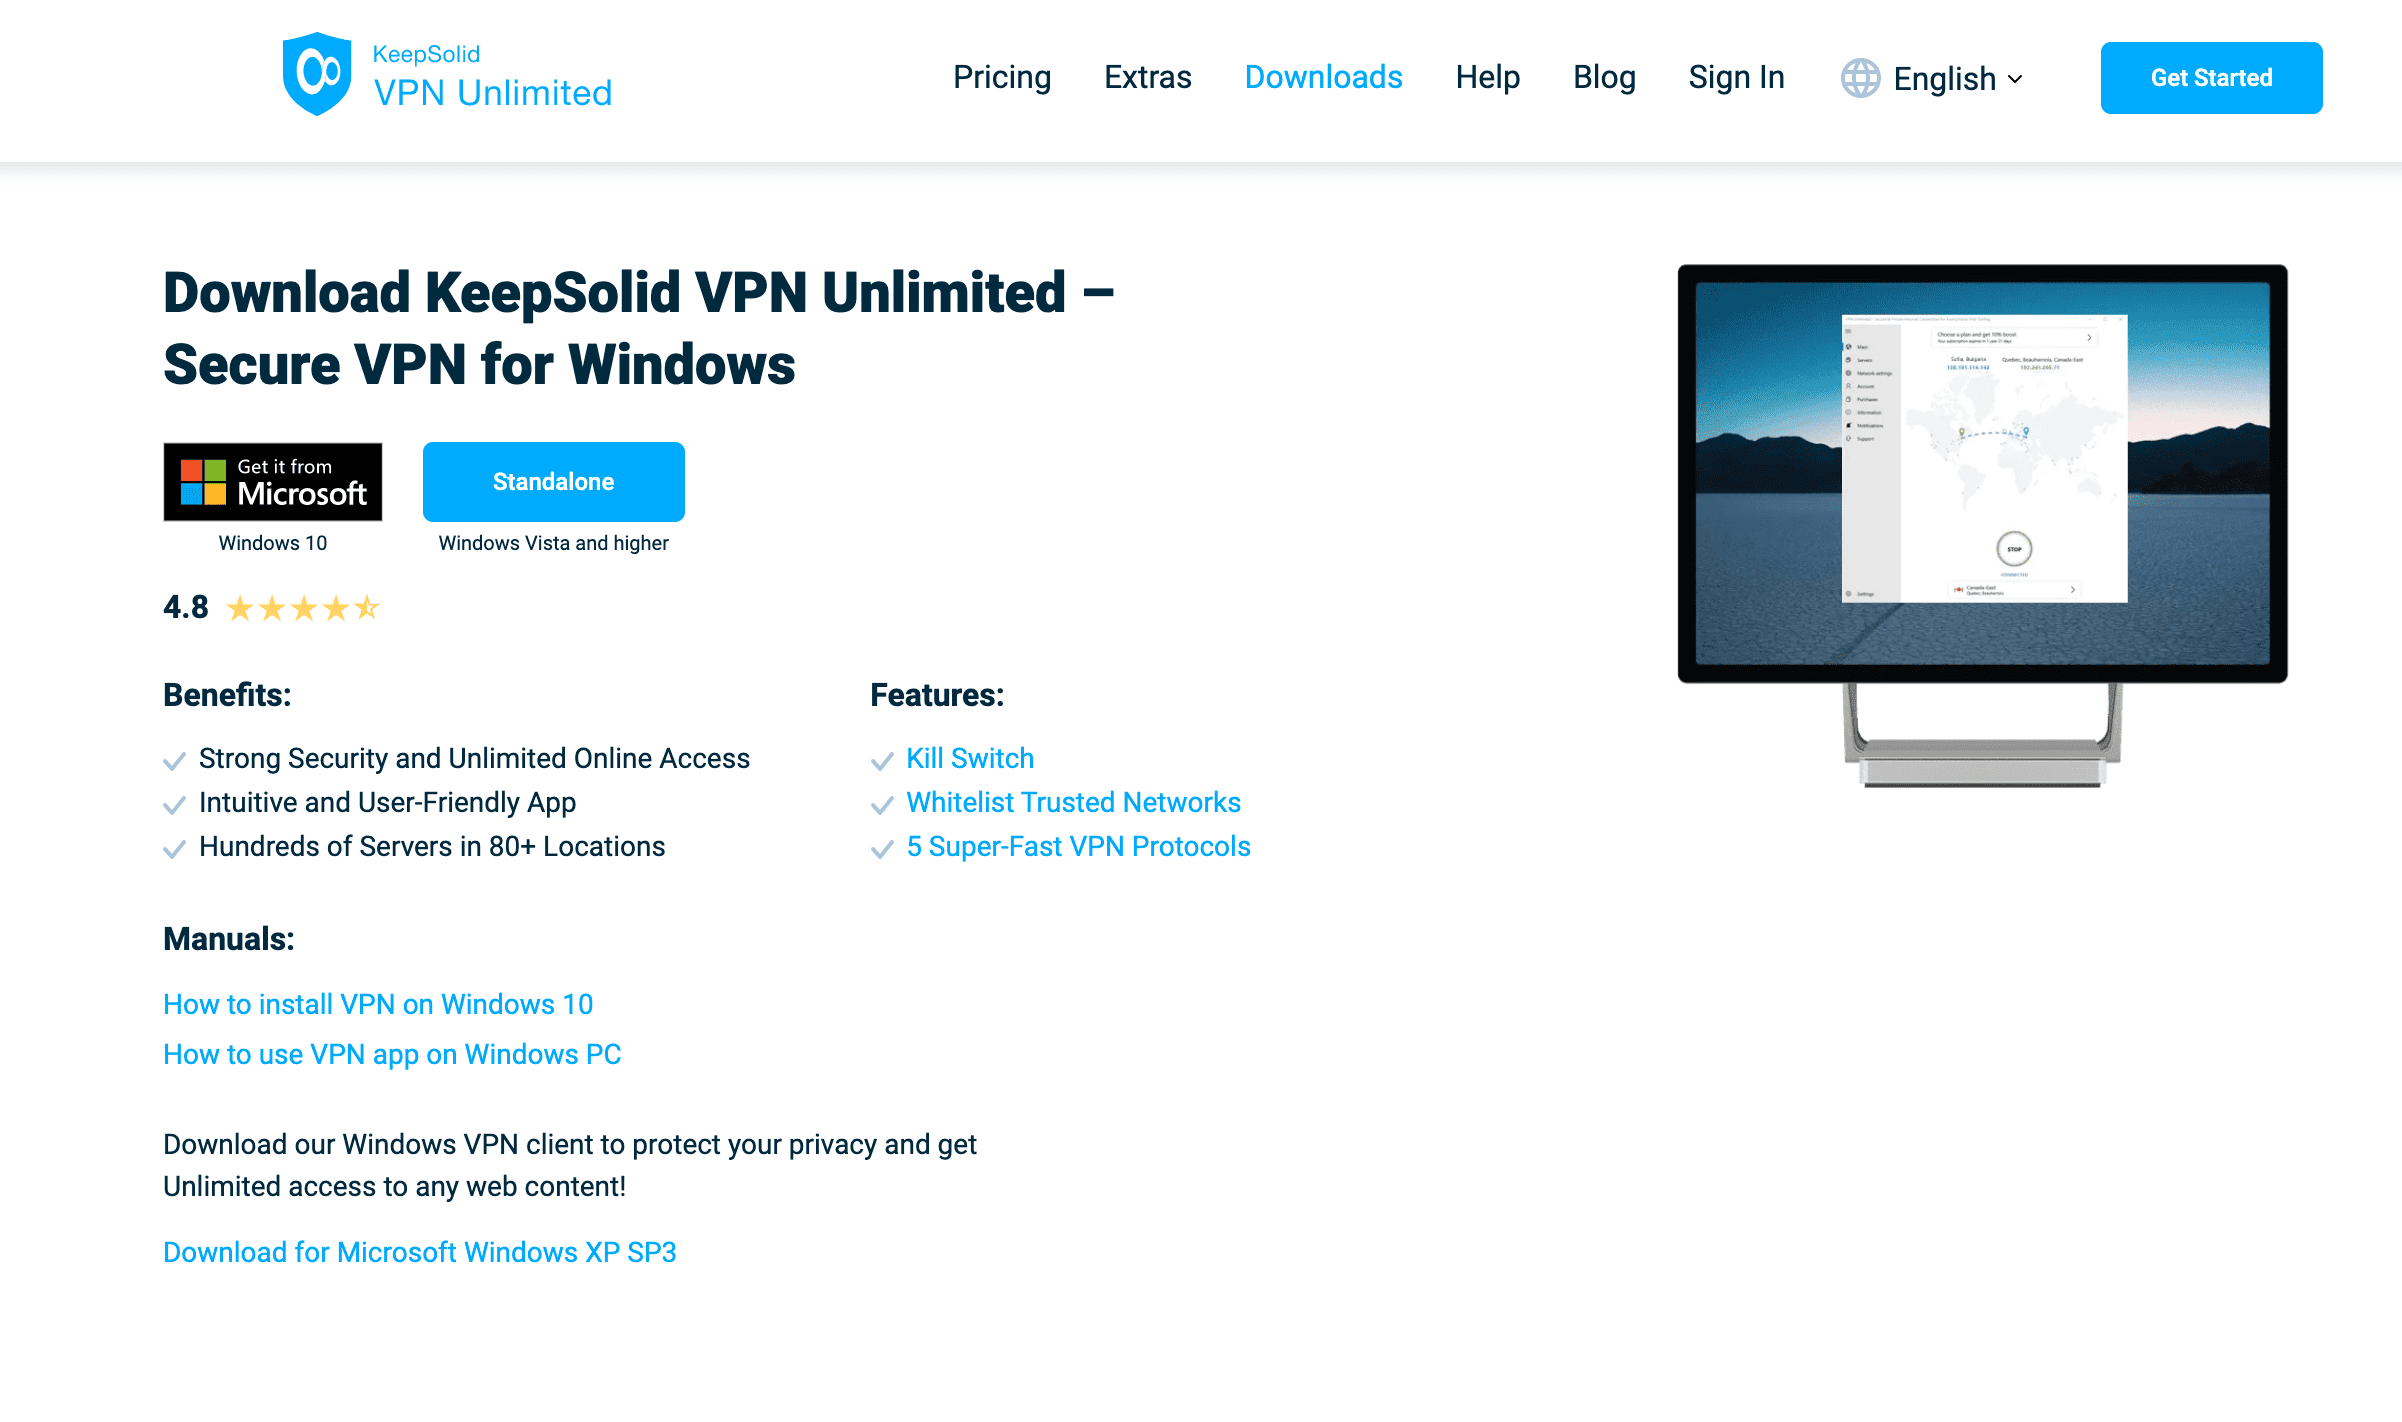
The file download will start. When this process is completed, launch the downloaded installer.
You may receive the following alert if User Account Control is enabled in your system. Click Yes to proceed.
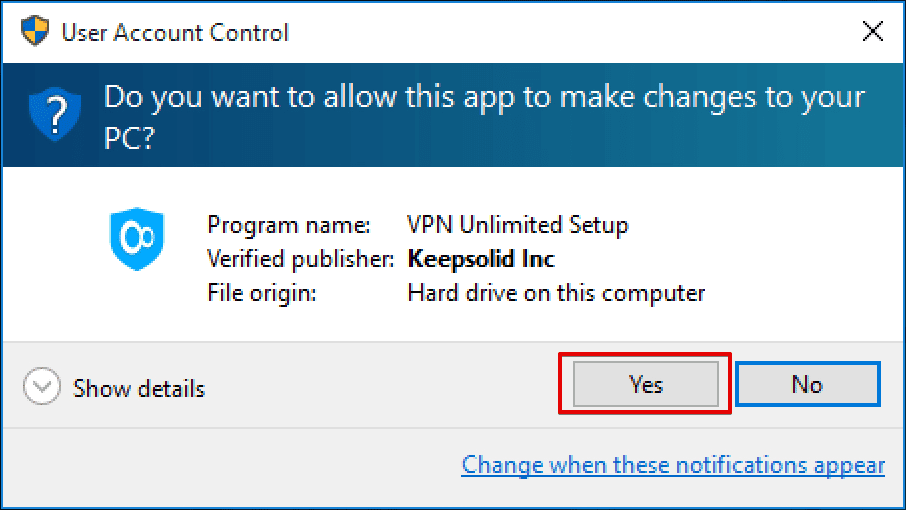
Now, complete a standard installation process. It is recommended to disable antivirus software to ensure that all components will be installed properly.
The next step is to install the TAP Adapter. Please set the checkbox for Always trust software from ”OpenVPN Technologies, Inc.” and click Install.
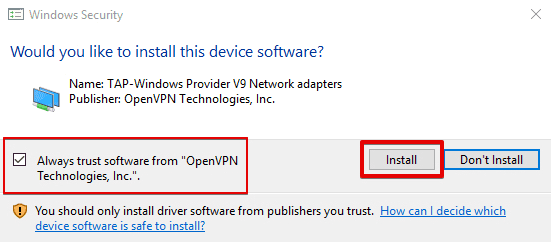
After the installation click Finish.
The VPN Tap driver is an important part of the VPN installation process, as it is required for the correct operation of VPN services. Without it, our VPN for Windows 10 won’t be able to successfully establish the connection.
When installed, the TAP-Windows Adapter can be found at Network Connections.

That’s it! You’ve successfully installed a VPN on Windows 10. Now, be sure to check the next section of this manual that describes how to manage the first launch, as well as our tutorial on how to use VPN on Windows PC.
Protect All Your Devices with VPN Unlimited
VPN Unlimited is available for iOS and Android smartphones, macOS, Windows, and Linux PCs, smart TVs and routers, as well as Chrome, Firefox, Opera, and Edge browsers.
2. How to Manage the First Launch of Windows 10 VPN Client
If you already have a KeepSolid ID, just enter your email address and password and tap the Sign in button. You can continue with Facebook or Google accounts as well.
To create a new KeepSolid ID tap Create KeepSolid ID, enter your email address and password. Then repeat your password, check the box next to By continuing, you agree to our…, and tap the Sign up button.
More information about KeepSolid ID and why you need it, you can find on this page.
At the application startup, Windows Firewall or any other Firewall installed in the system may request permission for the open-vpn.exe and vpn-unlimited.exe files to access the network. To proceed, please allow access.
If you accidentally denied the access, to ensure smooth work of the VPN app, go to Windows Firewall settings: Control Panel > System and Security > Windows Firewall. Select Allow an app or feature through Windows Firewall.
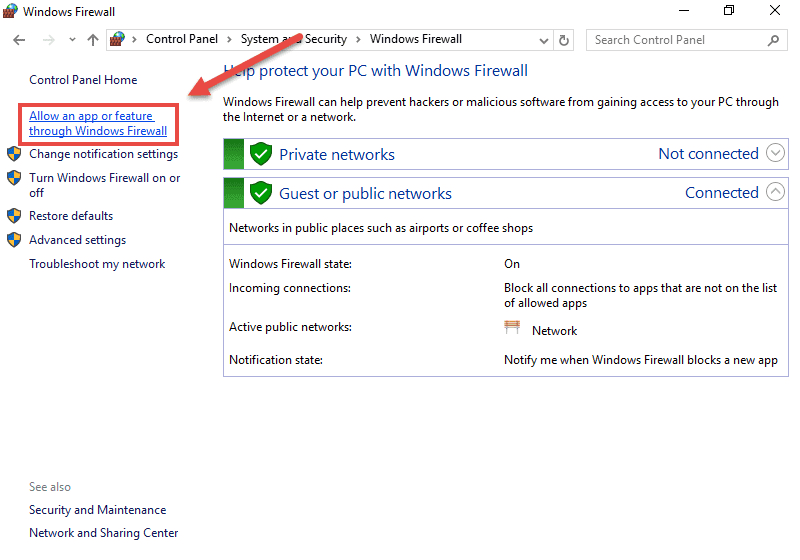
Click Change settings and set both checkboxes for VPNUnlimited and OpenVPN. Then click OK.
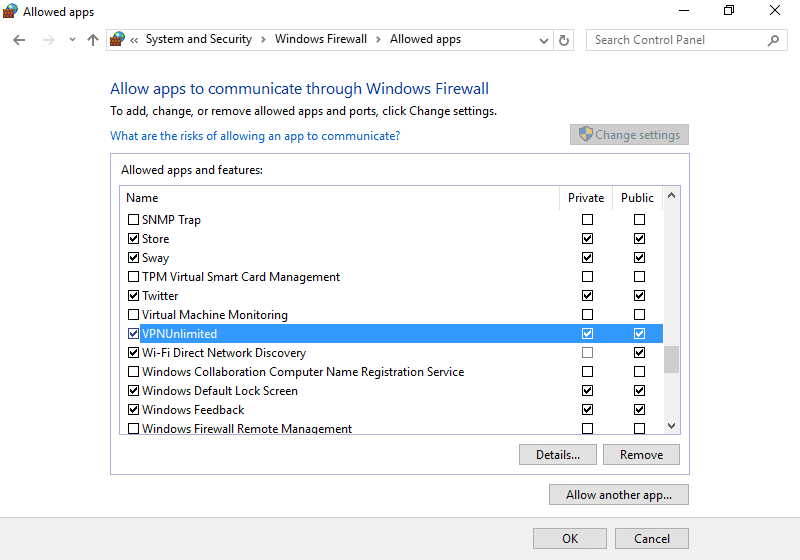
Now, VPN Unlimited is added to the Windows Firewall list of allowed apps.
3. How to Update VPN on Windows 10 OS
The program checks for updates automatically whenever starting. However, you can check for a new version of our VPN for Windows 10 manually: open VPN Unlimited, go to the app Menu, and select Check for update on the Information tab.
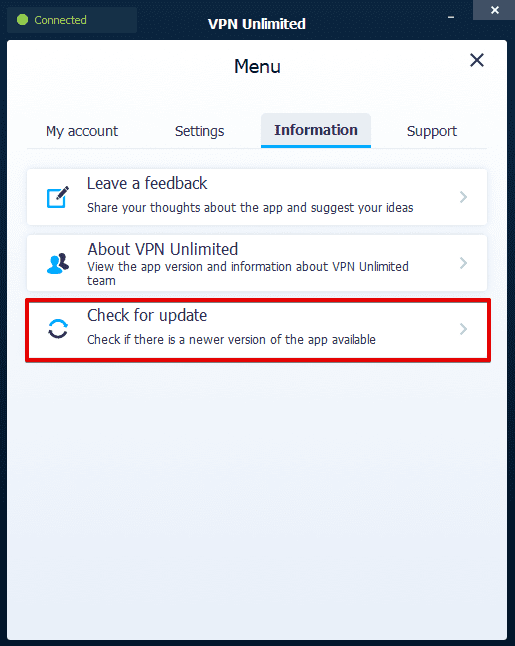
If a new version of the VPN app for Windows is available, you will be prompted to download and install it.
If an error occurs during the updating process, you will need to remove the application (the relevant instruction is below) and download the latest version from the website.
4. How to Enable a Secure Virtual Connection
To establish a secure VPN connection, first of all, you need to sign in to the VPN Unlimited app using your KeepSolid ID or log in using the Guest mode.
When you’re ready, navigate to the main screen and click the Start button.
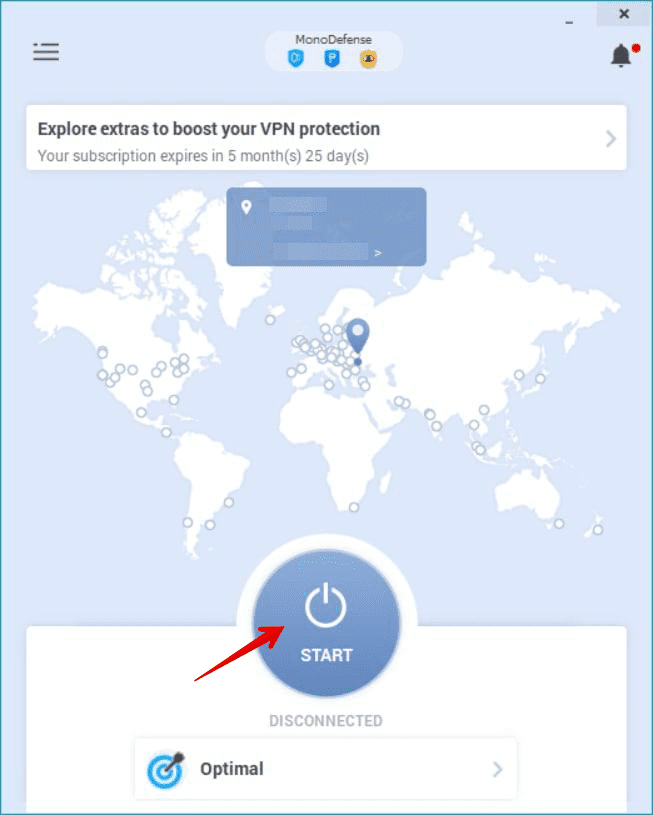
And before that, you can select the desired server location by clicking on the server you are currently using and choosing another one.
Also, you can choose which virtual protocol to use. To do that, go to Menu, open the Settings tab, click Protocols, and select the protocol that suits your needs. If you are not sure which protocol provides you with the best conditions, choose the Optimal one. Thus, our app automatically selects VPN protocol for your best performance.
5. How to Disable VPN on Windows 10
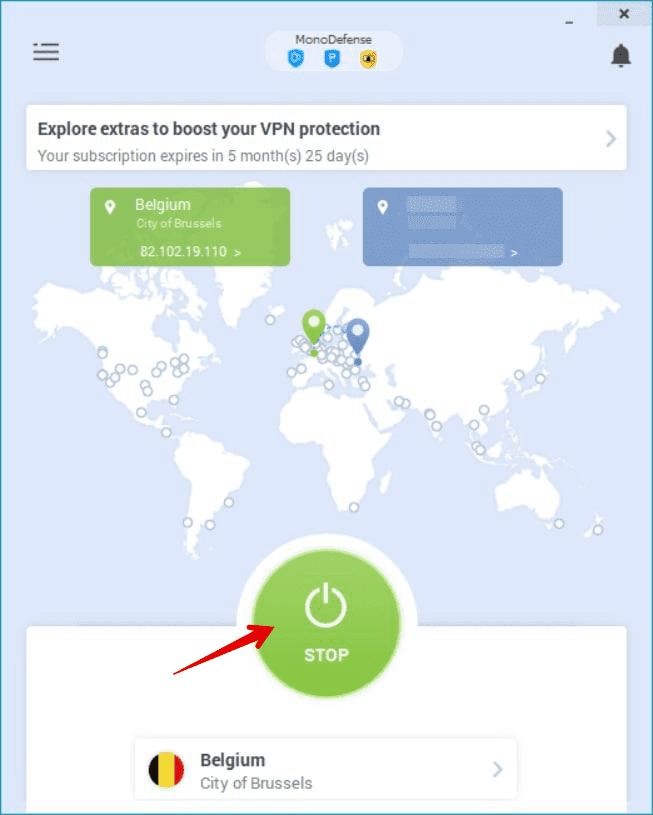
It’s a piece of cake! To disable VPN on Windows 10, go to the main screen and click the Stop button.
Sometimes you may face the following warning when trying to disable your VPN on Windows 10 device:
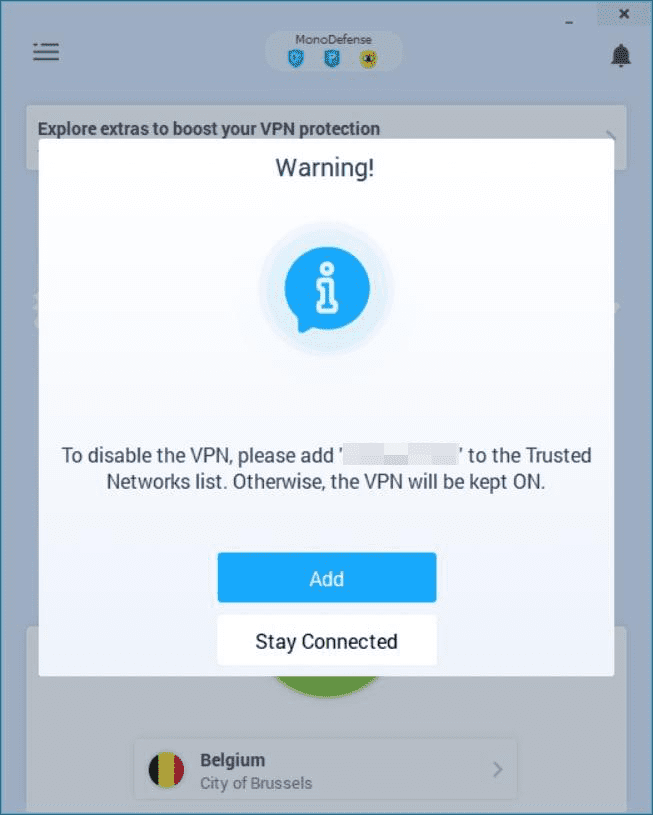
To solve this issue and disable your virtual connection, click Add, and thus, the network you’re currently connected to will be added to the Trusted Networks list.
Note: Be sure to add only the networks you consider completely secure to this list.
To manage your Trusted Networks list, navigate to Menu > Settings > Trusted Networks, and switch off the Disable VPN in whitelisted networks option. Thus, you never face this warning again. However, keep in mind that this feature aims to protect your sensitive data, online traffic, and real-life identity from being compromised by unauthorized users. Thus, weigh the pros and cons before disabling it.
6. How to Uninstall VPN on Windows 10
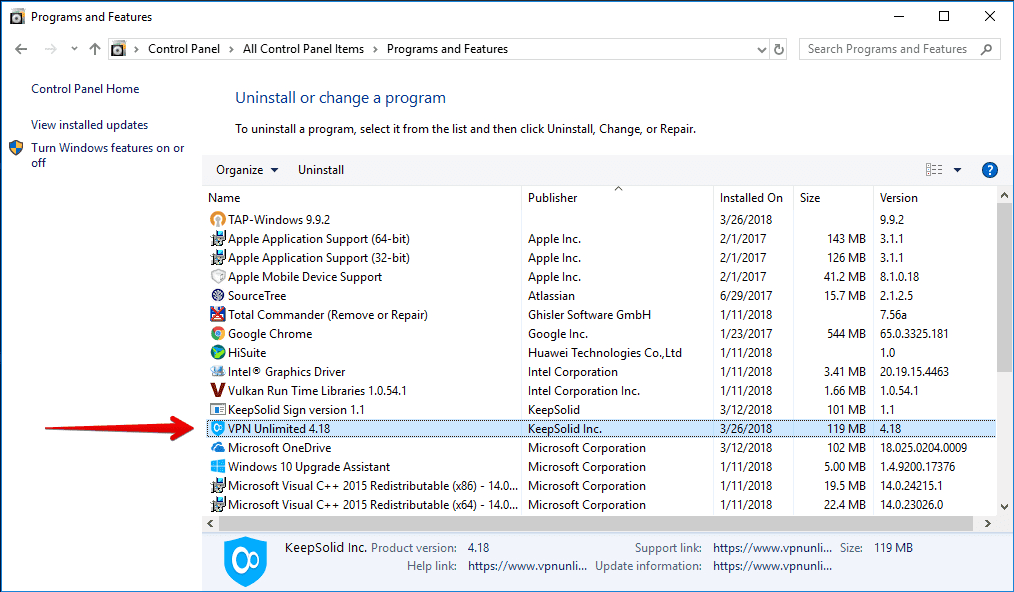
To remove the VPN Unlimited application, please go to Control Panel > Programs and Features. Select VPN Unlimited and click Uninstall.
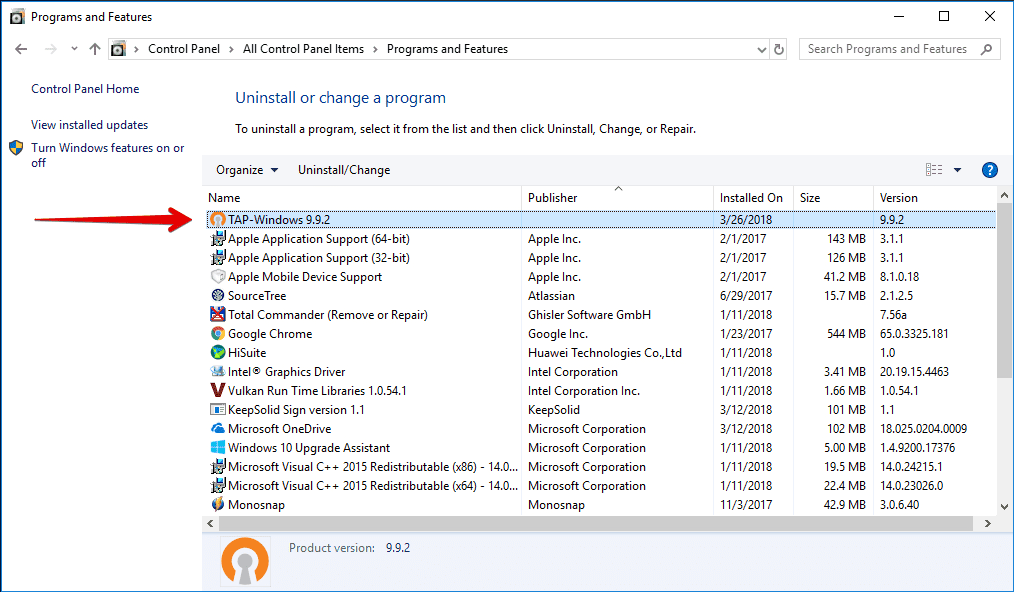
Then, do the same with TAP-Windows.
Now, VPN Unlimited is fully removed from your computer.
If you still have any questions on how to get a VPN on Windows 10, face any issues during the VPN app installation or removal processes, please feel free to contact our customer support team via [email protected]. We’ll gladly assist you anytime!
Make Sure No One Can Intercept Your Online Traffic
Download our best VPN for Windows 10 and protect your sensitive information with the AES-256 encryption standard!
Benefits of Using our Reliable Windows 10 VPN Client
Online privacy and security
VPN Unlimited negates any chances of any unauthorized parties intercepting, decrypting, and reading your online info. Thanks to the bulletproof AES 256-bit encryption, you can freely send any kind of data over the web without any worries.
1 account = 5/10 devices
With a single subscription, you can protect up to 5 or even 10 different devices, including macOS, iOS, Android, Windows, Linux, and even some browsers: Chrome, Firefox, Opera, and Edge. Furthermore, you can extend this amount to as many devices as you need.
3000+ VPN servers in 80+ locations
Our reliable Windows 10 VPN client allows you to virtually travel all around the world in a matter of seconds. How? VPN Unlimited changes your IP address to the IP of the chosen server. As a result, you can freely bypass any geo-restrictions and gain access to any online content you want.
It’s High Time to Try VPN Unlimited
Get our top-notch VPN application right now and enjoy a secure and private internet with absolutely no borders!