OpenVPN Client Configuration on GLiNet Router
Guide for VPN Unlimited users
How to Install VPN Unlimited on Different Platforms & Create KeepSolid ID
Detailed installation guides on different platforms:
- How to install VPN Unlimited on macOS 10.14 and higher (Standalone Version)
- How to install VPN Unlimited on macOS 10.14 and higher (App Store version)
- How to install and get started with VPN Unlimited on iOS
- How to install VPN Unlimited Application on Android
- How to install VPN Unlimited application on Windows XP SP3
- How to install VPN Unlimited Application on Windows 7
- How to set up VPN Unlimited Application on Windows 8/8.1
- How to Install and Get Started with VPN Unlimited App on Windows 10
- How to install VPN Unlimited on Linux
How to create a new KeepSolid ID
- After installing the VPN Unlimited app, you will see the line "Create KeepSolid ID", сlick on it to start the process.
- Enter your email address in the designated field.
- Create a password and enter it in the password field.
- Repeat your password in the provided field to confirm it.
- Check the box next to the statement "By continuing, you agree to our…".
- Tap the "Sign up" button to complete the registration.
Connecting to a VPN server for the first time, you will be requested to allow adding VPN configurations and downloading a VPN profile. For more details, please refer to the manuals provided above on how to install VPN Unlimited on different platforms.
Due to the OpenVPN® protocol strong features, ease of use, and extensive support, this protocol became one of the most popular VPN software solutions. To get more information about the OpenVPN protocol, check out our detailed article What is OpenVPN protocol.
This guide provides you with step-by-step instructions on how to set up and configure the OpenVPN protocol on GLiNet router.
Generate VPN Unlimited manual configurations
First you need to generate VPN configurations in your KeepSolid User Office and then configure your OpenVPN client on the GLiNet router. Please follow a few simple steps outlined in the tutorial about how to manually create VPN configurations and then follow instructions that are described below.
Important! Please note that you will need to configure your device using the generated settings by yourself at your own risk.
Configure OpenVPN Client on the GLiNet router
1. Open the GLiNet Admin Panel. For this, connect your device to the GLiNet router by using wired or wireless connection. Find the IP address on the bottom side of the router or follow instructions in this manual, type your router IP address in your browser address bar, and log in.
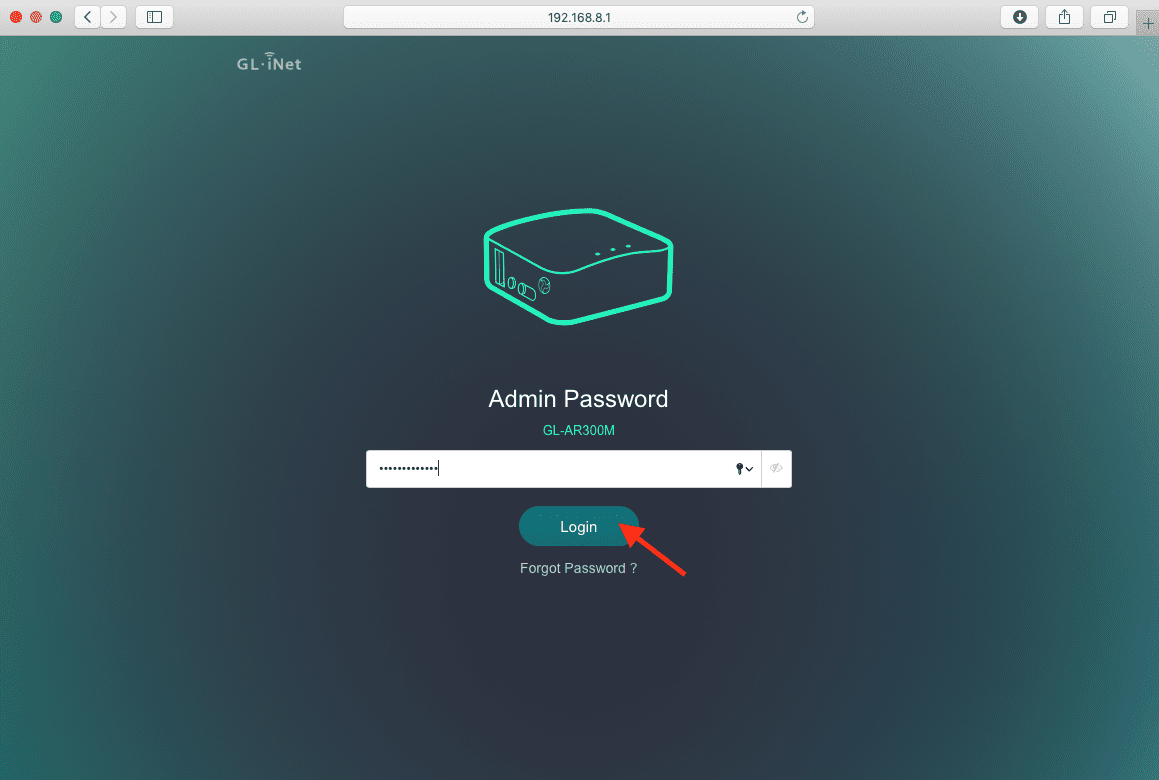
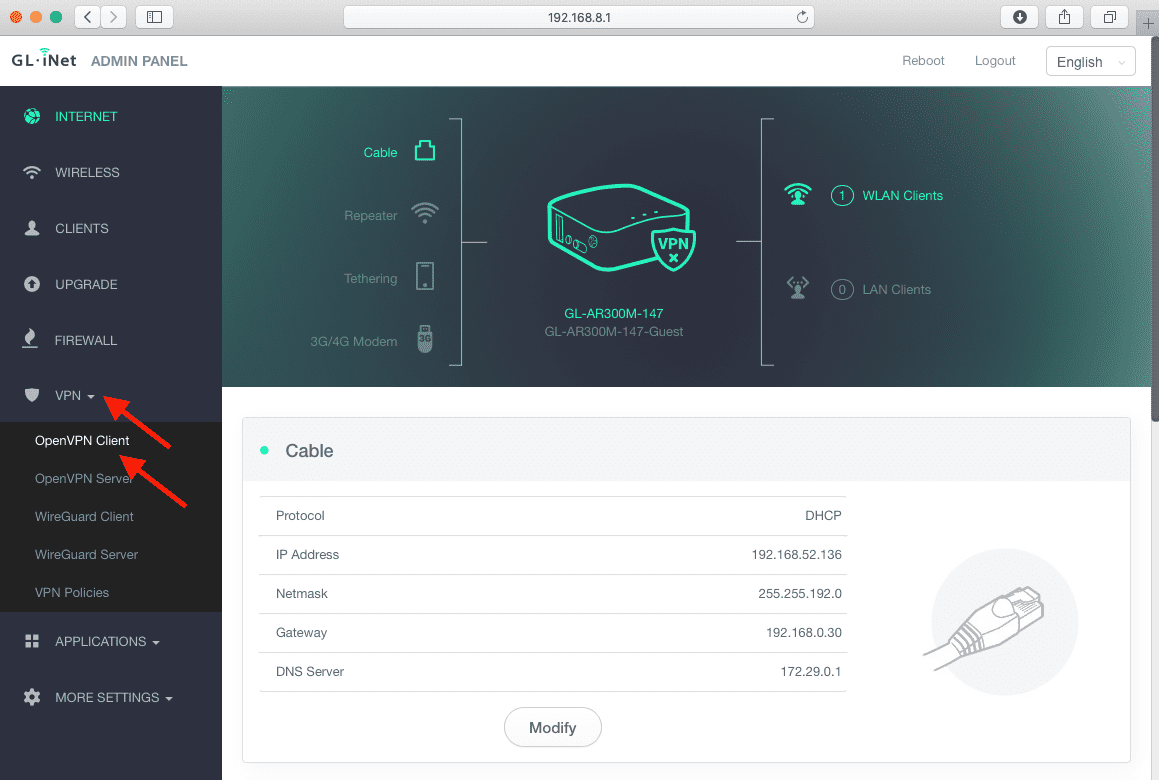
2. Select VPN and click OpenVPN Client.
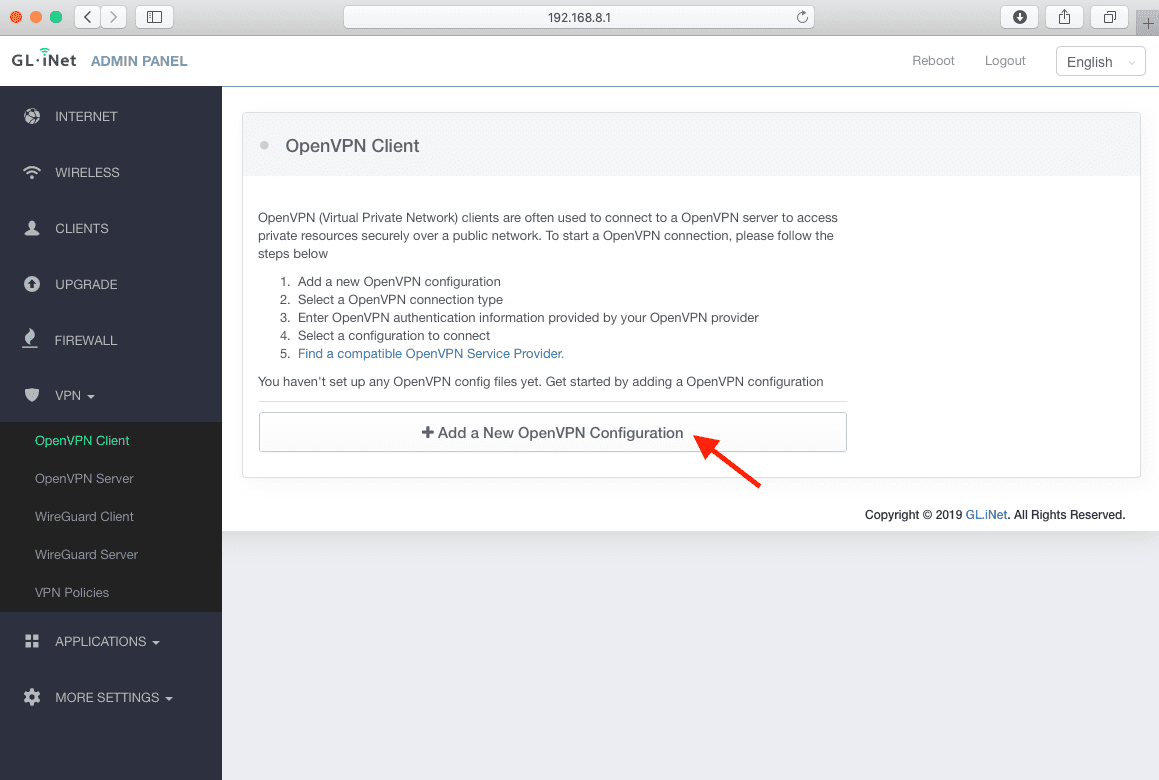
3. Click Add a New OpenVPN Configuration.
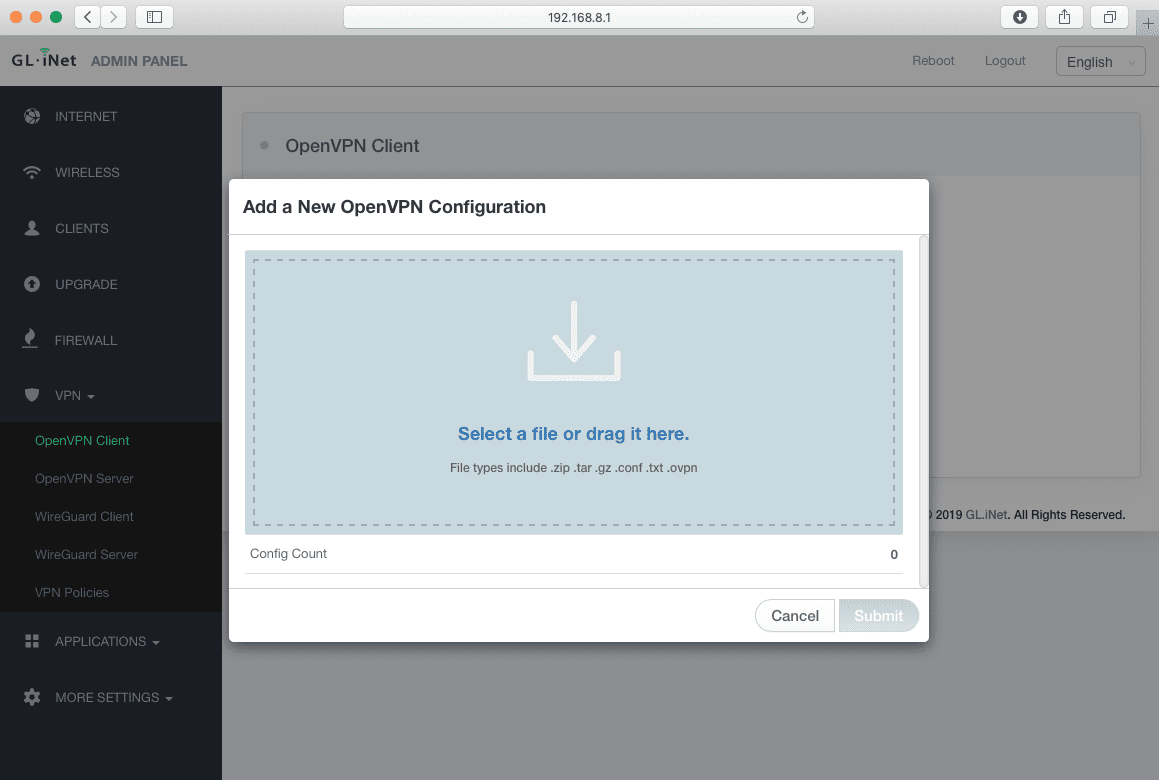
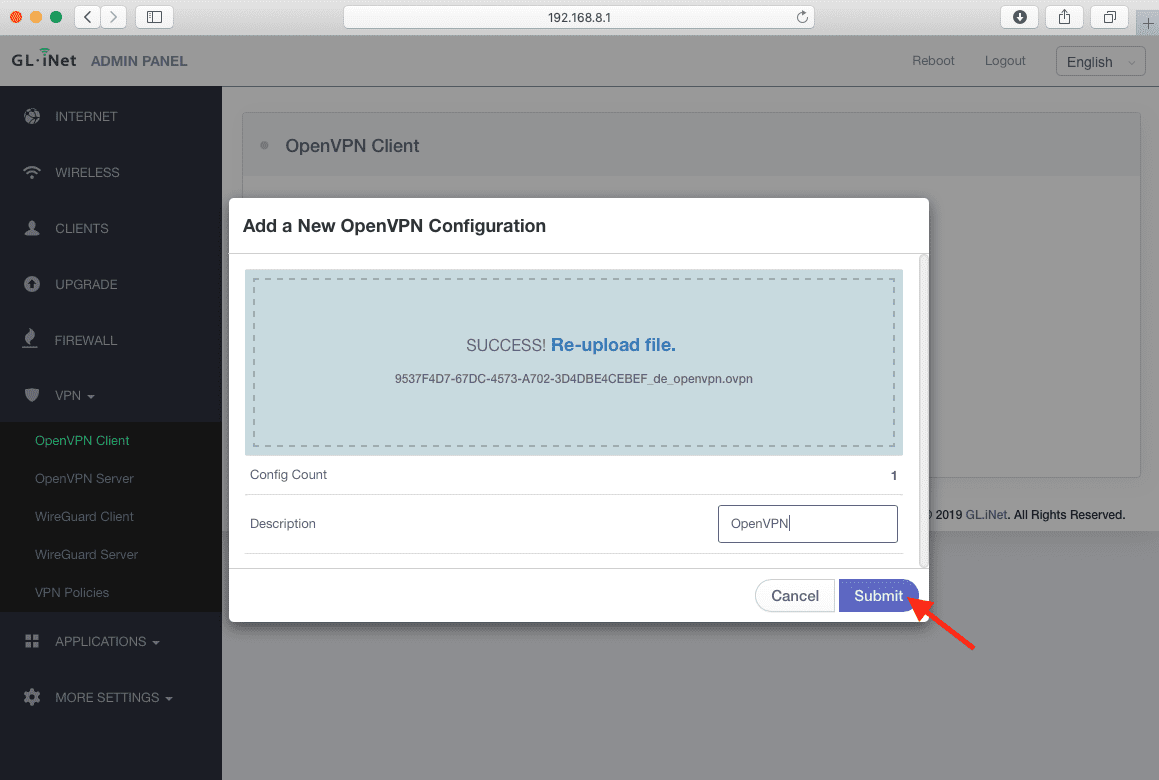
4. Select a file with manual configurations or drag it into the Add a New OpenVPN Configuration window. You’ve downloaded this file from your KeepSolid User Office earlier.
5. Fill in the Description field with the custom name of the new configuration, for example OpenVPN, and click Submit.
Connect to the VPN server on your GLiNet router
To establish a secure OpenVPN connection on the GLiNet router, select appropriate configuration from the drop-down menu in front of Current OpenVPN configuration.
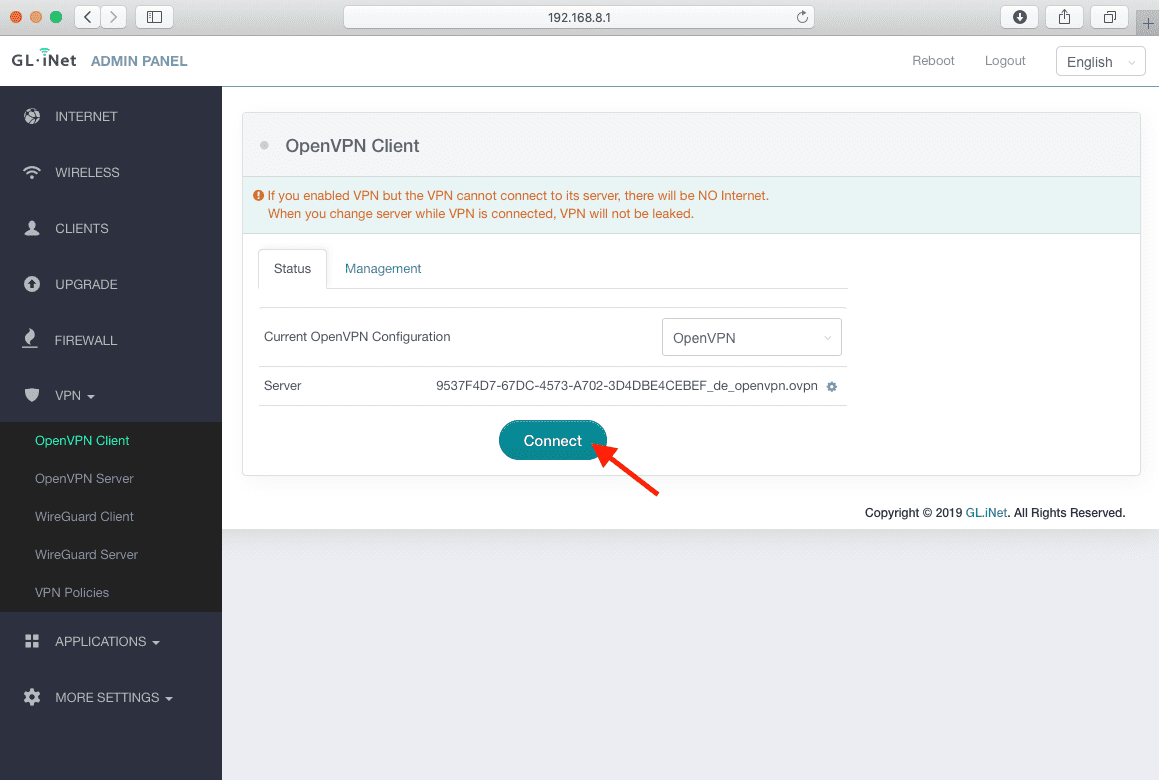
Well done! You’ve successfully set up OpenVPN connection on your GLiNet router. In case you have any questions or comments related to our security solution, don’t hesitate to contact our customer support via [email protected].
“OpenVPN” is a registered trademark of OpenVPN Inc.
Ready to give it a try?
Check VPN Unlimited subscriptions, select your perfect one, and make your online experience enjoyable and secure!