L2TP VPN Client Configuration on pfSense Router
for VPN Unlimited users
How to Install VPN Unlimited on Different Platforms & Create KeepSolid ID
Detailed installation guides on different platforms:
- How to install VPN Unlimited on macOS 10.14 and higher (Standalone Version)
- How to install VPN Unlimited on macOS 10.14 and higher (App Store version)
- How to install and get started with VPN Unlimited on iOS
- How to install VPN Unlimited Application on Android
- How to install VPN Unlimited application on Windows XP SP3
- How to install VPN Unlimited Application on Windows 7
- How to set up VPN Unlimited Application on Windows 8/8.1
- How to Install and Get Started with VPN Unlimited App on Windows 10
- How to install VPN Unlimited on Linux
How to create a new KeepSolid ID
- After installing the VPN Unlimited app, you will see the line "Create KeepSolid ID", сlick on it to start the process.
- Enter your email address in the designated field.
- Create a password and enter it in the password field.
- Repeat your password in the provided field to confirm it.
- Check the box next to the statement "By continuing, you agree to our…".
- Tap the "Sign up" button to complete the registration.
Connecting to a VPN server for the first time, you will be requested to allow adding VPN configurations and downloading a VPN profile. For more details, please refer to the manuals provided above on how to install VPN Unlimited on different platforms.
Check our comprehensive tutorial and figure out how to configure the L2TP VPN client on your pfSense router. To get more information about the L2TP protocol, check out our detailed article What is L2TP protocol.
Important! Please note that you will need to configure your device using the generated settings by yourself at your own risk.
I. Get L2TP VPN configurations for pfSense router
First of all, you need to generate manual configuration files in your KeepSolid User Office. To do that, follow a few simple steps described in the tutorial How to manually create VPN configurations.
As you are going to configure L2TP protocol on your pfSense router, select the L2TP/IPsec option in the Protocol field.
II. Set up L2TP VPN client on your pfSense router
Once you get all the required VPN configurations, follow the steps described below.
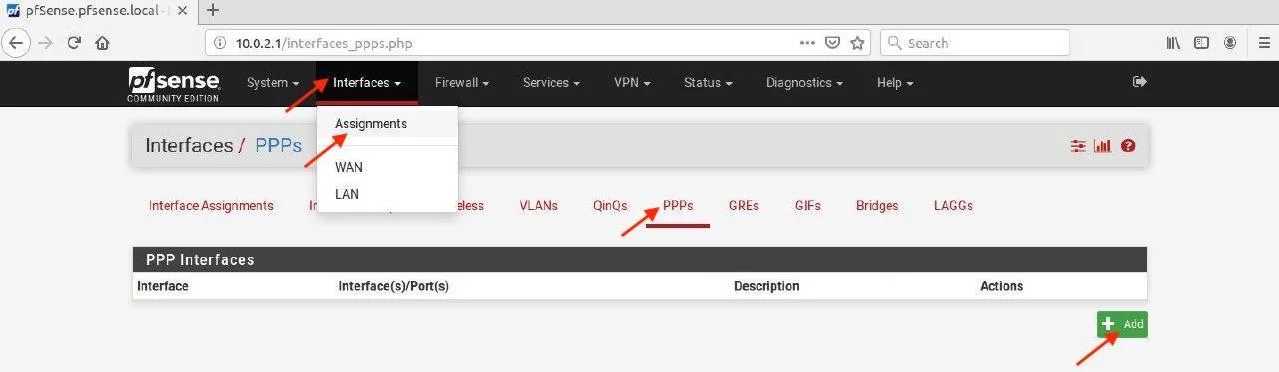
1. Navigate to the Interfaces tab > Assignments > PPPs and click +Add button.
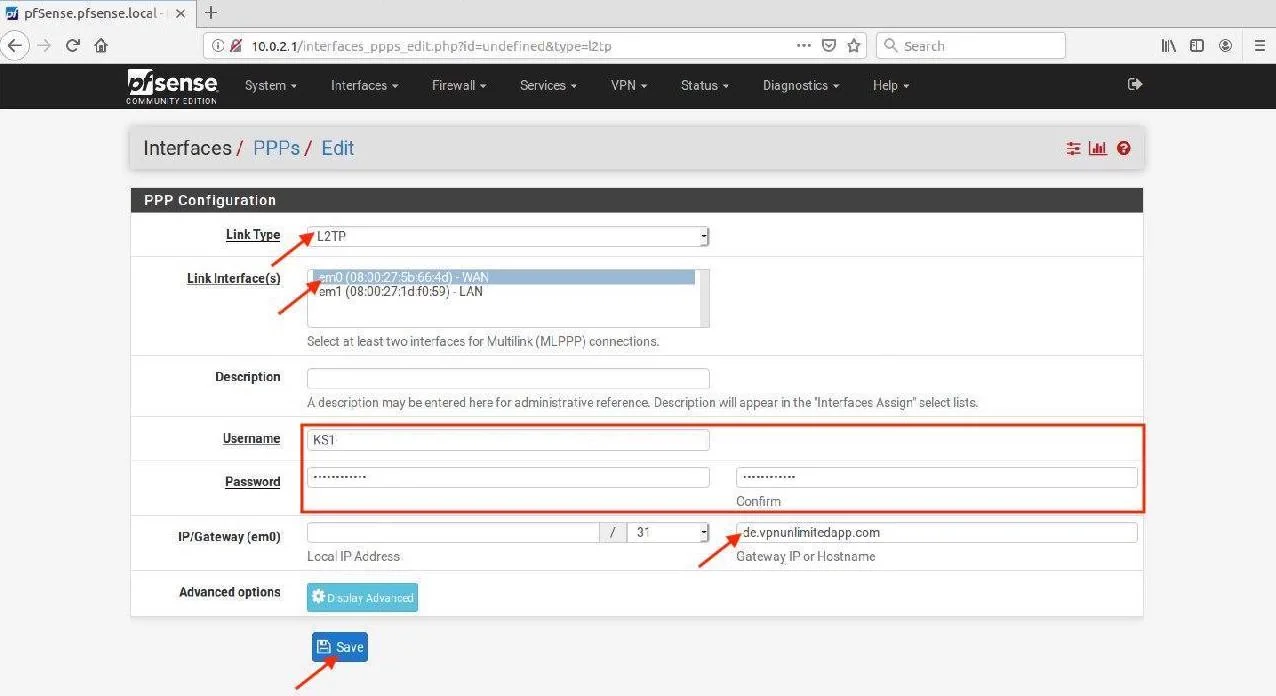
2. Configure the next parameters as follows:
- Link Type: choose L2TP
- Link Interface(s): select WAN
- Username: paste the Login from the user Office
- Password: paste the Password from the user Office
- IP/Gateway(em0): paste the Domain name from the user Office
Click Save.
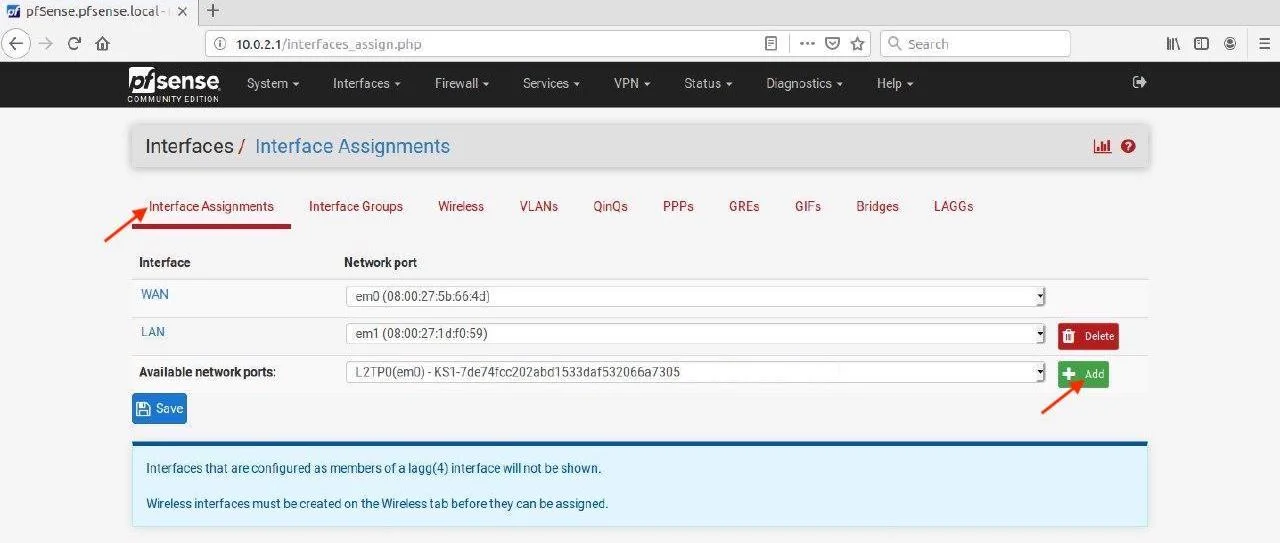
3. Go to the Interface Assignments tab, select L2TP option for Available network ports and click +Add.
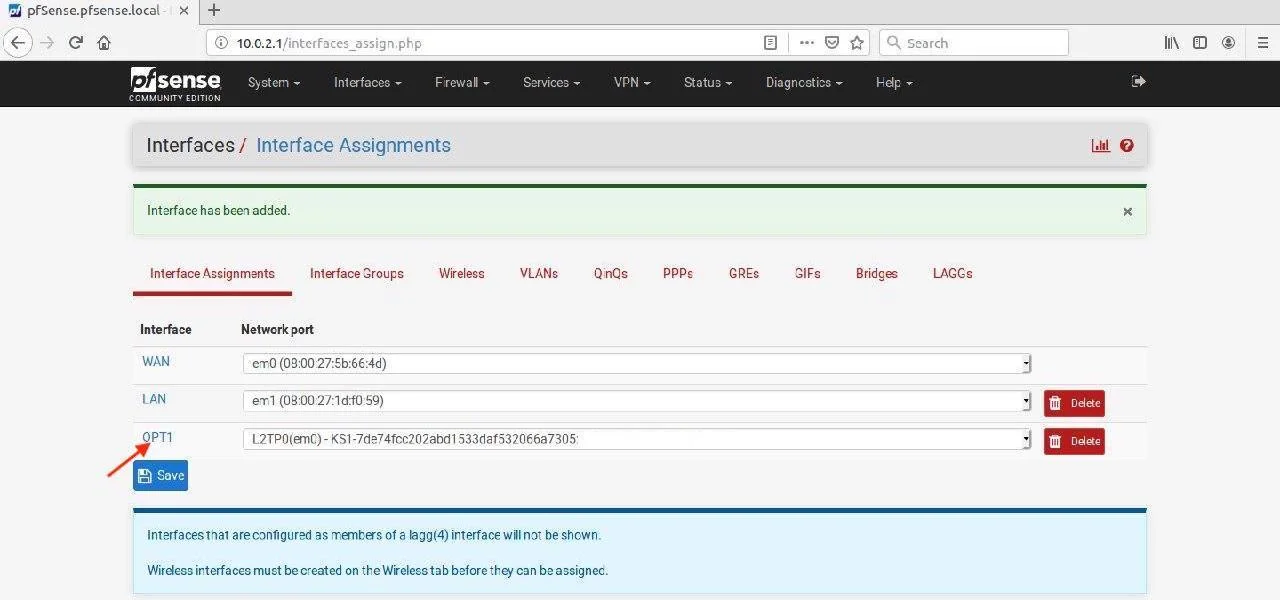
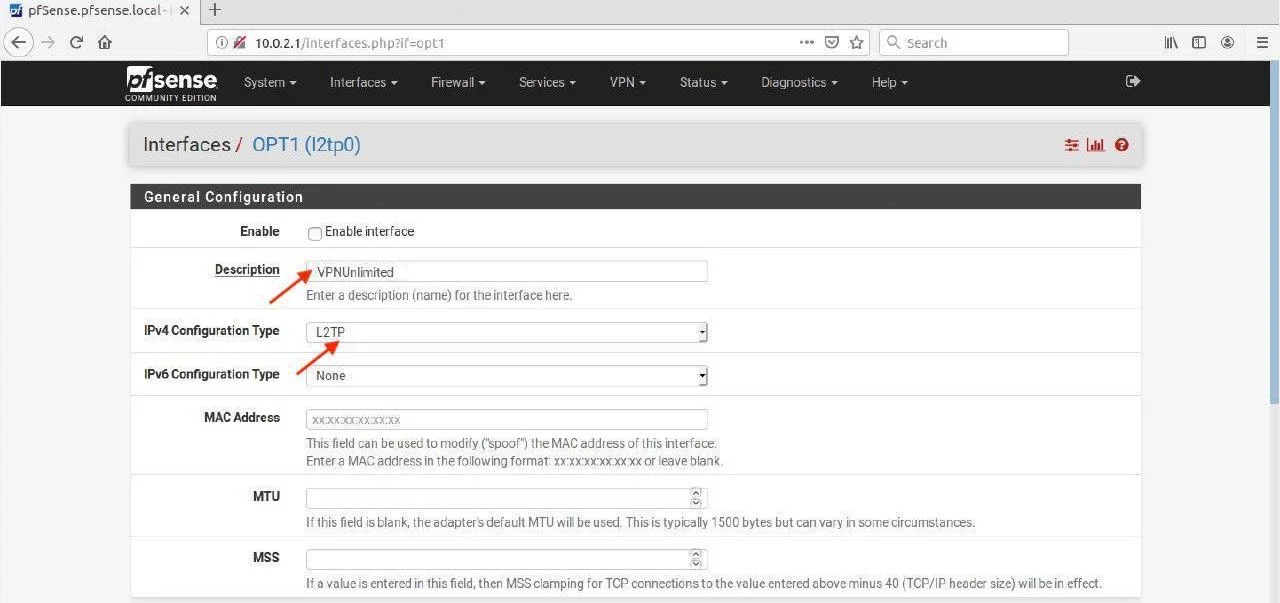
4. Click the OPT1 label.
5. Change the following parameters:
- Description: print VPNUnlimited
- IPv4 Configuration Type: select L2TP
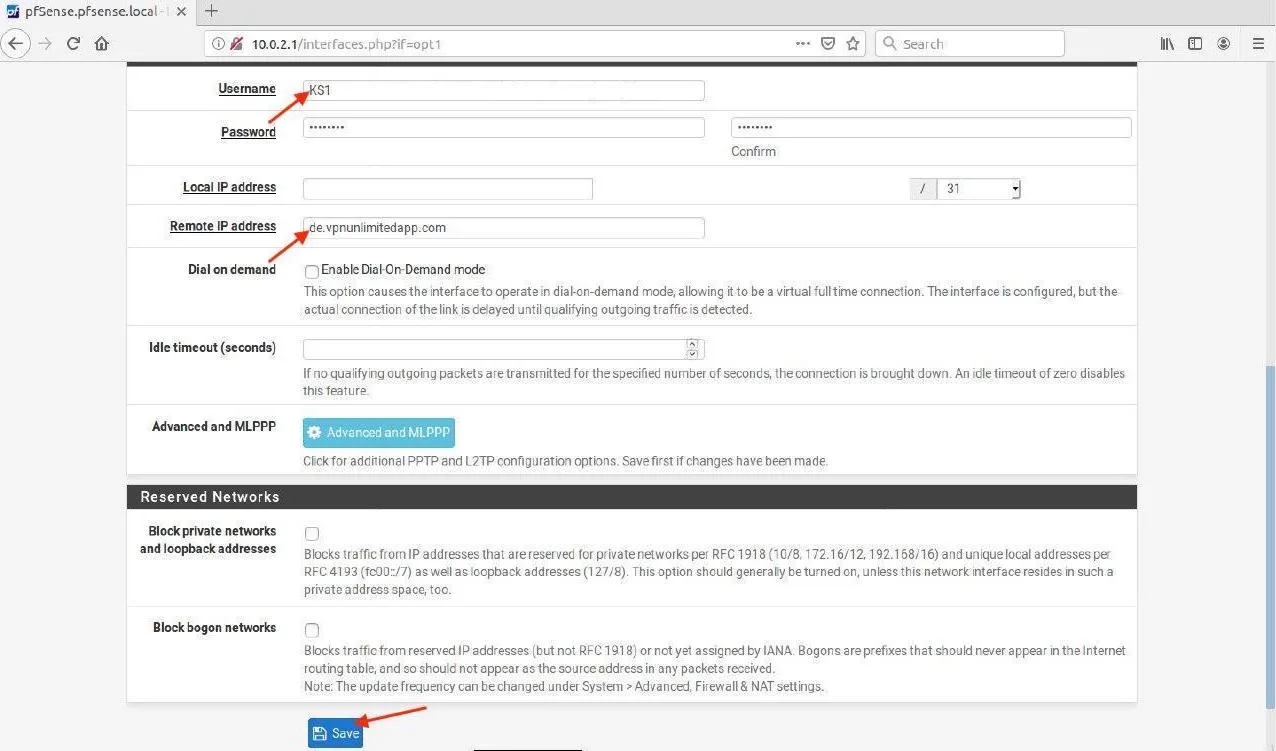
6. Check the Username and Remote IP address fields.
7. Click Save.
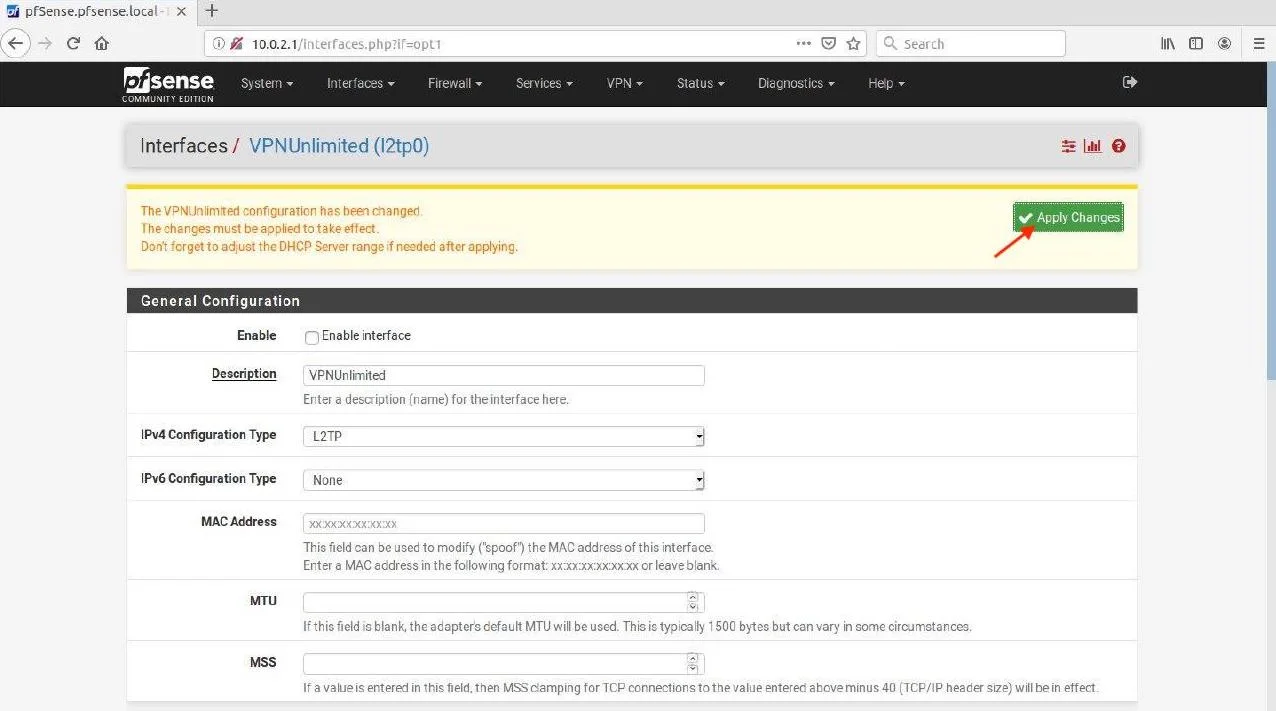
8. Press Apply Changes.
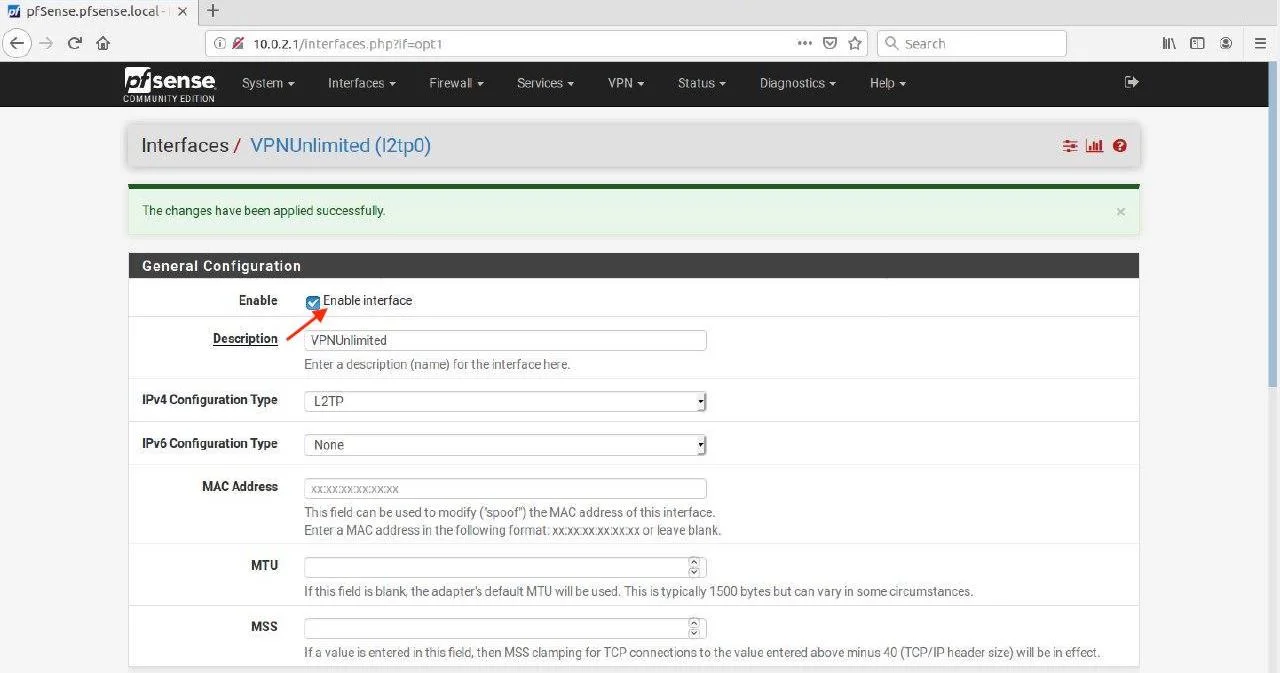
9. Check Enable interface and press Save > Apply Changes.
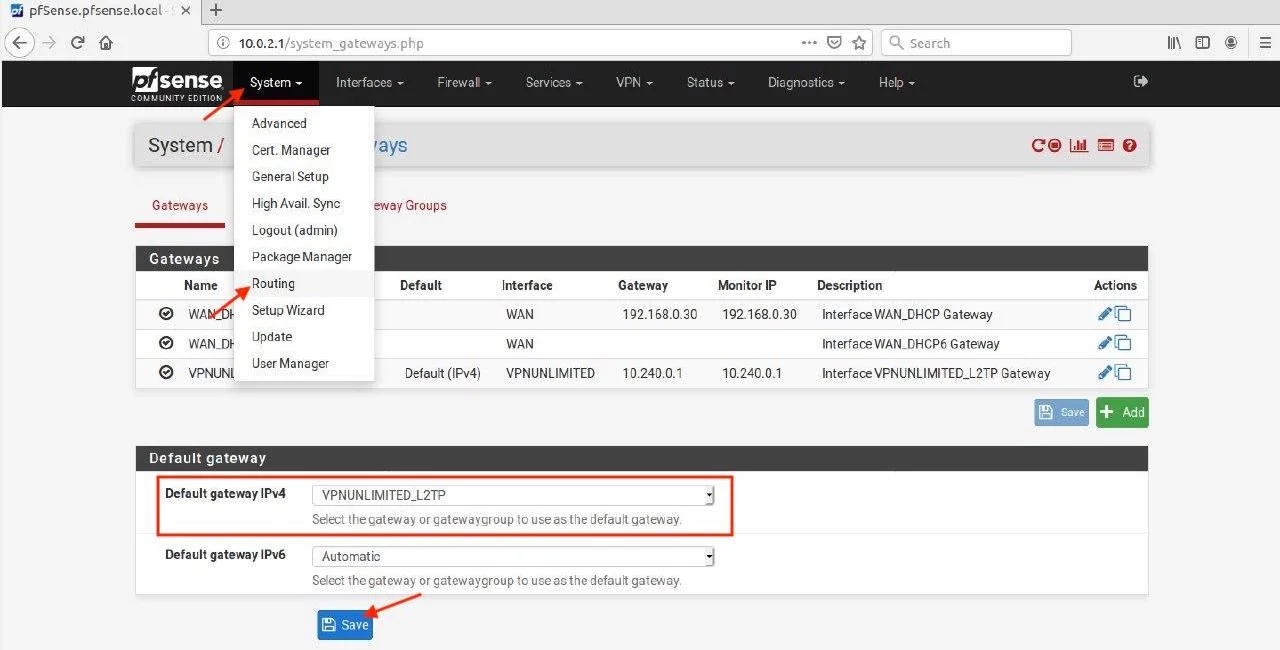
10. Go to the System tab > Routing and select VPNUNLIMITED_L2TP for the Default gateway IPv4 option.
11. Click Save.
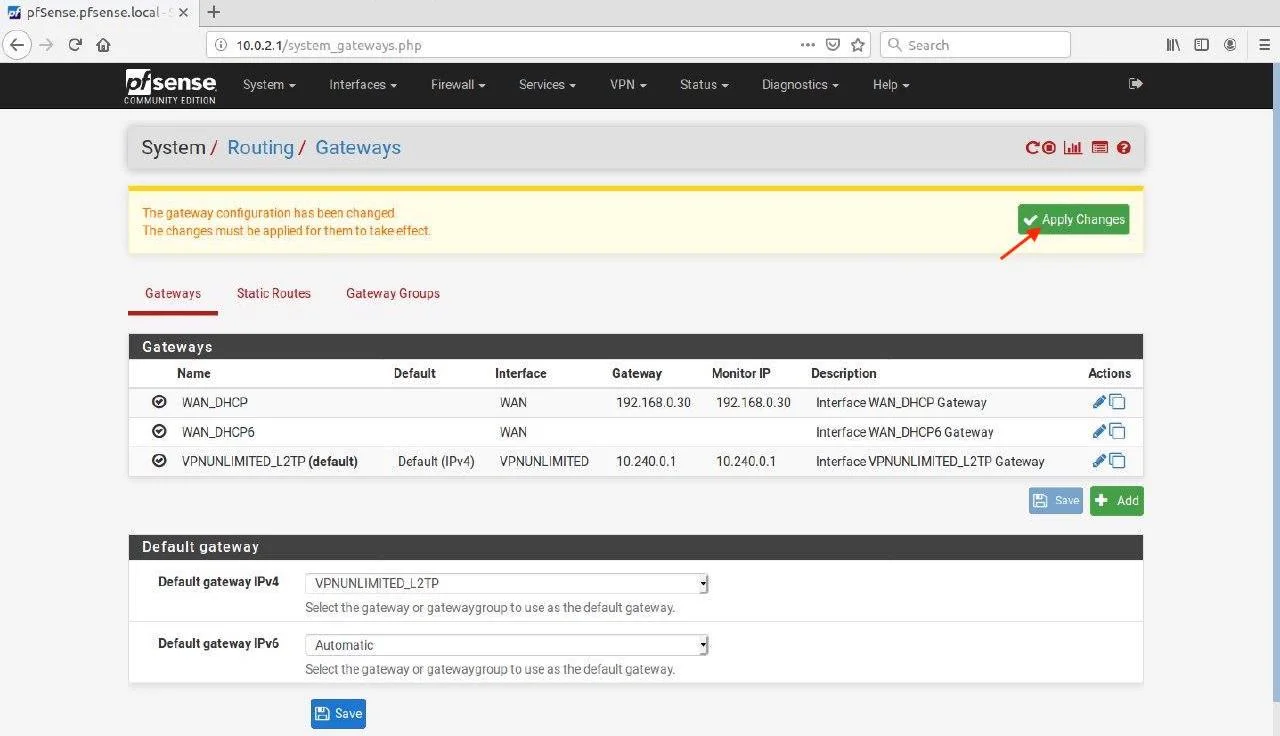
12. Press Apply Changes.
That’s it! You’ve successfully configured L2TP VPN connection on your pfSense router. In case you need to set up VPN on other devices, check out our Manuals page. If you need any assistance, please feel free to contact our customer support via [email protected].

Streamline your web experience, protect your sensitive data, and defend against online threats and hackers.


