WireGuard VPN Client Setup for OpenWrt router
for VPN Unlimited users
How to Install VPN Unlimited on Different Platforms & Create KeepSolid ID
Detailed installation guides on different platforms:
- How to install VPN Unlimited on macOS 10.14 and higher (Standalone Version)
- How to install VPN Unlimited on macOS 10.14 and higher (App Store version)
- How to install and get started with VPN Unlimited on iOS
- How to install VPN Unlimited Application on Android
- How to install VPN Unlimited application on Windows XP SP3
- How to install VPN Unlimited Application on Windows 7
- How to set up VPN Unlimited Application on Windows 8/8.1
- How to Install and Get Started with VPN Unlimited App on Windows 10
- How to install VPN Unlimited on Linux
How to create a new KeepSolid ID
- After installing the VPN Unlimited app, you will see the line "Create KeepSolid ID", сlick on it to start the process.
- Enter your email address in the designated field.
- Create a password and enter it in the password field.
- Repeat your password in the provided field to confirm it.
- Check the box next to the statement "By continuing, you agree to our…".
- Tap the "Sign up" button to complete the registration.
Connecting to a VPN server for the first time, you will be requested to allow adding VPN configurations and downloading a VPN profile. For more details, please refer to the manuals provided above on how to install VPN Unlimited on different platforms.
WireGuard® is a new open-source VPN protocol that provides bulletproof privacy and security. To get more information about the WireGuard protocol, check out our detailed article What is WireGuard protocol.
With our detailed instructions, you’ll learn how to configure the WireGuard VPN client on your OpenWrt router with 19.07. and 21.02. firmware. TP-Link TL-WR841N router was taken as an example.
Note: To set up a WireGuard VPN Client on your router you should install the latest OpenWrt firmware.
Important! Please note that you will need to configure your device using the generated settings by yourself at your own risk.
I. Get manual configurations for your OpenWrt router
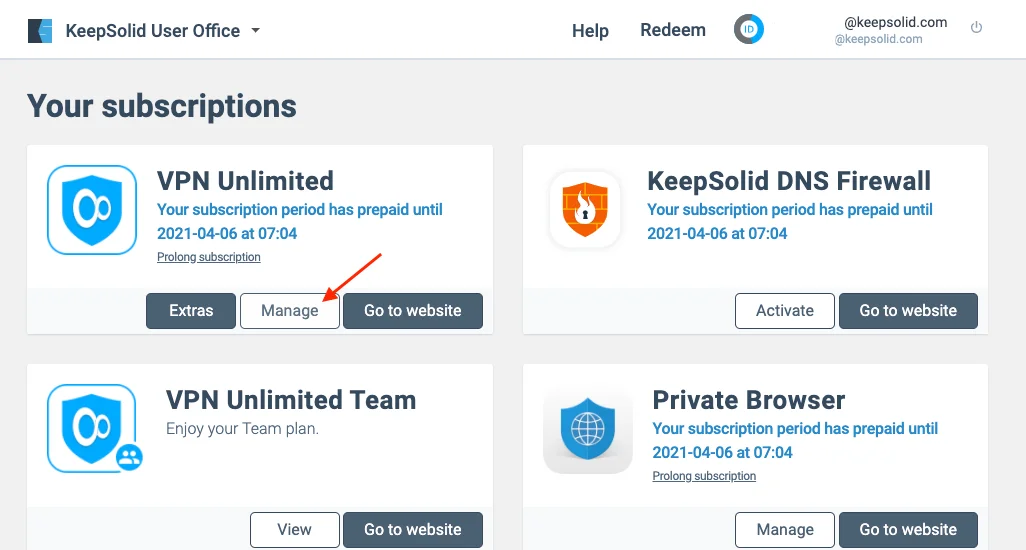
1. Sign in to your User Office, select the VPN Unlimited application, and click Manage.
2. Pick a device from the list or create a new one. Then choose the appropriate location of the Server and select the WireGuard protocol from the dropdown menu.
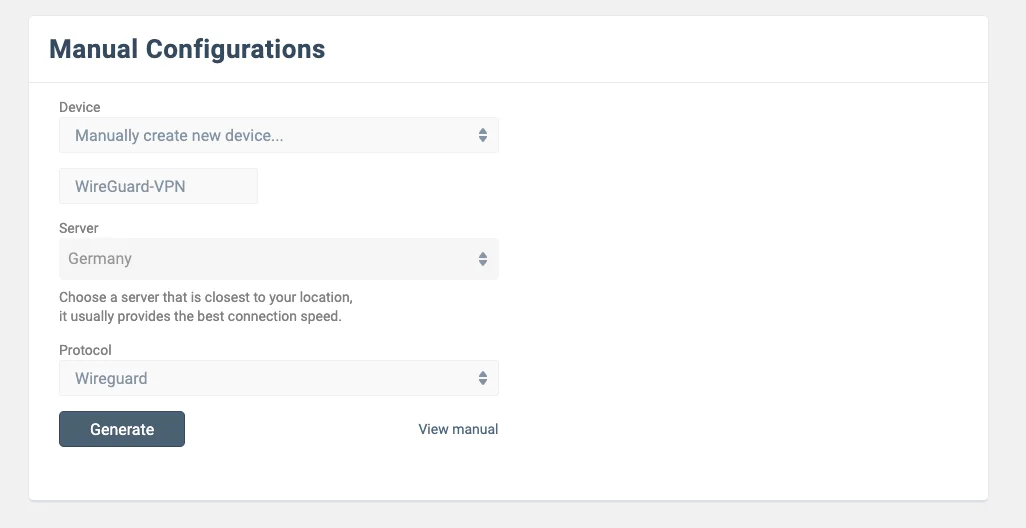
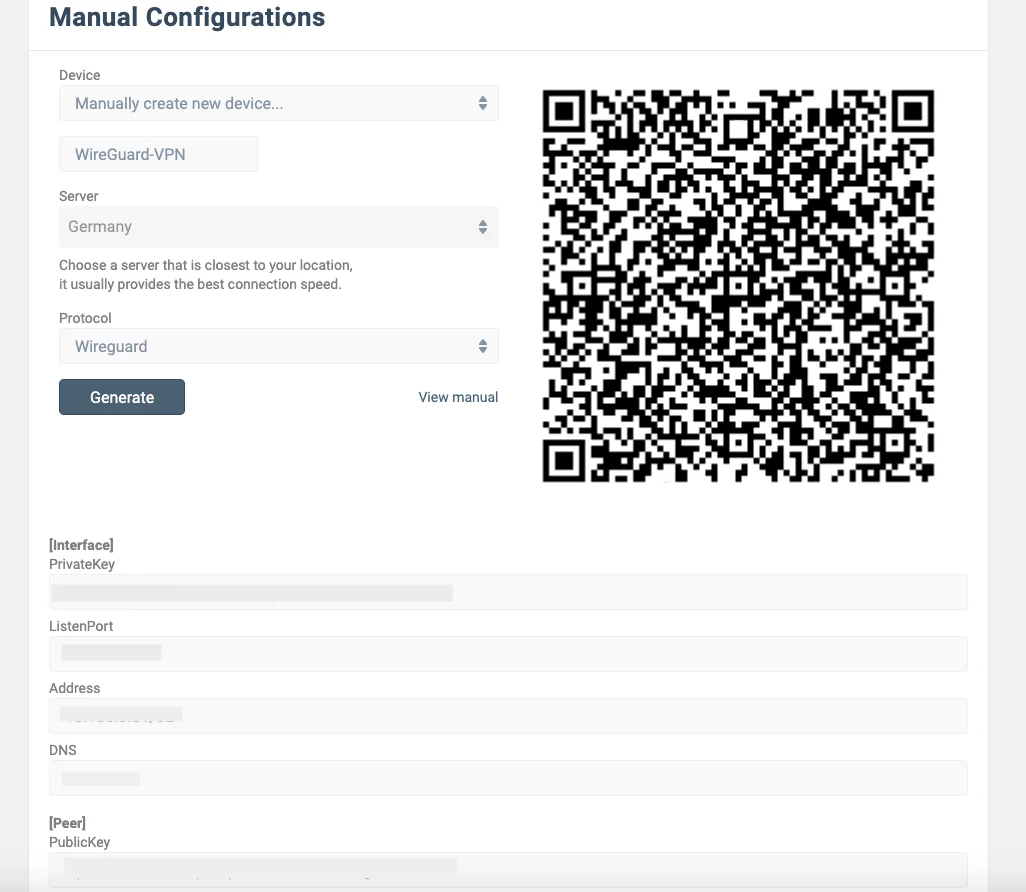
3. Press Generate and you will get all the data required to set up a VPN connection.
II. Configure WireGuard VPN Client on your OpenWrt router
1. Install the Wireguard packages
1. Connect your device to the OpenWrt router and type the IP-address of the admin panel in the address line of the browser. The default IP-address of the router is 192.168.1.1.
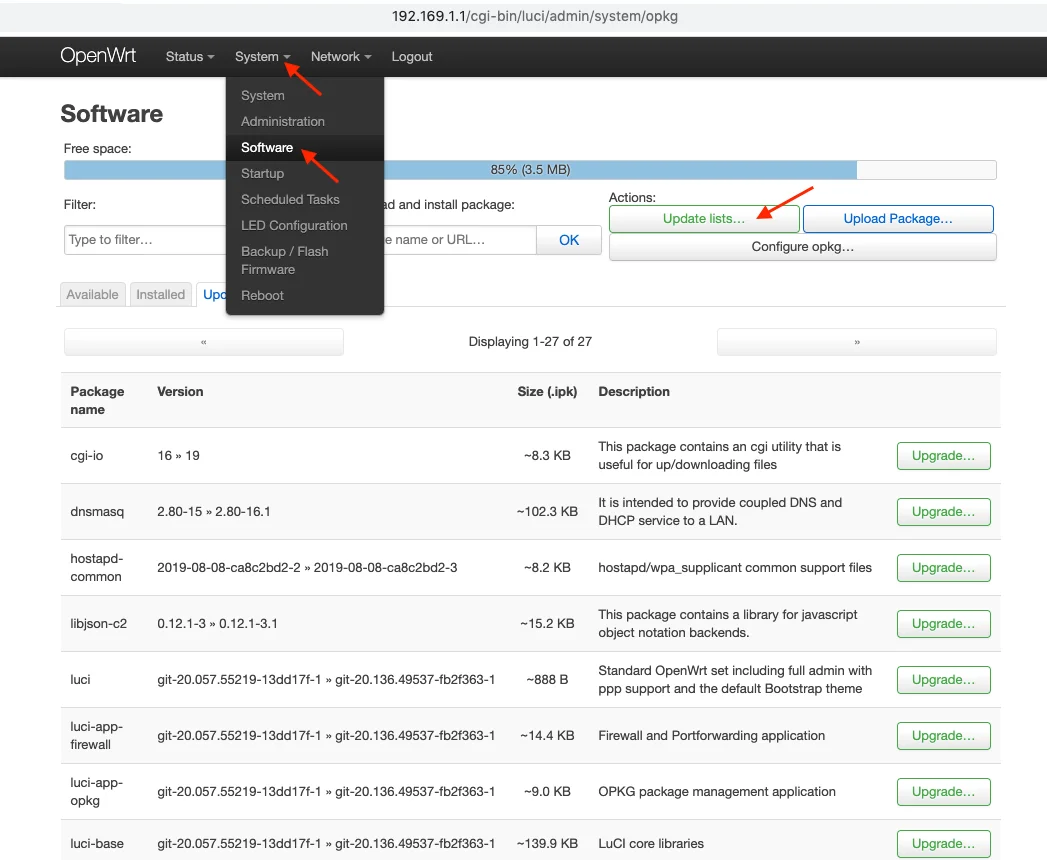
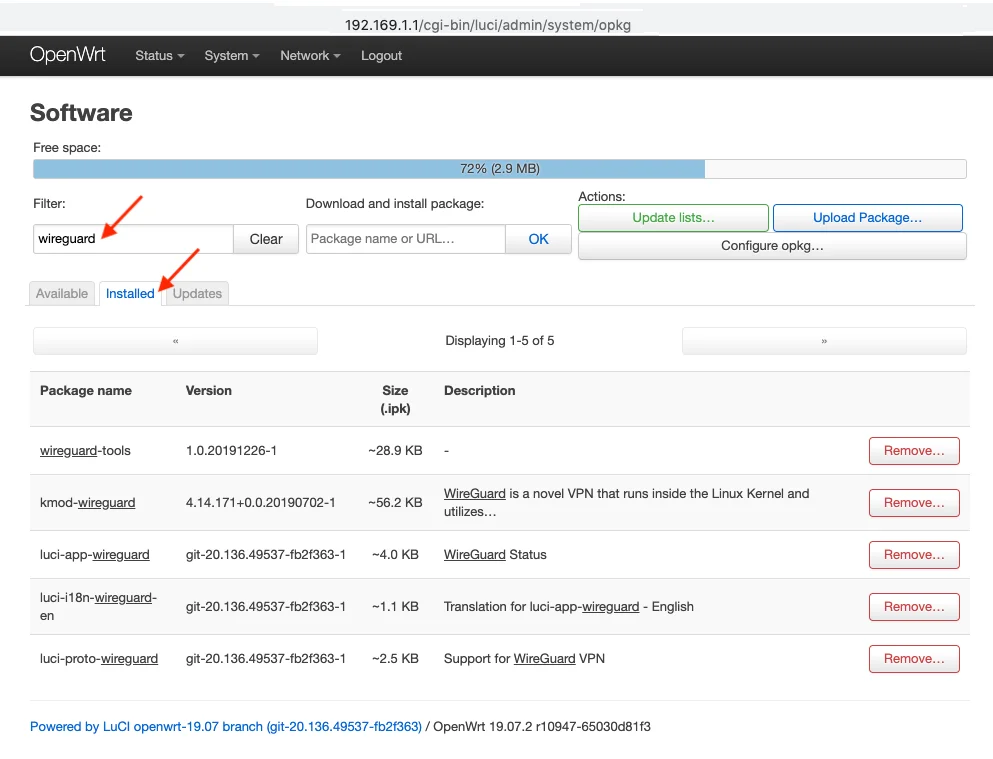
2. Go to the System > Software.
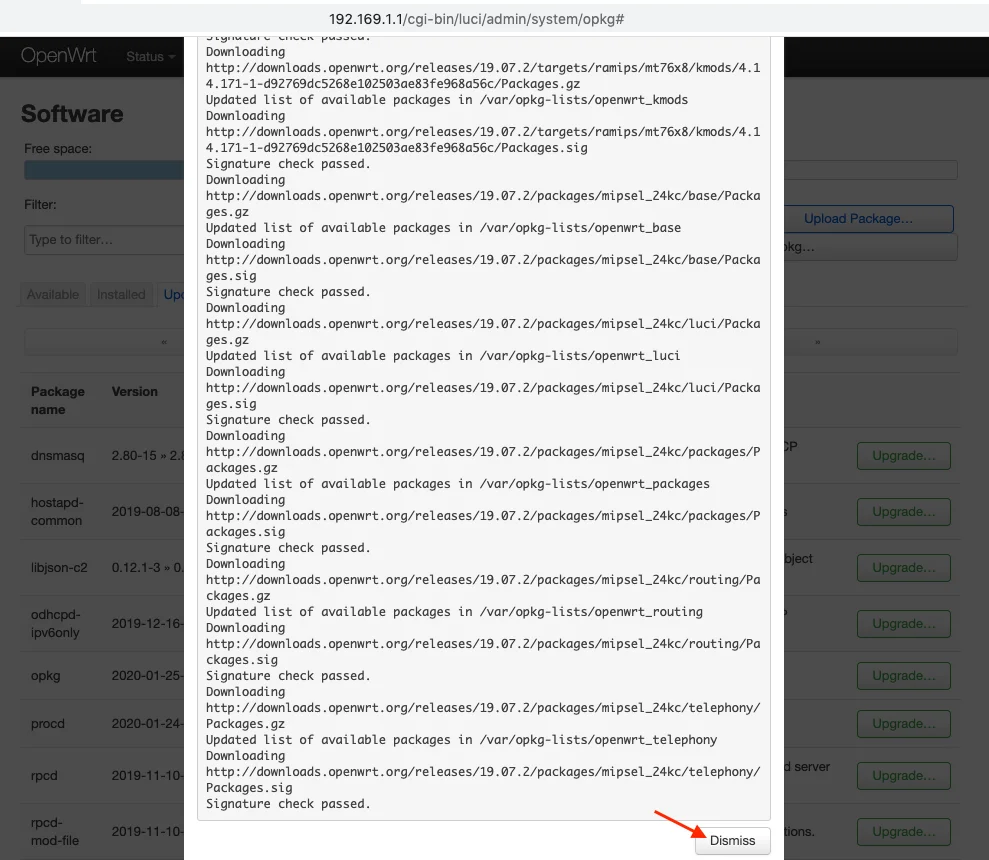
3. Press Update Lists and wait for a moment. Scroll down the page and press Dismiss.
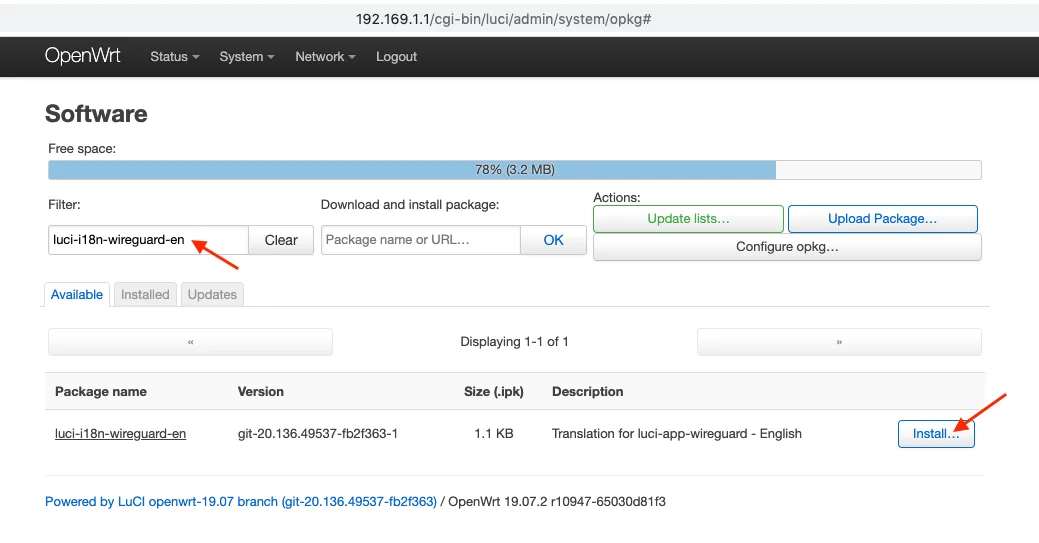
4. Paste luci-i18n-wireguard-en in the Search field and press Install.
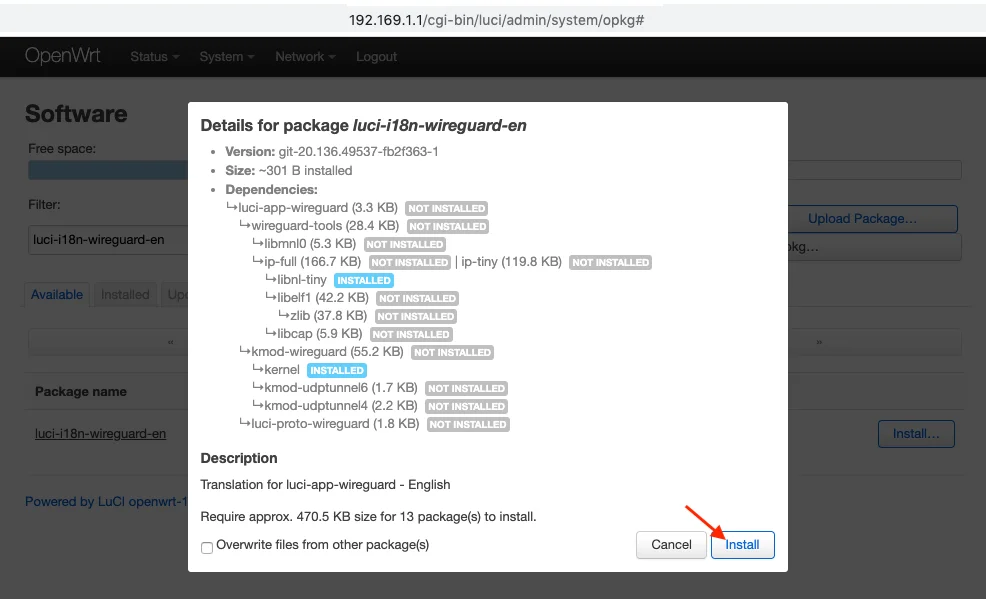
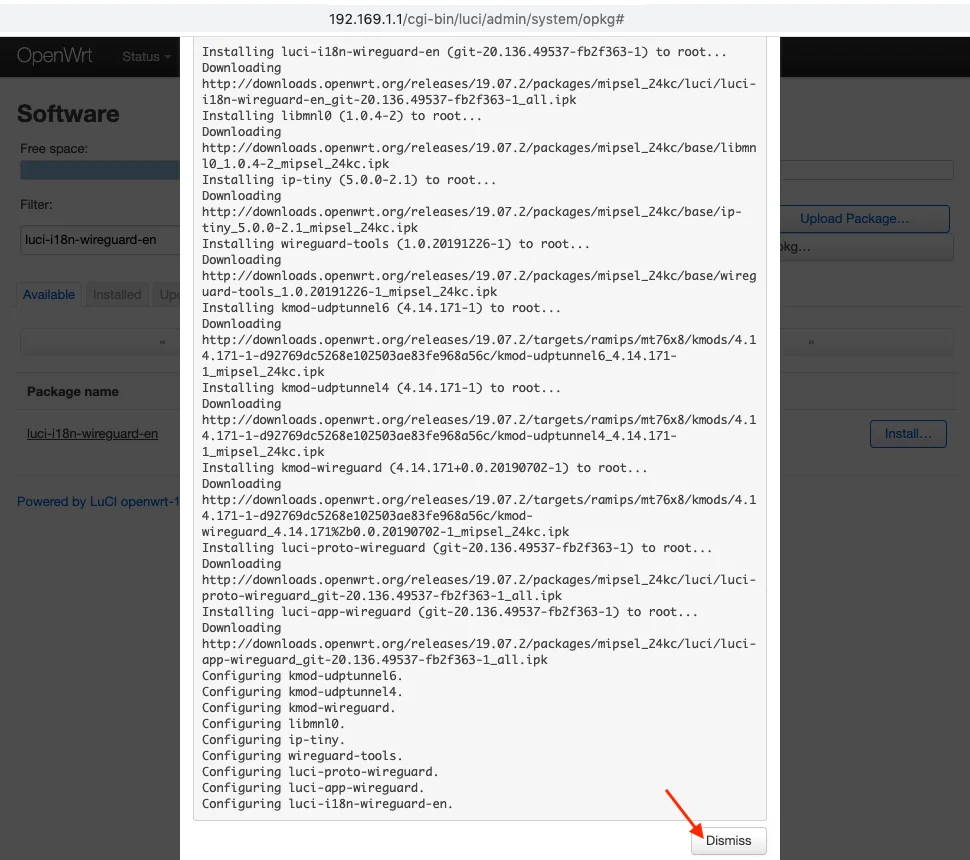
5. Click Install. Scroll down the page and press Dismiss.
6. Go to the Installed tab, print wireguard in the Search field, and check if the following packages were successfully installed:
- wireguard-tools
- kmod-wireguard
- luci-app-wireguard
- luci-i18n-wireguard-en
- luci-proto-wireguard
7. To apply the changes, go to the Status tab and reboot your router.
2. Create the WireGuard interface
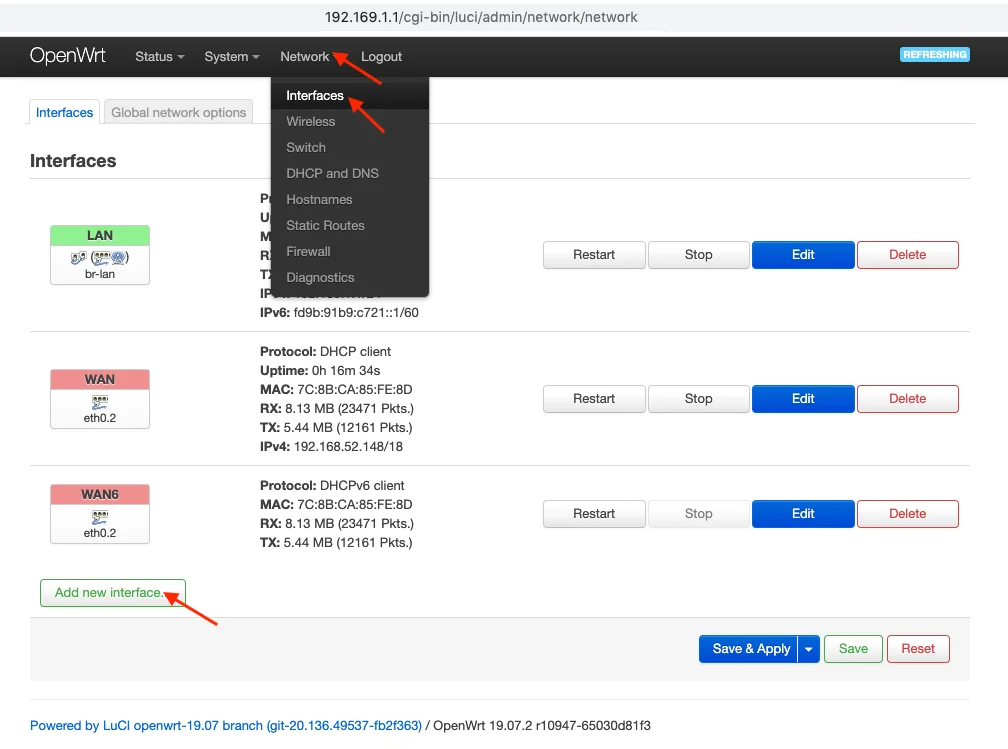
1. Go to the Network tab > Interfaces > Add New Interface.
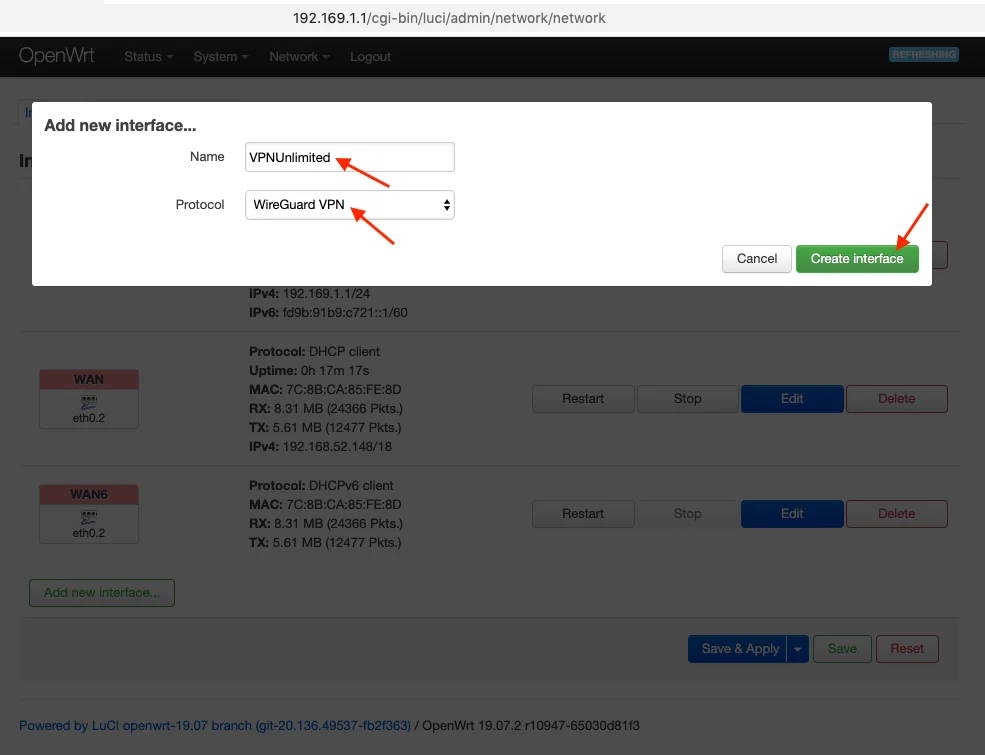
2. Set it’s custom name, for example VPNUnlimited and choose the Wireguard protocol. Press Create Interface.
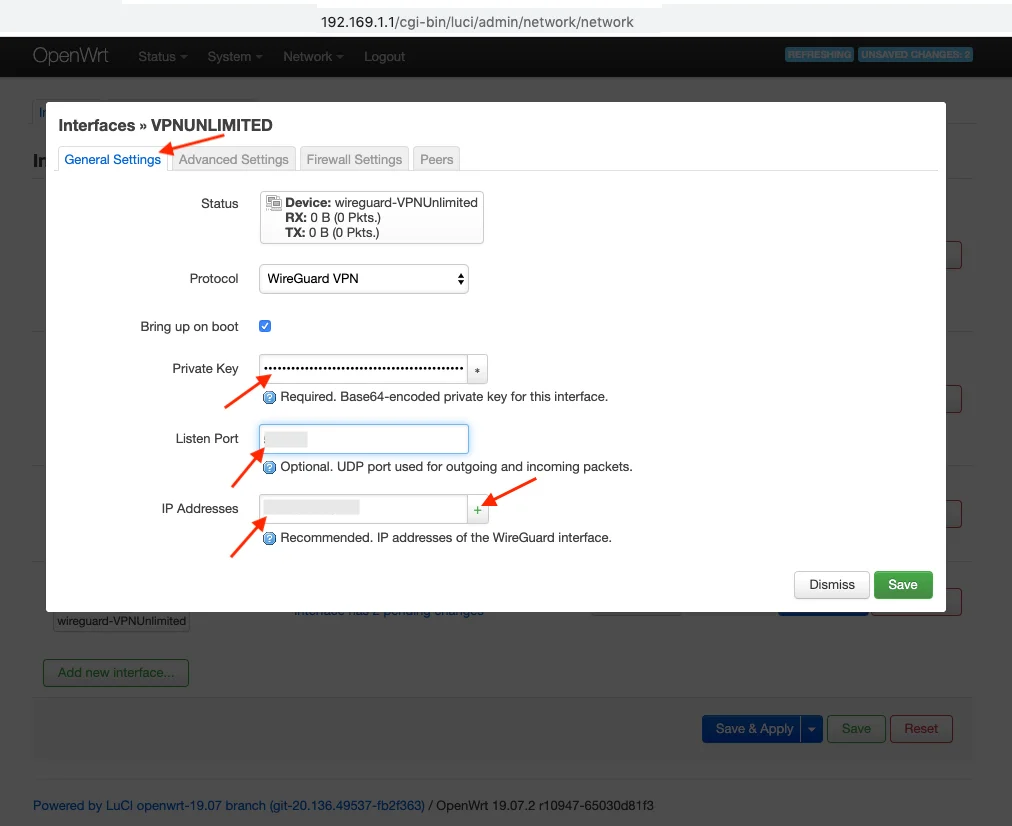
3. Select General Settings and paste the details of the manual configuration settings you’ve generated before:
- PrivateKey = paste the PrivateKey from your User Office
- ListenPort = paste the ListenPort details
- IP Addresses = paste Address information and press +
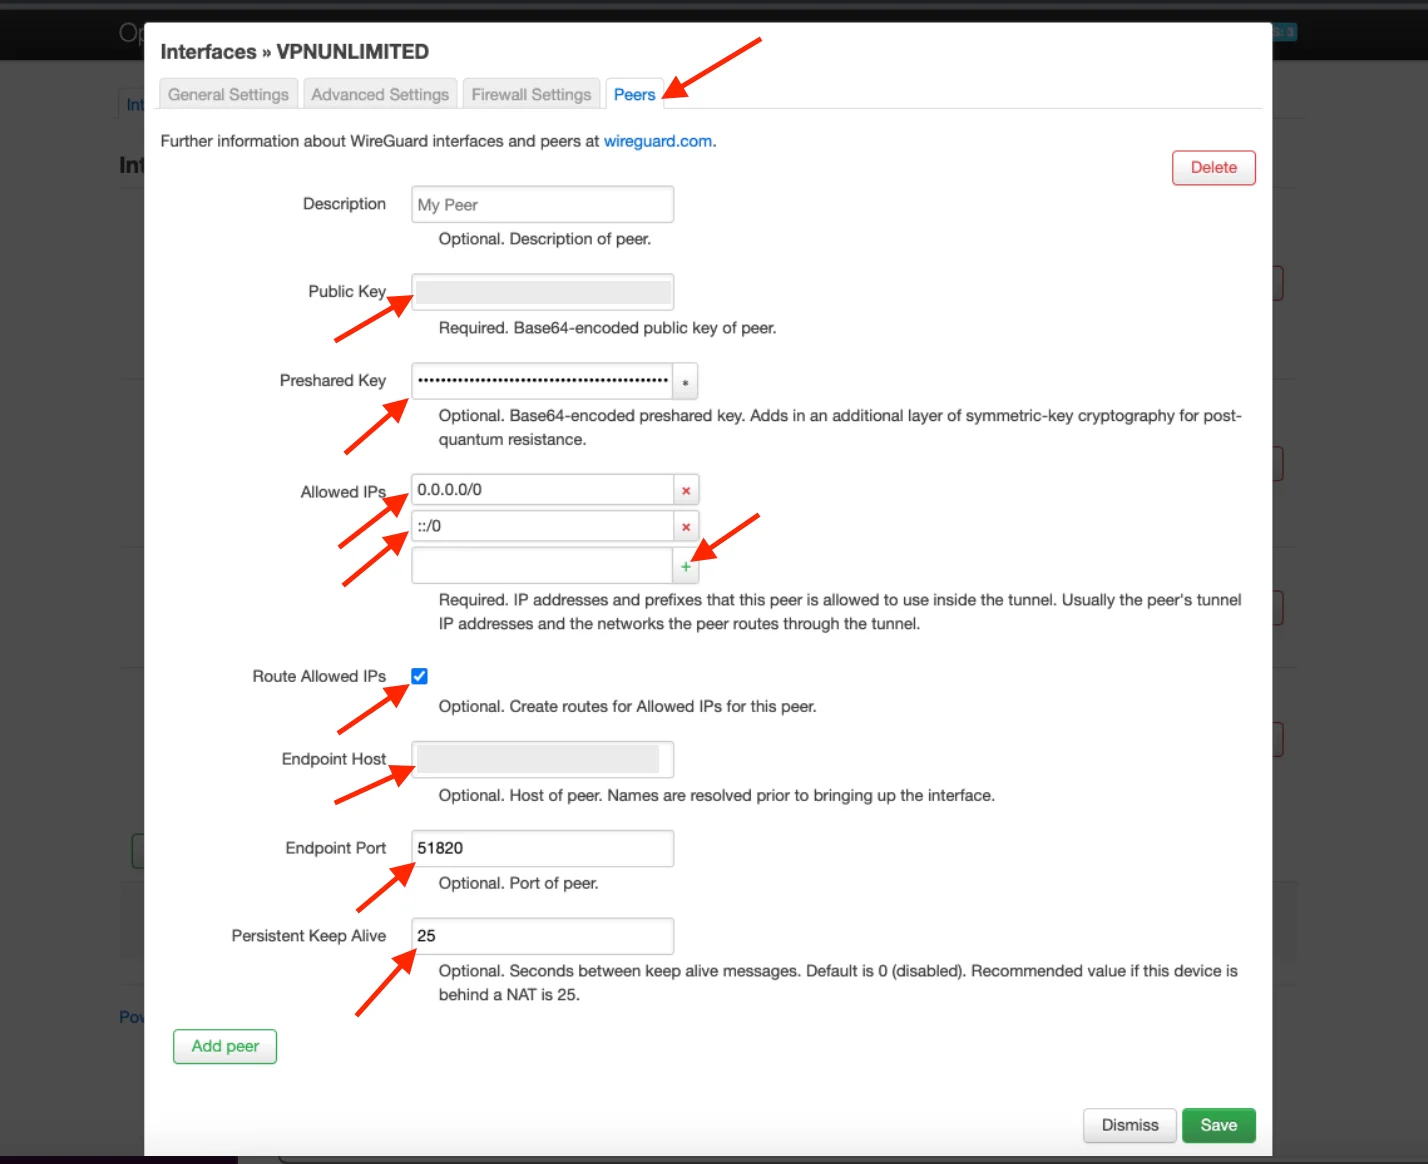
4. Go to the Peers tab and add the following details:
- PublicKey = paste PublicKey from the User Office
- PresharedKey = paste PresharedKey details
- AllowedIPs = paste the first AllowedIP, press the + sign, and enter the second AllowedIP
- Set the checkbox for Route Allowed IPs
- Endpoint Host = paste Endpoint information before the colon sign
- Endpoint Port = paste Endpoint information after the colon sign
- Persistent Keep Alive = paste PersistentKeepalive from the User Office
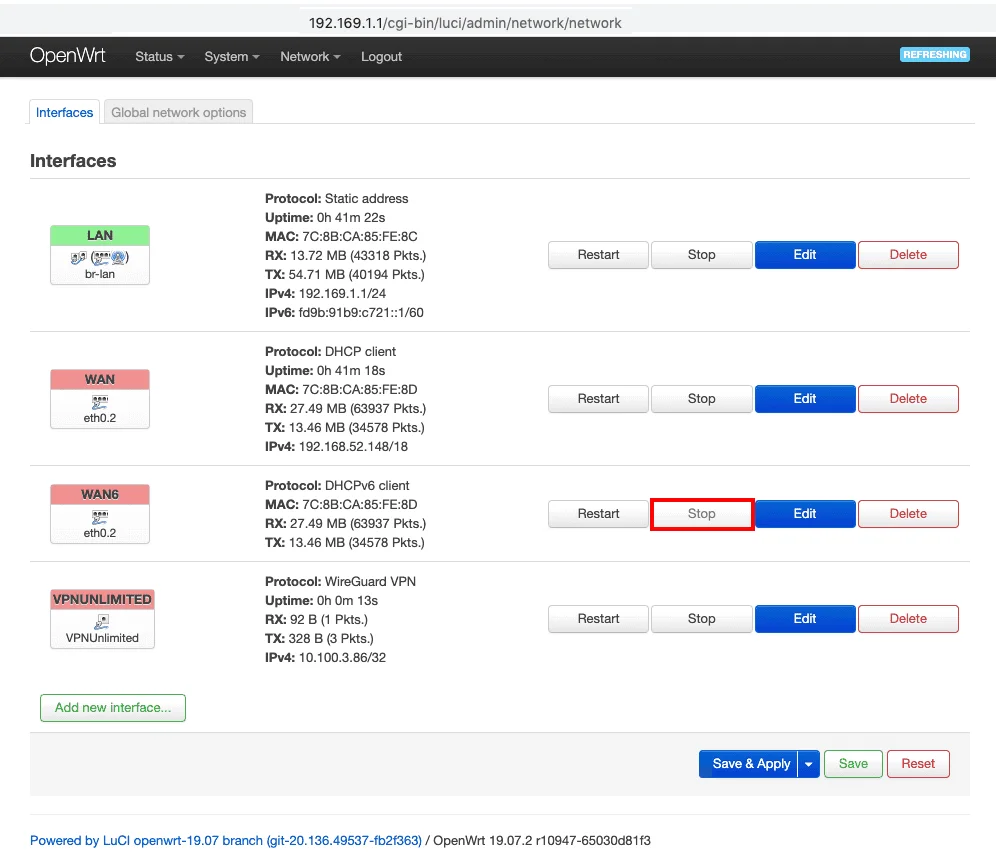
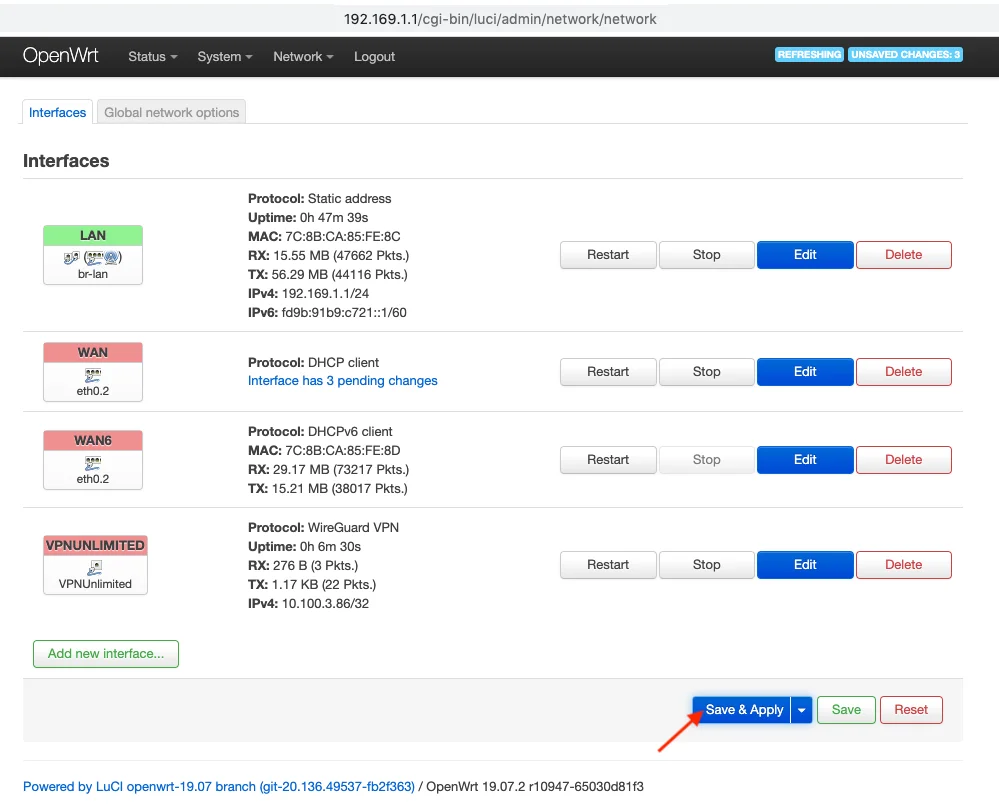
5. Press the Stop button at WAN6 interfaces.
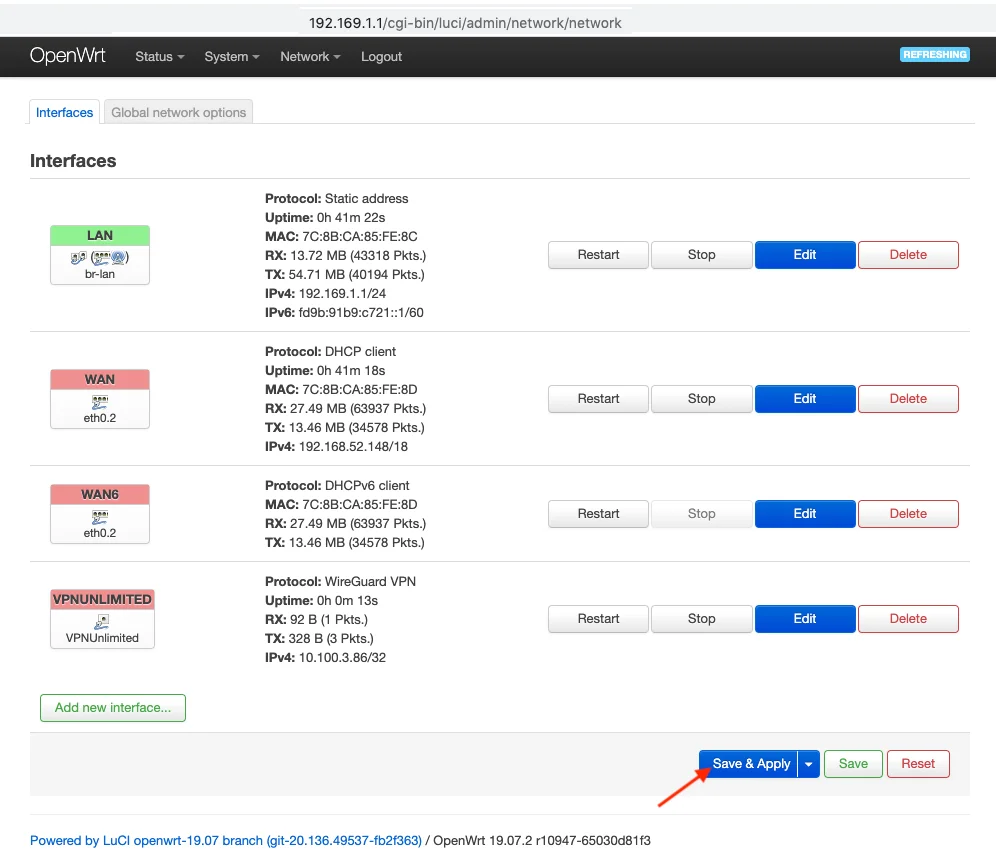
6. Press Save & Apply.
3. Set up the Firewall zones
1. Navigate to Network > Firewall Zone Settings and click Add.
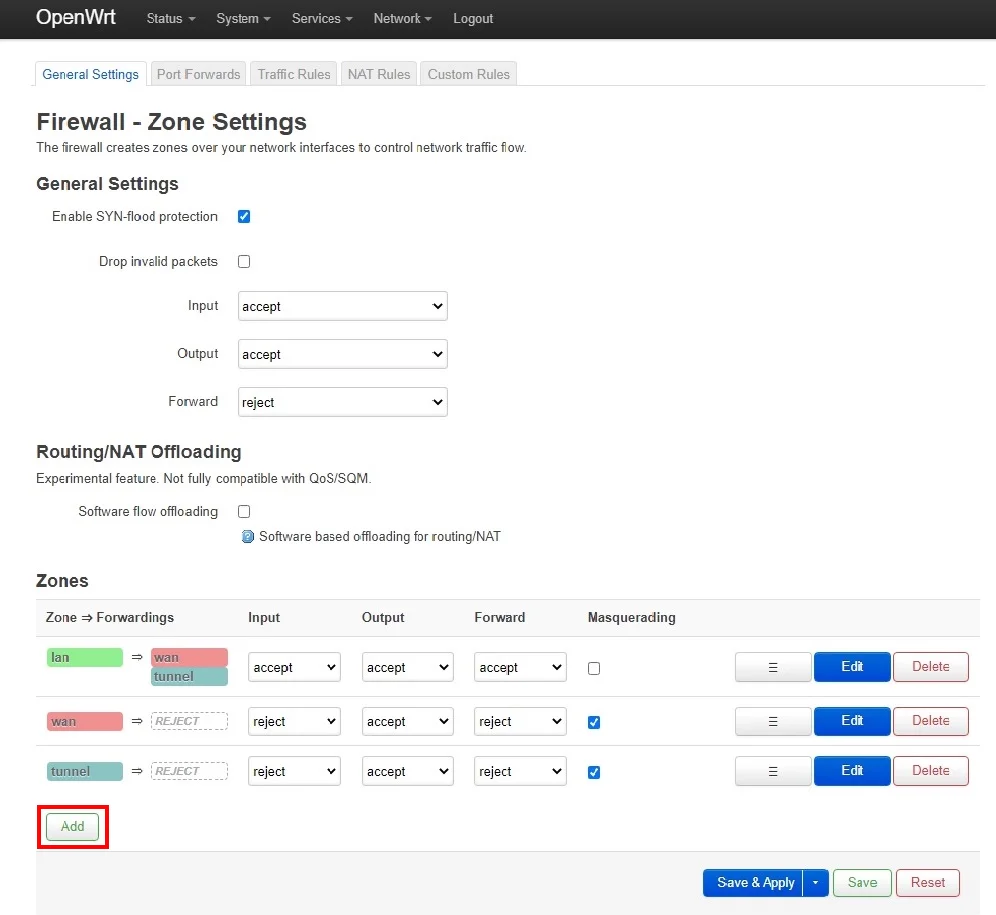
2. In this window enter the following configuration:
- Name - Give it any name, e.g. vpnunl
- Input - Reject
- Output - Accept
- Forward - Reject
- Masquerading - Checked
- MSS clamping - Checked
- Covered networks - select the previously created VPN tunnel interface (e.g. VPNUNLIMITED)
- Allow forward to destination zones - Unspecified
- Allow forward from source zones - lan
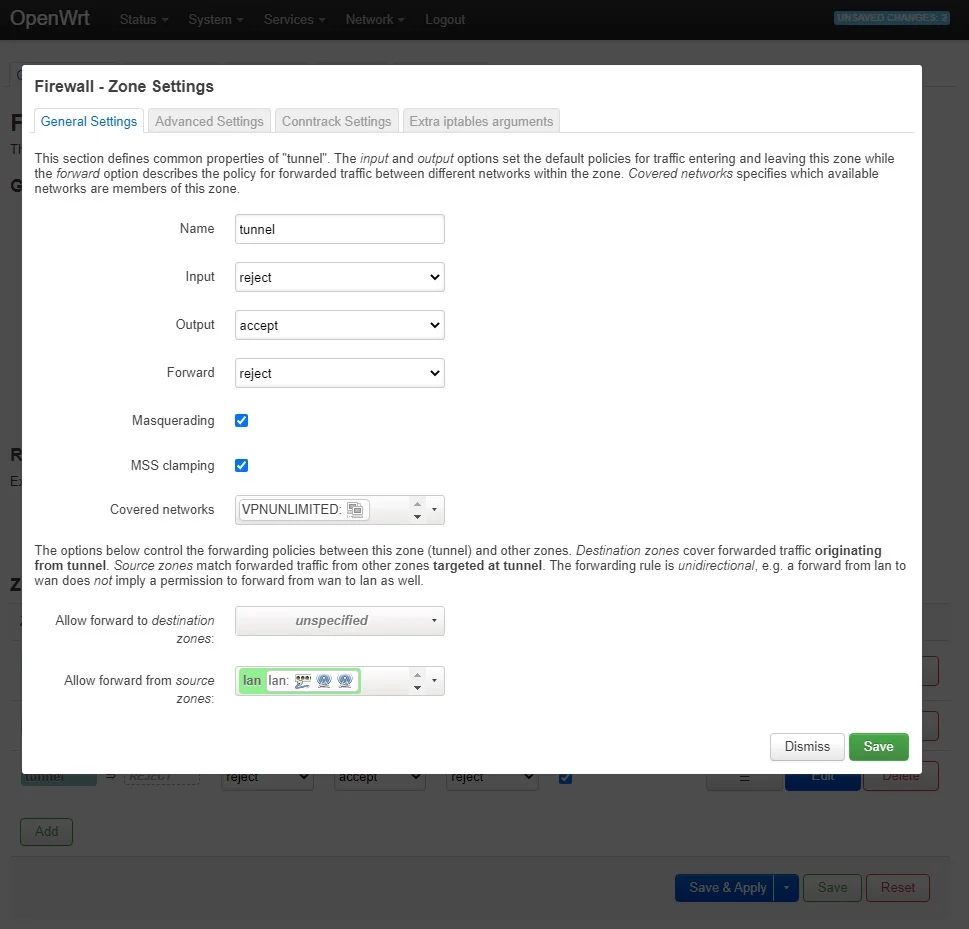
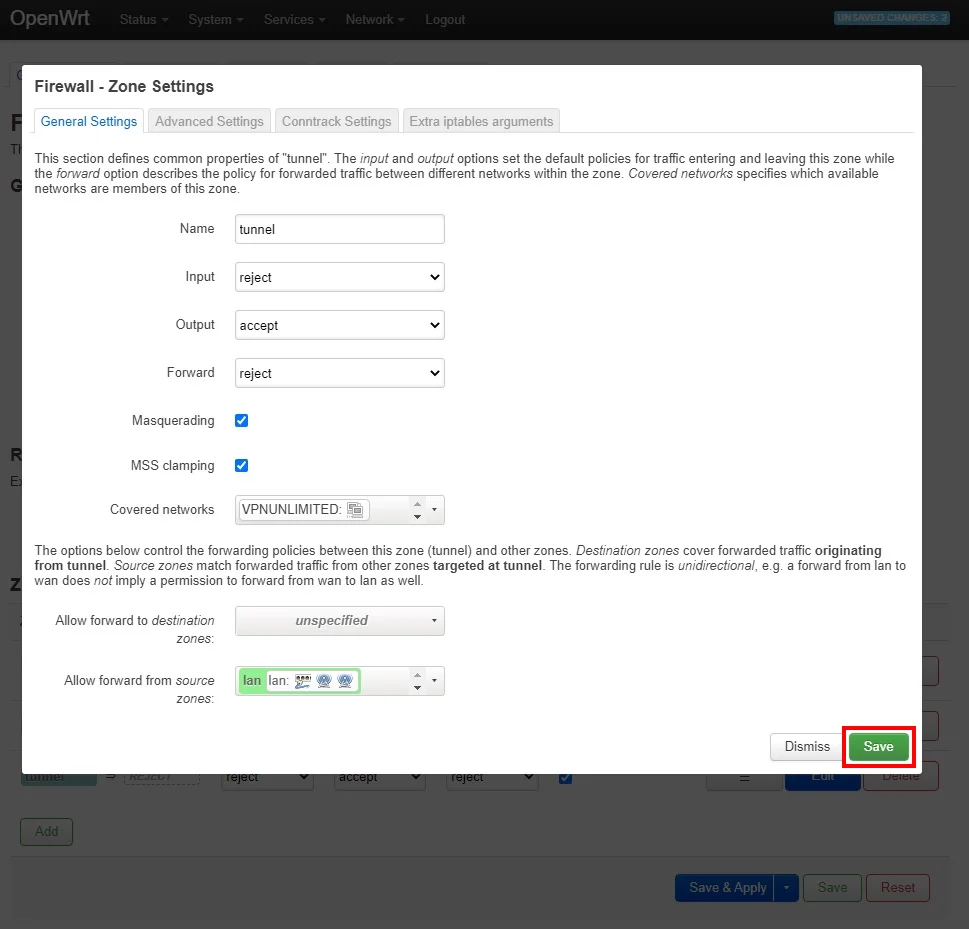
3. Press Save.
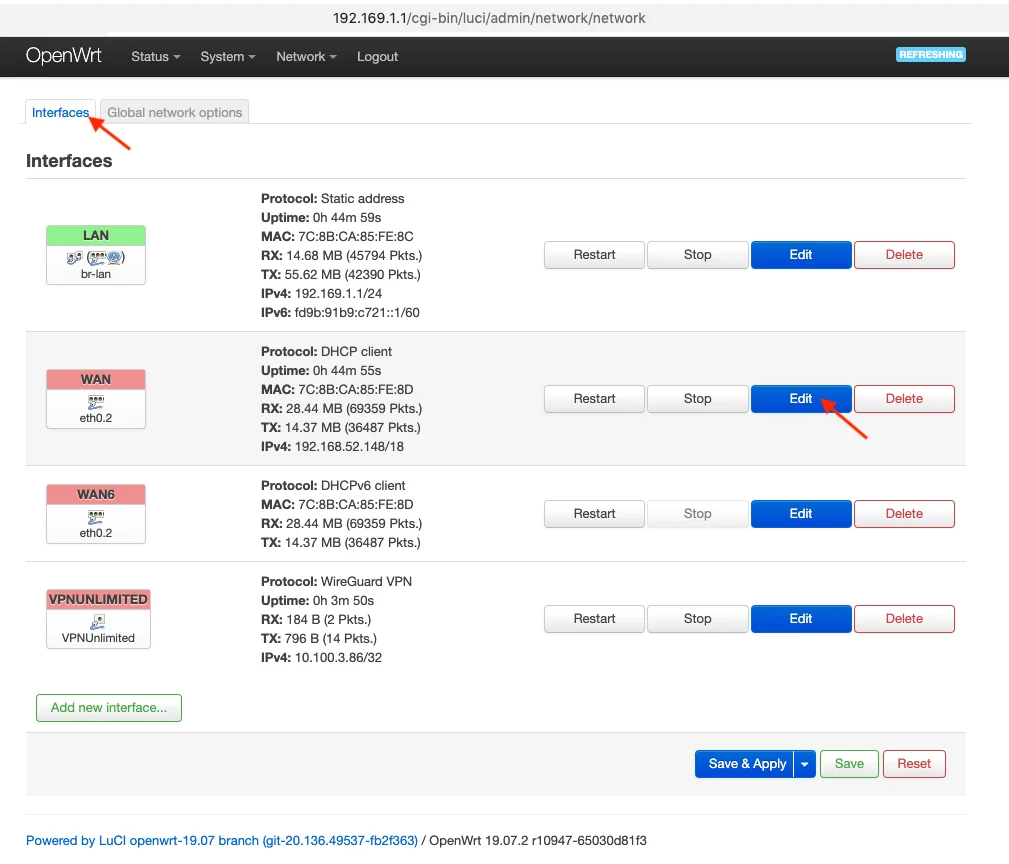
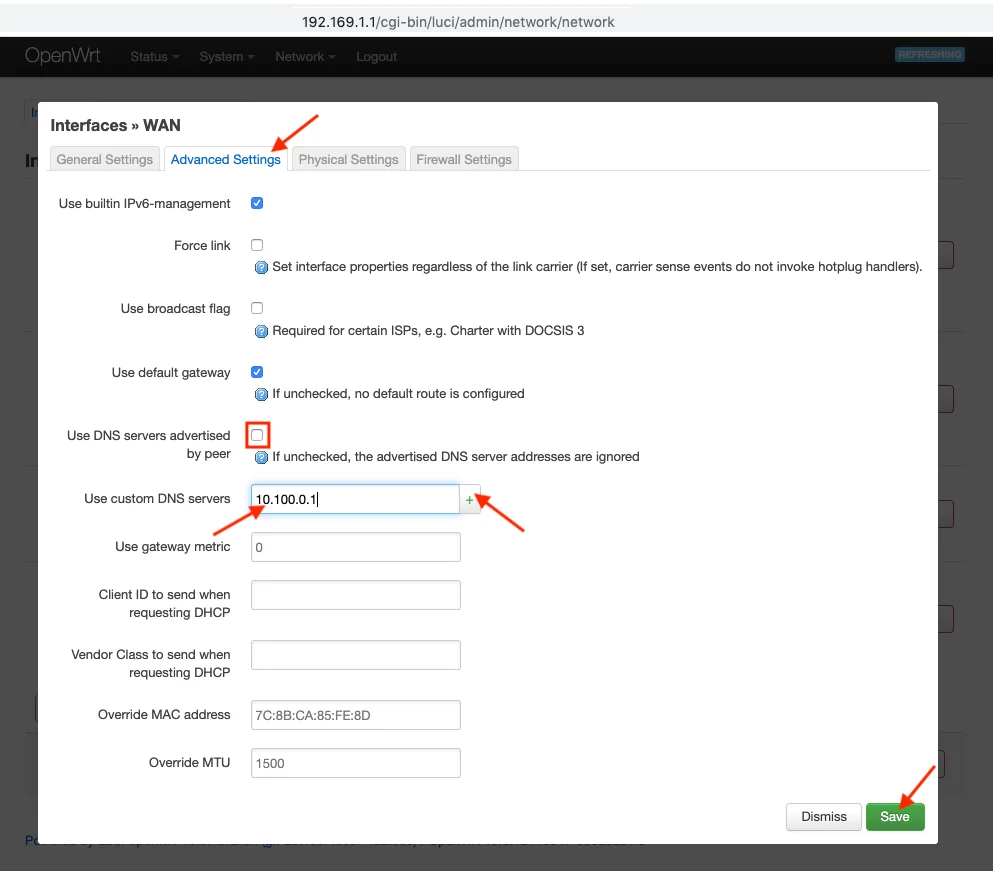
4. Add Static DNS server
1. Go to the Interface tab > WAN > click Edit > select Advanced Settings tab. Uncheck the Use DNS servers advertised by Peers option, paste the DNS details from the User Office, and press + sign.
2. Click Save.
3. Press Save & Apply.
Note: If you face any issues related to your VPN connection, please reboot your router. To do this, go to the Status tab and click Reboot.
5. Add Kill Switch (Optional)
1. Navigate to Network > Firewall and click Edit at LAN Firewall Zone.
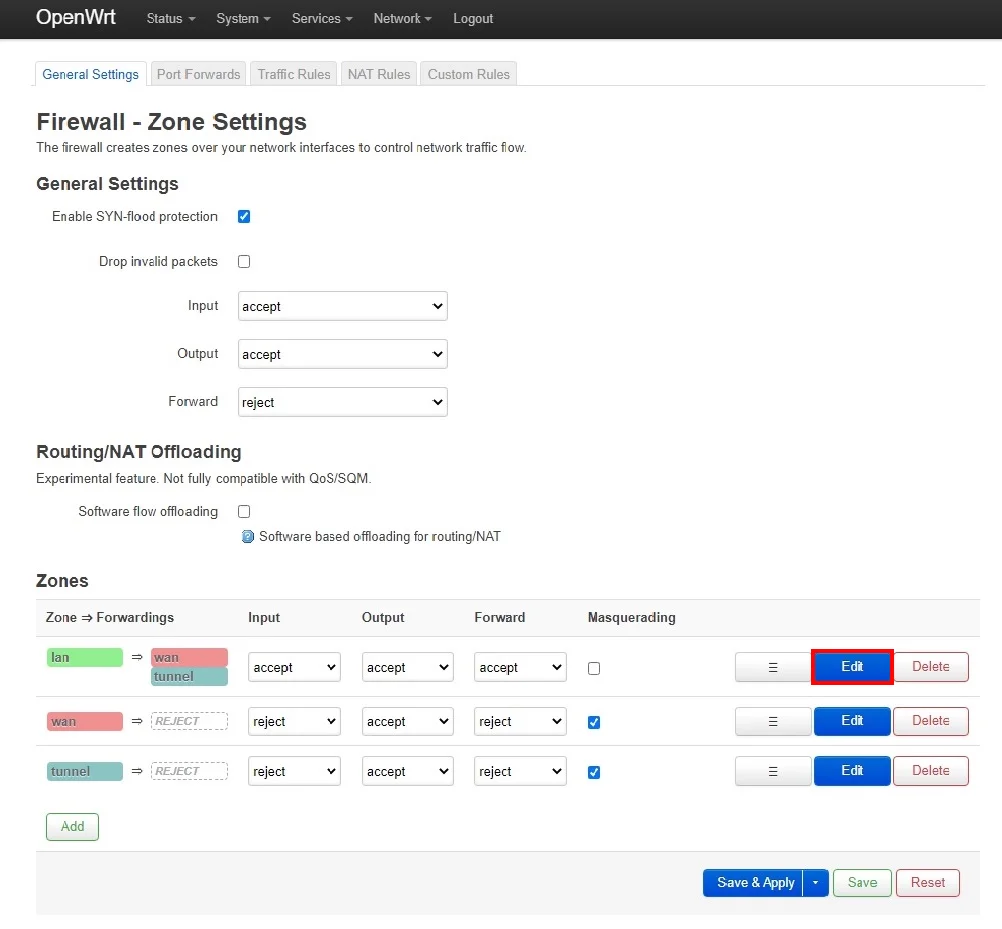
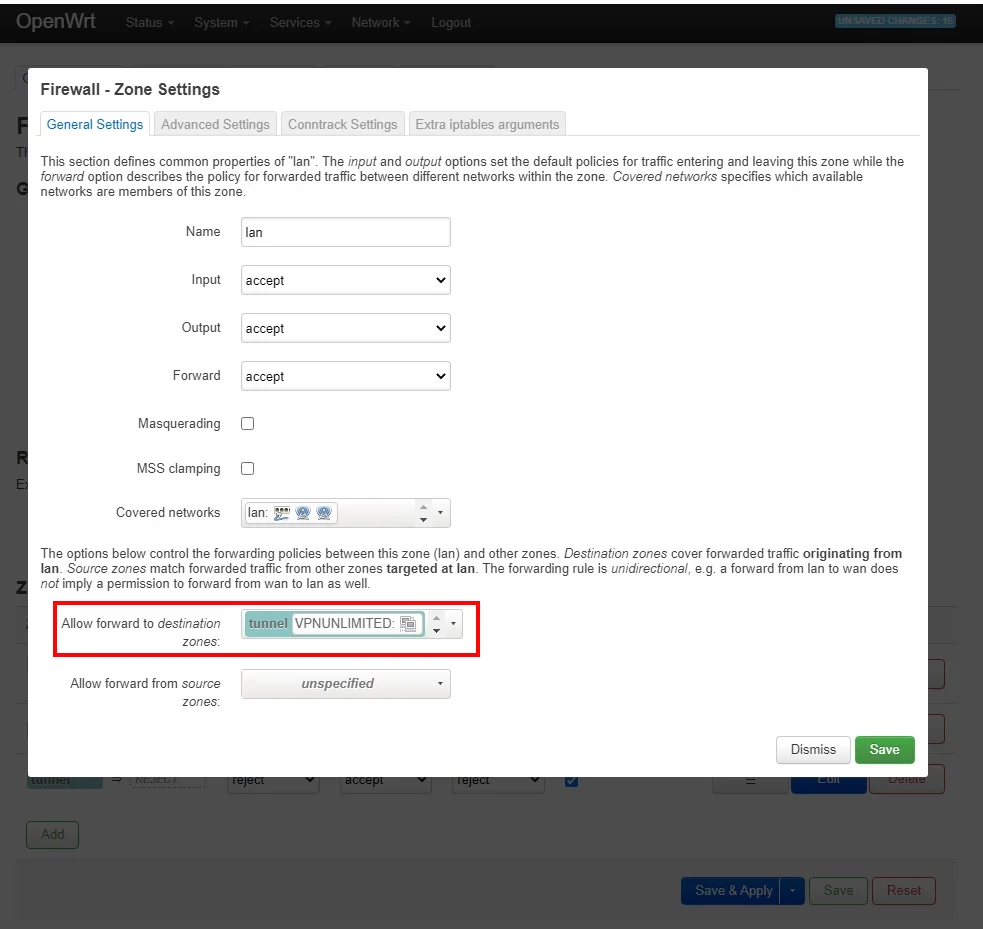
2. In this window enter the following configuration:
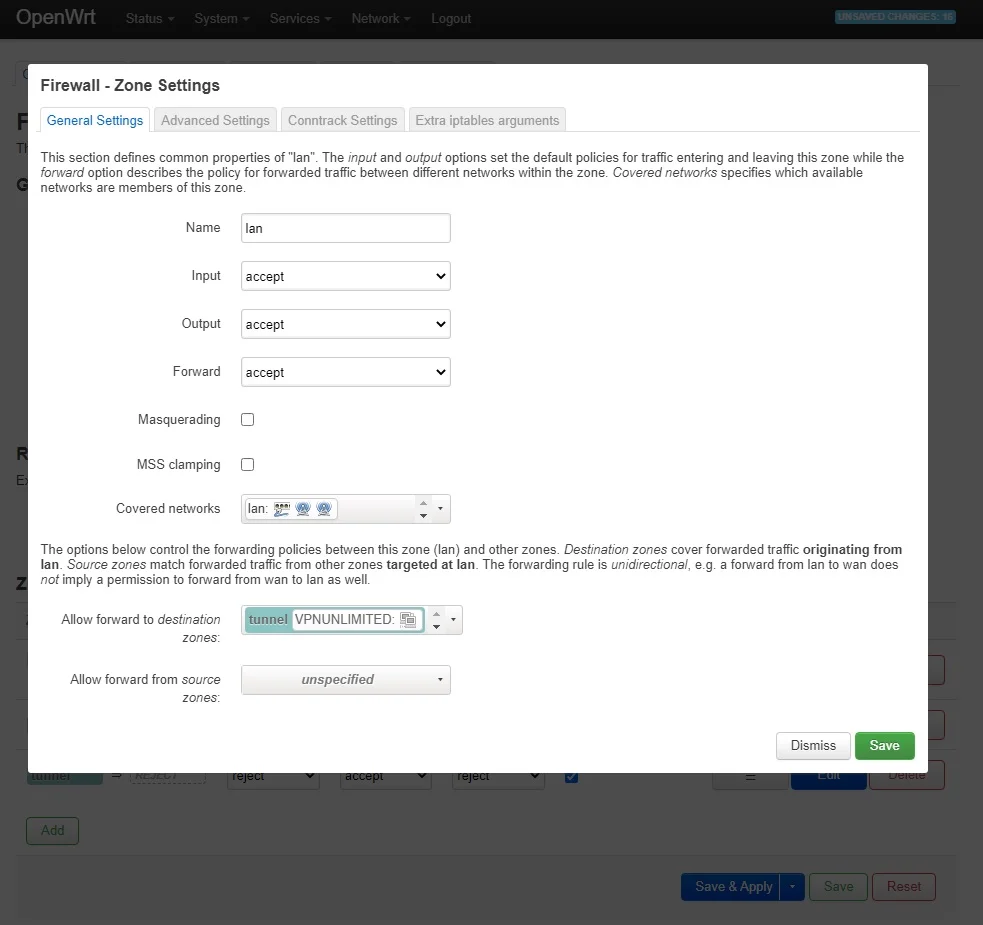
3. Remove wan from "Allow forward to destination zones".
That's it. Now you have a VPN connection running through the WireGuard VPN protocol.
If you have other questions or comments, feel free to contact our customer support team at [email protected].
“WireGuard” is a registered trademark of Jason A. Donenfeld.

Get started with our reliable VPN solution, configure it on your OpenWRT router, and freely use on other devices!


